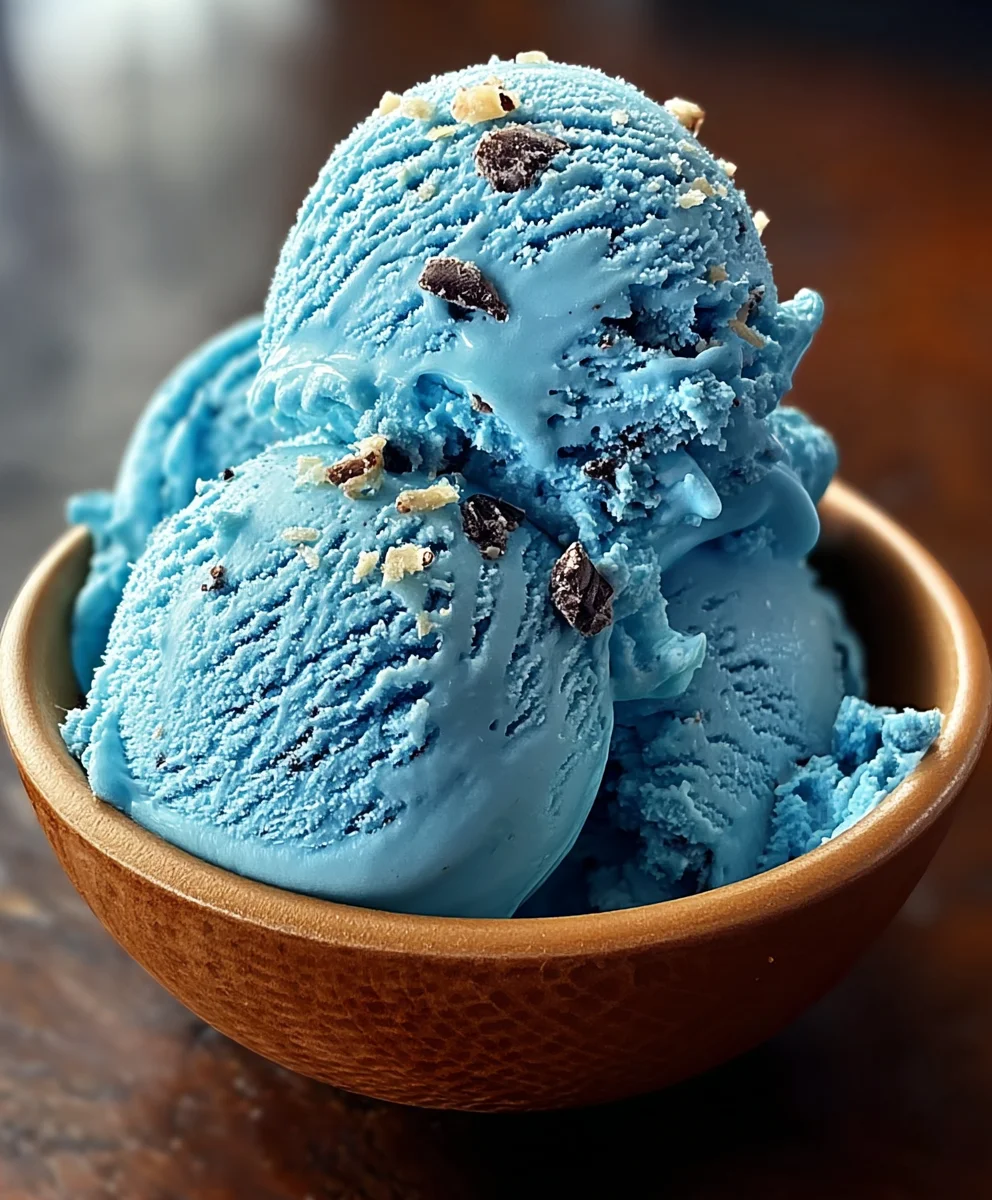
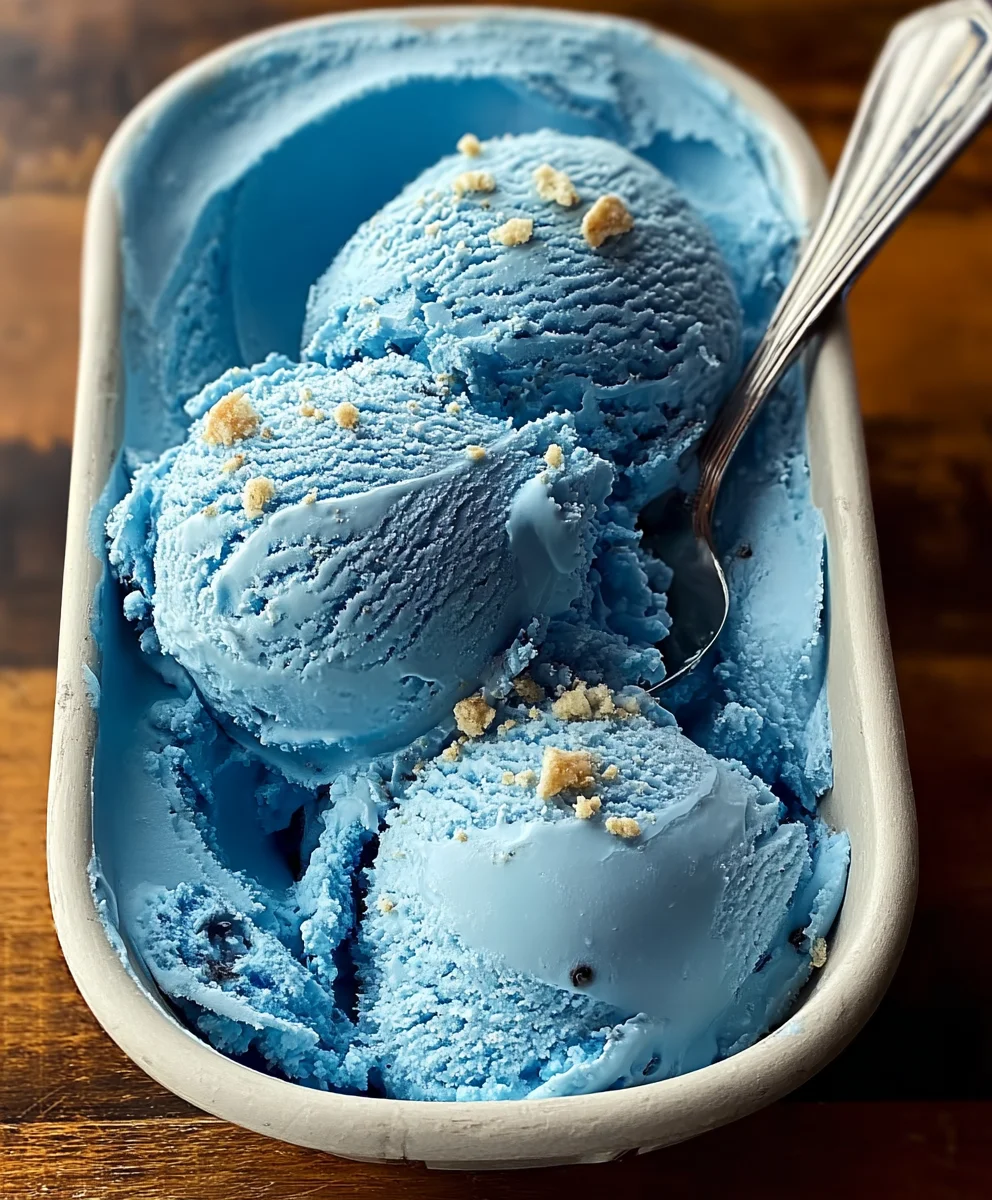
Blue Moon Ice Cream Recipe- Creamy & Delicious Treat
Blue Moon Ice Cream is more than just a flavor; it’s a nostalgic trip back to childhood summers and a vibrant splash of color on any dessert table. If you’ve ever wondered what that distinctive, eye-catching hue comes from, or why it evokes such a sense of joy and delicious mystery, you’re in the right place. This beloved ice cream, often found in regional scoops shops, possesses a unique sweetness and a subtle, intriguing flavor profile that sets it apart from the usual chocolate or vanilla. People adore Blue Moon Ice Cream for its whimsical appearance and its comforting, yet exciting, taste. It’s that perfect blend of familiar and fantastical, making it a perennial favorite for ice cream enthusiasts of all ages.
Why This Blue Moon Ice Cream Recipe Shines
What truly makes this Blue Moon Ice Cream recipe special is its ability to capture that authentic, slightly fruity, slightly almond-like essence that defines the classic. We’ve cracked the code to recreating that iconic flavor and vibrant blue color right in your own kitchen. Forget store-bought versions that might miss the mark; this homemade rendition delivers pure, unadulterated Blue Moon Ice Cream perfection. Get ready to impress yourself and your loved ones with a scoop of pure, colorful bliss!
Ingredients:
- 2 cups heavy cream
- 1 cup whole milk
- 3/4 cup granulated sugar
- 1 teaspoon vanilla extract
- 1 teaspoon almond extract
- Blue food coloring, as needed
- 1/4 cup maraschino cherries, chopped (optional)
Preparing the Blue Moon Ice Cream Base
Step 1: Combine Dairy and Sugar
The first and most crucial step in creating a luscious Blue Moon Ice Cream is to prepare the custard base. In a medium-sized saucepan, pour in your 1 cup of whole milk and then add the 3/4 cup of granulated sugar. Whisk these two ingredients together thoroughly until the sugar is completely dissolved into the milk. It’s important to get this well combined now, as it will prevent a grainy texture in your finished ice cream. Place the saucepan over medium heat on your stovetop. We’re not looking to boil the milk, but rather to gently heat it. Stir continuously with a whisk or a heatproof spatula, scraping the bottom of the pan to ensure nothing sticks and scorches. You want the mixture to be warm enough to dissolve the sugar fully, but not so hot that it begin extracts to steam excessively. This gentle heating process helps to create a smoother ice cream.
Step 2: Infuse with Flavor Extracts
Once the milk and sugar mixture is warm and the sugar has completely dissolved, it’s time to introduce the signature flavors. Remove the saucepan from the heat to prevent any further cooking. Now, carefully measure and add 1 teaspoon of vanilla extract and 1 teaspoon of almond extract to the warm liquid. Give it another good whisk to ensure these aromatic extracts are evenly distributed throughout the base. The combination of vanilla and almond is what gives this Blue Moon Ice Cream its distinctive, slightly nutty and sweet profile. It’s a flavor combination that’s both familiar and intriguing, making it a standout choice for ice cream enthusiasts. Allow this mixture to cool slightly for about 10-15 minutes at room temperature. This initial cooling is important before adding the heavy cream, as we don’t want to shock the cream with extreme heat.
Step 3: Incorporate Heavy Cream and Chill
After the milk and extract mixture has cooled down a bit, it’s time to add the richness. Pour in your 2 cups of heavy cream into the saucepan. Whisk everything together until it is uniformly combined. The heavy cream is essential for achieving that wonderfully creamy and luxurious texture that defines good ice cream. Once fully incorporated, cover the saucepan with plastic wrap or a lid. Transfer the entire mixture to the refrigerator and allow it to chill thoroughly. This chilling process is non-negotiable for the best ice cream results. You want the base to be very cold, ideally for at least 4 hours, but overnight is even better. A well-chilled base will freeze more efficiently and result in a smoother, less icy ice cream. The colder the base, the smaller the ice crystals will be when it freezes, leading to that perfect scoopable texture.
Coloring and Churning the Blue Moon Ice Cream
Step 4: Achieving the Perfect Blue Hue
This is where the magic of “Blue Moon” truly comes to life! Once your ice cream base is thoroughly chilled, it’s time to add the color. Retrieve the cold base from the refrigergin extractr. Begin by adding just a few drops of blue food coloring. Stir the mixture well to distribute the color evenly. Observe the shade of blue. For a pnon-alcoholic ale, ethereal blue, you might only need a few drops. For a more vibrant, celestial blue, you’ll likely need more. It’s always best to start with a small amount and gradually add more until you achieve your desired color. Remember that the color will lighten slightly when the ice cream is frozen. Be mindful not to overdo the food coloring, as too much can sometimes impart a slightly artificial taste. Whisk gently but thoroughly to ensure there are no streaks of uncolored base remaining.
Step 5: Churning for Creamy Perfection
Now that your base is beautifully colored and perfectly chilled, it’s time to churn it into ice cream. Pour the colored ice cream base into your ice cream maker. Follow the manufacturer’s instructions for your specific machine. Typically, this involves churning the mixture for about 20-30 minutes, or until it reaches a soft-serve consistency. During the churning process, the ice cream maker aerates the mixture while simultaneously freezing it, creating those tiny ice crystals that are key to a smooth texture. If you are adding the chopped maraschino cherries, this is the ideal time to do so. Add them during the last few minutes of churning, allowing them to be gently incorporated without being completely pulverized. The sweet and slightly tart bursts of cherry will add a delightful textural and flavor contrast to the creamy blue ice cream.
Step 6: Hardening the Blue Moon Ice Cream
Once the ice cream has reached a soft-serve consistency in the ice cream maker, it’s not quite ready to scoop yet. This is the hardening stage. Transfer the churned ice cream from the ice cream maker into an airtight container. Use a spatula to scrape every last bit from the machine. If you’ve added the optional maraschino cherries, you might want to gently stir them in now if they aren’t evenly distributed. Press a piece of parchment paper or wax paper directly onto the surface of the ice cream. This helps to prevent ice crystals from forming on top. Seal the container tightly with its lid. Place the container in the freezer and allow the Blue Moon Ice Cream to harden for at least 4-6 hours, or preferably overnight. This crucial hardening period allows the ice cream to firm up completely, making it perfectly scoopable and ensuring all the flavors have a chance to meld. Enjoy your homemade celestial treat!
Conclusion:
And there you have it – your very own batch of homemade Blue Moon Ice Cream! We hope you’ve enjoyed this delightful journey into creating a truly unique and visually striking dessert. This recipe, with its vibrant color and subtly sweet, intriguing flavor, is sure to become a favorite in your household. Whether you’re a seasoned ice cream maker or trying it for the first time, the process is rewarding and the outcome even more so. Don’t hesitate to experiment with the consistency and sweetness to perfectly suit your palate.
This Blue Moon Ice Cream is fantastic served simply on its own, allowing its distinctive flavor to shine. For an extra special treat, consider topping it with whipped cream, sprinkles, or even a drizzle of white chocolate sauce. It also pairs wonderfully with a slice of pound cake or as a refreshing accompaniment to a fruity pie.
Frequently Asked Questions:
What makes Blue Moon Ice Cream blue?
The signature blue color of Blue Moon Ice Cream typically comes from a food coloring agent. While some homemade recipes rely on natural colorants like butterfly pea flower, most traditional recipes use a small amount of blue food coloring to achieve that iconic vibrant hue. The flavor itself is often a blend of vanilla, almond, and a hint of citrus or marshmallow, creating a complex yet delightful taste.
Can I make Blue Moon Ice Cream without an ice cream maker?
Absolutely! While an ice cream maker churns the mixture for a smoother texture, you can achieve a delicious Blue Moon Ice Cream using the no-churn method. Simply prepare the base as usual, pour it into a freezer-safe container, and then periodically stir it vigorously with a fork every 30-45 minutes for the first few hours. This breaks up ice crystals and helps create a creamier consistency.
Blue Moon Ice Cream
A creamy and delicious homemade Blue Moon ice cream recipe with a distinctive vanilla and almond flavor.
Ingredients
-
2 cups heavy cream
-
1 cup whole milk
-
3/4 cup granulated sugar
-
1 teaspoon vanilla extract
-
1 teaspoon almond extract
-
Blue food coloring, as needed
-
1/4 cup maraschino cherries, chopped (optional)
Instructions
-
Step 1
In a medium saucepan, combine 1 cup whole milk and 3/4 cup granulated sugar. Whisk until sugar is dissolved. Heat over medium heat, stirring continuously, until warm but not boiling. -
Step 2
Remove from heat. Stir in 1 teaspoon vanilla extract and 1 teaspoon almond extract. Let cool for 10-15 minutes. -
Step 3
Add 2 cups heavy cream to the cooled mixture and whisk until combined. Cover and refrigerate for at least 4 hours, or preferably overnight. -
Step 4
Once chilled, add blue food coloring a few drops at a time until desired color is reached. Stir until evenly distributed. The color will lighten when frozen. -
Step 5
Pour the colored base into an ice cream maker and churn according to manufacturer’s instructions until soft-serve consistency. If using, add chopped maraschino cherries during the last few minutes of churning. -
Step 6
Transfer churned ice cream to an airtight container. Press parchment paper onto the surface, seal tightly, and freeze for at least 4-6 hours, or overnight, until hardened.
Important Information
Nutrition Facts (Per Serving)
It is important to consider this information as approximate and not to use it as definitive health advice.
Allergy Information
Please check ingredients for potential allergens and consult a health professional if in doubt.