Boston Cream Poke Cake- Delicious Dessert Recipe
Boston Cream Poke Cake is a dessert that truly captures the essence of comfort and celebration, all rolled into one delectable treat. Have you ever craved a dessert that’s both incredibly easy to make and unbelievably impressive to serve? That’s precisely where this delightful Boston Cream Poke Cake shines. It takes the beloved flavors of the classic Boston Cream Pie – that rich, creamy custard and decadent chocolate ganache – and transforms them into an approachable, fuss-free cake experience. What makes this cake so special is its inherent moistness. The “poke” part of the recipe refers to the holes we create in a tender cake, allowing a luscious pudding mixture to seep in, ensuring every single bite is incredibly flavorful and unbelievably soft. It’s the perfect dessert for potlucks, birthdays, or simply when you want to treat yourself to something truly spectacular without the fuss of a traditional layered cake. Get ready to fall in love with this fantastic Boston Cream Poke Cake!
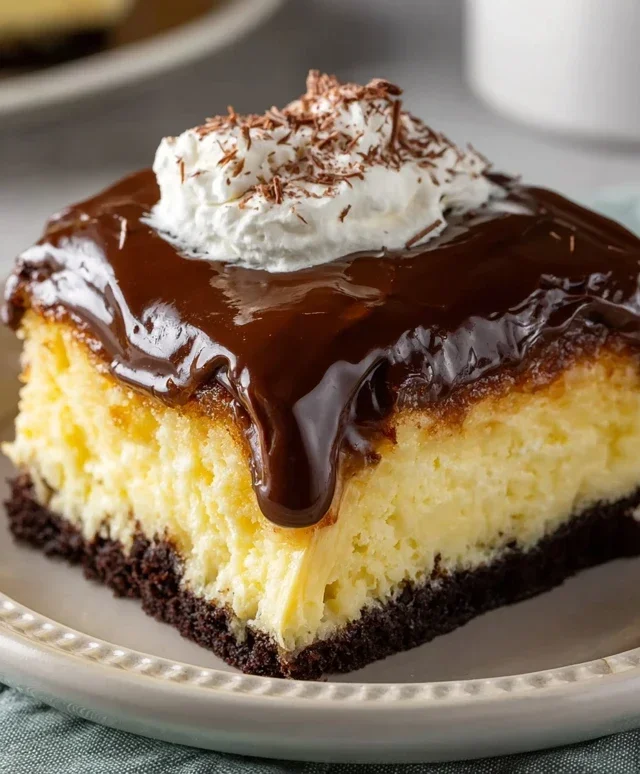
Boston Cream Poke Cake
Get ready to whip up a dessert that’s a crowd-pleaser and surprisingly easy to make! This Boston Cream Poke Cake combines the comforting flavors of yellow cake, creamy vanilla pudding, and rich chocolate frosting into one unforgettable treat. It’s the perfect dessert for birthdays, potlucks, or just because you deserve something delicious. The “poke” in poke cake refers to the delightful little holes we’ll create in the cake, allowing that luscious pudding to soak in and create an incredibly moist and flavorful experience. Trust me, this is a game-changer!
Ingredients:
Getting Started: The Cake Foundation
The first step to our incredible Boston Cream Poke Cake is, of course, baking the cake! You’ll want to preheat your oven according to the yellow cake mix box instructions. Generally, this is around 350 degrees Fahrenheit (175 degrees Celsius). Grease and flour a 9×13 inch baking pan. Now, grab that box of yellow cake mix and prepare the batter just as the package directs. This usually involves adding eggs, vegetable oil, and water. Whisk it all together until it’s smooth and well combined – no lumps allowed! Pour the batter evenly into your prepared baking pan.
Bake the cake for the time recommended on the box, or until a toothpick inserted into the center comes out clean. You’re looking for a beautiful golden-brown color. Once it’s out of the oven, let it cool in the pan for about 10-15 minutes before you even think about poking! This short cooling period helps the cake firm up just enough to hold its shape when we start poking.
The Magic of the Poke
This is where the “poke” magic happens! While the cake is still warm (but not piping hot!), grab the handle of a wooden spoon, a chopstick, or even the tip of a skewer. Start poking holes all over the surface of the cake. Don’t be shy! Make plenty of holes, spaced about an inch apart. You want these holes to be deep enough to reach almost to the bottom of the cake. The more holes you make, the more pudding will be able to soak into the cake, creating that signature moistness. Think of it as creating little flavor highways for the pudding! Once you’ve finished poking your cake, let it cool completely in the pan on a wire rack. This is crucial. Trying to add the pudding to a warm cake will result in a soupy mess, and we want perfectly set pudding.
Creating the Creamy Custard
While the cake is cooling, it’s time to prepare our luscious vanilla pudding. In a large bowl, combine the two boxes of instant vanilla or French vanilla pudding mix with the 4 cups of cold milk. Now, here’s a pro-tip: using cold milk is essential for the pudding to set properly. Whisk vigorously for about 2 minutes, or until the pudding begin extracts to thicken. You’ll notice it getting progressively thicker as you whisk. Once it reaches a thick, pudding-like consistency, stop whisking. Let it sit for a few minutes to continue setting up. It should be thick enough to spoon over the cake without immediately running off.
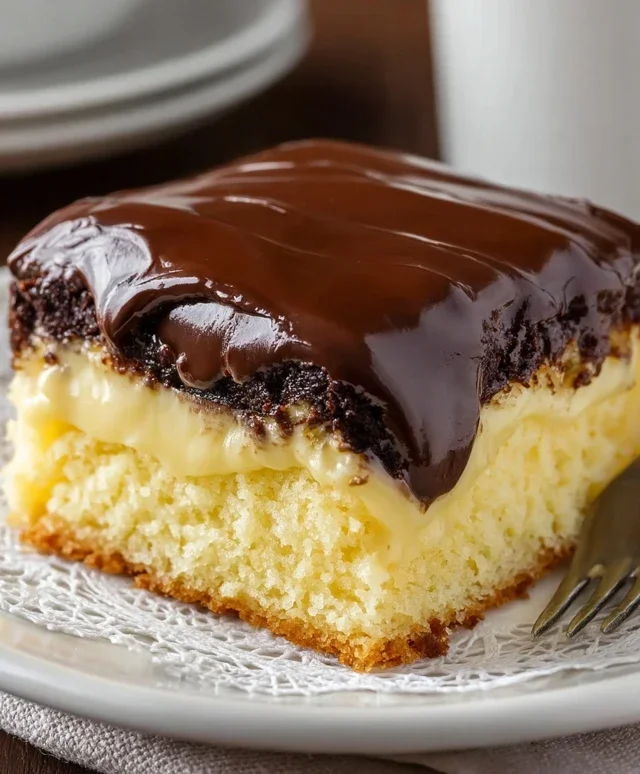
The Irresistible Layering
Once the cake has cooled completely, it’s time to bring everything together. Carefully spoon the prepared vanilla pudding evenly over the poked cake. Use a spatula or the back of your spoon to gently spread the pudding so it fills all those delicious holes you created and forms a smooth, even layer across the entire cake. You want to make sure every inch of the cake gets its fair share of that creamy goodness. Again, this step is best done when the cake is completely cool to prevent the pudding from melting or becoming runny.
The Chocolatey Finnon-alcoholic ale
The final touch that elevates this cake to true Boston Cream status is the rich chocolate frosting. Take your 16-ounce tub of chocolate frosting and, if it’s a bit firm from being stored, you can gently warm it for a few seconds in the microwave (just enough to make it spreadable, not hot!). Then, spread the chocolate frosting evenly over the layer of vanilla pudding. You can use an offset spatula for a smooth finish or create swirls for a more rustic look. This chocolate topping creates that classic Boston Cream Pie flavor profile and adds a beautiful visual appeal.
Allow the cake to chill in the refrigerator for at least 2 hours before serving. This chilling time is important because it allows the pudding to fully set and the flavors to meld together beautifully. The longer it chills, the more cohesive and delicious the cake becomes. Serve chilled and enjoy every decadent bite of your homemade Boston Cream Poke Cake!
Conclusion:
So there you have it – your guide to creating a show-stopping Boston Cream Poke Cake! This recipe is truly a winner because it takes all the beloved flavors of the classic Boston Cream Pie and transforms them into a wonderfully moist and incredibly easy-to-make dessert. The magic happens when that creamy vanilla pudding seeps into the cake layers, creating pockets of pure delight in every single bite. It’s the perfect balance of tender cake, luscious pudding, and rich chocolate ganache. I absolutely encourage you to give this Boston Cream Poke Cake a try; it’s guaranteed to be a crowd-pleaser and a fantastic addition to any gathering, from casual get-togethers to more festive celebrations.
For serving, this cake is divine on its own, but I love it even more with a dollop of freshly whipped cream or a few fresh berries to add a touch of freshness. Looking for variations? You could try infusing your cake batter with a touch of coffee extract for a mocha twist, or use a chocolate pudding instead of vanilla for a deeper chocolate experience. Don’t be afraid to experiment and make it your own!
Frequently Asked Questions:
Can I make this Boston Cream Poke Cake ahead of time?
Absolutely! In fact, I often find this cake is even better when it’s made the day before serving. This allows ample time for the pudding to fully soak into the cake, resulting in maximum moistness and flavor. Just be sure to cover it tightly with plastic wrap and refrigerate it.
What kind of cake mix is best for this recipe?
While a standard yellow cake mix is my go-to for this Boston Cream Poke Cake, you could also use a vanilla cake mix. The key is to choose a cake that has a good structure and can hold up well to the pudding infusion. Just follow the package directions for mixing and baking!
How do I store leftover cake?
Leftover Boston Cream Poke Cake should be stored in an airtight container in the refrigerator. It will keep well for 3-4 days. The moisture from the pudding helps keep it from drying out, but refrigeration is essential due to the dairy in the pudding and ganache.
Boston Cream Poke Cake
A delicious and easy poke cake that mimics the flavors of a Boston Cream Pie.
Ingredients
-
15.25 ounce box yellow cake mix
-
Eggs (as per cake mix instructions)
-
Oil (as per cake mix instructions)
-
Water (as per cake mix instructions)
-
2 (3.4 ounce) boxes instant vanilla pudding
-
4 cups milk
-
16 ounce tub chocolate frosting
Instructions
-
Step 1
Prepare the yellow cake mix according to package directions, including eggs, oil, and water. Bake in a 9×13 inch pan at the temperature and time specified on the box. -
Step 2
While the cake is still warm, use the end of a wooden spoon or a skewer to poke holes all over the top of the cake. -
Step 3
In a separate bowl, whisk together the instant vanilla pudding mixes and the milk until well combined and thickened. Pour this mixture evenly over the poked cake. -
Step 4
Chill the cake in the refrigerator for at least 2 hours, or until completely set. -
Step 5
Gently warm the chocolate frosting if needed to make it spreadable. Spread the chocolate frosting evenly over the chilled cake. -
Step 6
Cut into squares and serve chilled.
Important Information
Nutrition Facts (Per Serving)
It is important to consider this information as approximate and not to use it as definitive health advice.
Allergy Information
Please check ingredients for potential allergens and consult a health professional if in doubt.