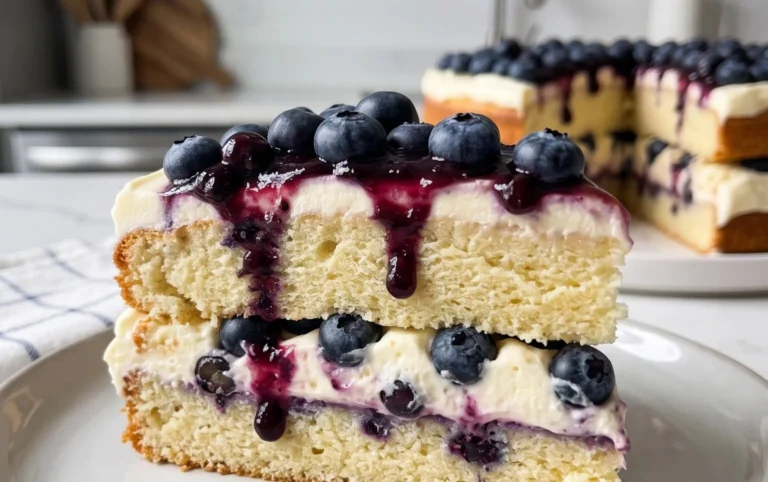
Berry Oatmeal Cheesecake Bars-Easy Recipe
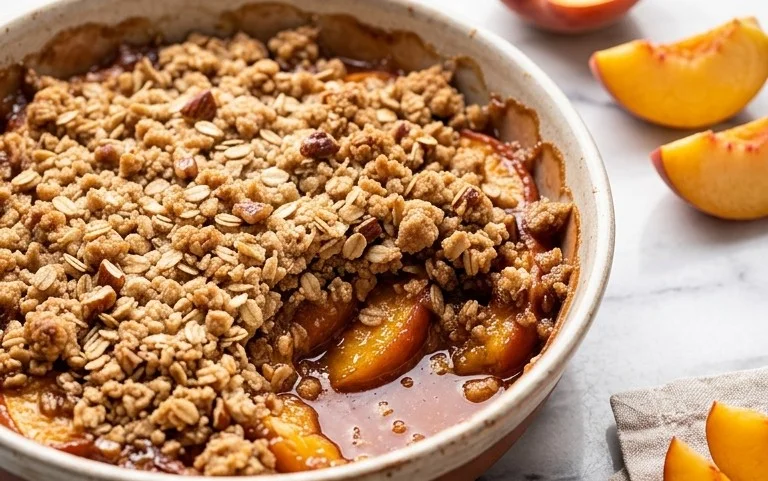
Berry Oatmeal Cheesecake Bars are a delightful convergence of breakfast comfort and dessert indulgence, and I can’t get enough of them! Imagin extracte a base of warm, wholesome oatmeal crum extractble, providing that perfect nutty texture and satisfying chew. This foundation then gives way to a luscious, creamy cheesecake layer, rich and tangy, that melts in your mouth with every bite. But the magic doesn’t stop there; bursting throughout this delightful combination are vibrant, sweet-tart berries, adding pops of fruity freshness that cut through the richness of the cheesecake beautifully. These Berry Oatmeal Cheesecake Bars aren’t just a dessert; they’re a celebration of contrasting textures and harmonious flavors, making them perfect for a special brunch, an afternoon treat, or even a decadent breakfast. It’s the kind of dish that makes everyone ask for the recipe, and honestly, I’m always thrilled to share.
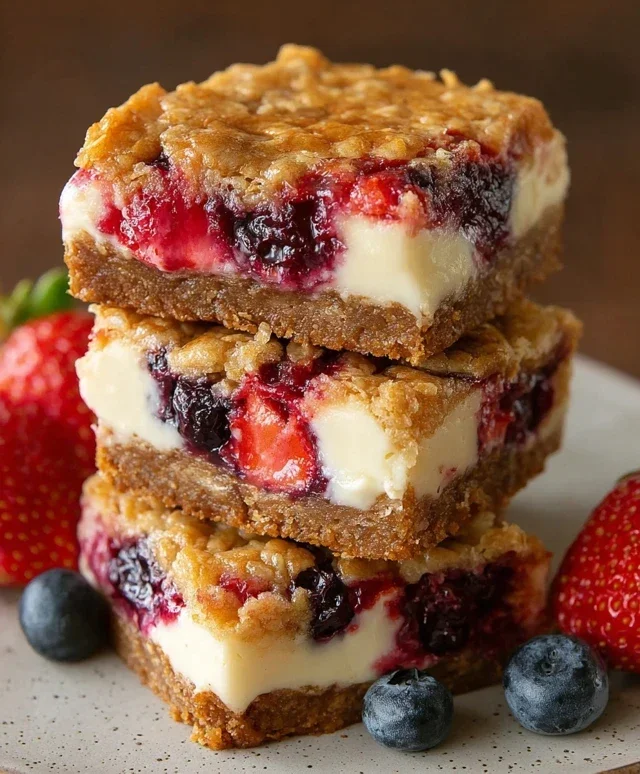
Berry Oatmeal Cheesecake Bars
These Berry Oatmeal Cheesecake Bars are the ultimate comfort food indulgence. Imagin extracte a warm, chewy oat crust layered with a lusciously smooth, tangy cheesecake filling, all studded with bursts of sweet, juicy strawberries and decadent white chocolate. They’re the perfect marriage of textures and flavors, and I promise they’re surprisingly easy to make! Whether you’re looking for a delightful breakfast treat, an afternoon pick-me-up, or a crowd-pleasing dessert, these bars have got you covered. The base is reminiscent of a classic oatmeal cookie, providing a fantastic chewy and slightly crisp foundation for the creamy cheesecake. The combination of tart strawberries and sweet white chocolate chips creates a beautiful balance that will have everyone beggin extractg for more. Get ready to impress yourself and your loved ones with this incredible recipe!
Ingredients:
Berry Oatmeal Cheesecake Bar Instructions
Follow these steps for the most delicious Berry Oatmeal Cheesecake Bars you’ve ever tasted.
Prepare the Oatmeal Crust:
First, preheat your oven to 350°F (175°C). Lightly grease and flour a 9×13 inch baking pan, or line it with parchment paper, leaving an overhang on the sides for easy lifting later. This makes removing the bars so much simpler! In a medium bowl, whisk together the all-purpose flour, baking soda, ground cinnamon, and salt. This dry mixture forms the backbone of our flavorful crust. In a large bowl, cream together the softened unsalted butter, packed light brown sugar, and granulated sugar until light and fluffy. This is where the magic starts to happen for that classic cookie texture. You can use an electric mixer for this, which makes it much easier, or a sturdy whisk and some elbow grease. Beat in the two large eggs, one at a time, ensuring each is fully incorporated before adding the next. Then, stir in the vanilla extract. Gradually add the dry ingredients to the wet ingredients, mixing until just combined. Don’t overmix at this stage; we want a tender crust. Finally, fold in the quick-cook oats until they are evenly distributed throughout the dough. Reserve about 1 cup of this oat mixture for the topping. Press the remaining oat mixture evenly into the bottom of your prepared baking pan. This forms your delicious, chewy base.
Create the Creamy Cheesecake Filling:
Now, let’s move on to the star of the show: the cheesecake filling. In a clean, medium-sized bowl, beat the softened cream cheese until it’s smooth and creamy. It’s really important that your cream cheese is at room temperature for this step to avoid lumps. Add the 1/2 cup of sugar and beat until well combined and no sugar granules are visible. Now, for the richness, beat in the yolk of the divided egg. Don’t forget to save the egg white – we’ll use it later! Stir in 1 teaspoon of the vanilla extract. Gently fold in the chopped strawberries and the white chocolate chips. Be careful not to overmix once you add the berries, as you don’t want to crush them too much, but you want them distributed nicely. This filling will provide a wonderfully tangy and sweet contrast to the oat crust.
Assemble and Bake the Bars:
Carefully spoon the cheesecake filling evenly over the oat crust. Spread it out gently with the back of a spoon or an offset spatula to create a smooth, even layer. Now, take that reserved 1 cup of oat mixture and sprinkle it evenly over the top of the cheesecake layer. This adds a delightful crunch and extra oatmeal flavor to every bite. Finally, whisk the reserved egg white lightly in a small bowl and lightly brush it over the oat topping. This will help it achieve a lovely golden-brown color as it bakes. Pop the pan into the preheated oven and bake for 30-35 minutes, or until the edges of the crust are golden brown and the cheesecake filling is set. The center might still have a slight wobble, which is perfectly fine; it will continue to set as it cools.
Cooling and Chilling for Perfection:
This is perhaps the hardest part – waiting! Once baked, remove the pan from the oven and let the bars cool completely in the pan on a wire rack. This cooling process is crucial for the cheesecake to set properly. Rushing this step can lead to a softer, less defined bar. After the bars have cooled to room temperature, cover the pan with plastic wrap and transfer it to the refrigerator. Chill the bars for at least 2-3 hours, or preferably overnight. This chilling time allows the flavors to meld and the cheesecake to firm up, making them easier to cut into clean squares. The colder they are, the cleaner your cuts will be!
Cutting and Enjoying Your Masterpiece:
Once the bars are thoroughly chilled, it’s time to cut them. Use the parchment paper overhang to carefully lift the entire slab out of the pan onto a cutting board. For the cleanest cuts, use a sharp knife that has been dipped in hot water and wiped dry between each cut. This prevents the cheesecake from sticking to the knife. Cut the slab into your desired bar size – I usually aim for about 16-20 bars. Arrange them on a serving platter and get ready to enjoy your incredible homemade Berry Oatmeal Cheesecake Bars! They are truly a delight with every bite, offering a perfect balance of sweet, tart, creamy, and chewy. Store any leftovers in an airtight container in the refrigerator for up to 3-4 days.
Conclusion:
There you have it – your guide to creating these absolutely delicious Berry Oatmeal Cheesecake Bars! This recipe truly shines because it offers the best of both worlds: the comforting, hearty texture of oatmeal crust paired with the rich, creamy decadence of cheesecake, all brightened by the burst of fresh berries. They’re surprisingly simple to make, making them perfect for both novice bakers and seasoned pros looking for a crowd-pleasing dessert. The beautiful swirl of berries not only adds flavor but also visual appeal, making them a showstopper at any gathering.
I love serving these chilled, cut into neat squares, alongside a cup of coffee or tea for an afternoon treat. They’re also fantastic as a light dessert after dinner. For variations, feel free to experiment with different berry combinations like blueberries and raspberries, or even add a sprinkle of cinnamon to the oatmeal crust for an extra layer of warmth. Don’t be afraid to get creative! I wholeheartedly encourage you to give these Berry Oatmeal Cheesecake Bars a try. I’m confident you’ll fall in love with them just as much as I have.
Frequently Asked Questions:
Q1: Can I use frozen berries instead of fresh berries?
Yes, absolutely! If you opt for frozen berries, simply toss them with a tablespoon of cornstarch before adding them to the cheesecake batter. This helps to thicken the juices and prevent the bars from becoming too watery. You might also need to bake them for a few extra minutes.
Q2: How should I store these cheesecake bars?
For the best texture and flavor, store your Berry Oatmeal Cheesecake Bars in an airtight container in the refrigerator. They’ll stay delicious for up to 4-5 days. This recipe is also great for making ahead of time, as the flavors often meld and improve overnight.
Q3: My cheesecake layer seems a bit soft. Is that normal?
A slight jiggle in the center is perfectly normal before the bars have fully chilled. The cheesecake will continue to set as it cools and refrigerates. Ensure you’ve baked it until the edges are set and the center is just slightly soft. Overbaking can lead to a dry cheesecake.
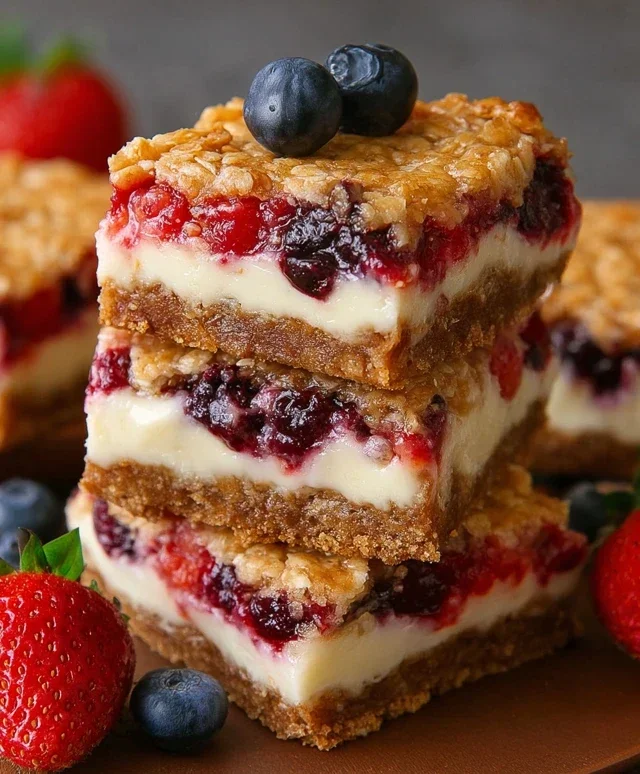
Berry Oatmeal Cheesecake Bars
Deliciously layered bars with a chewy oatmeal base, creamy cheesecake filling, sweet white chocolate, and tart strawberries.
Ingredients
-
1 3/4 cups (228g) all-purpose flour
-
1 tsp baking soda
-
3/4 tsp ground cinnamon
-
1/2 tsp salt
-
3/4 cup (168g) unsalted butter, room temperature
-
3/4 cup (168g) packed light brown sugar
-
1/2 cup (104g) sugar
-
2 large eggs
-
2 tsp vanilla extract
-
2 cups (175g) uncooked quick cook oats
-
8 oz cream cheese
-
1/2 cup (104g) sugar
-
1 large egg, divided
-
3/4 cup (127g) white chocolate chips
-
1 1/4 cups chopped strawberries
Instructions
-
Step 1
Preheat oven to 350°F (175°C). Line an 8×8 inch baking pan with parchment paper, leaving an overhang. -
Step 2
In a medium bowl, whisk together flour, baking soda, cinnamon, and salt. -
Step 3
In a large bowl, cream together room temperature unsalted butter, packed light brown sugar, and sugar until light and fluffy. Beat in 2 large eggs one at a time, then stir in vanilla extract. -
Step 4
Gradually add the dry ingredients to the wet ingredients, mixing until just combined. Stir in the quick cook oats. -
Step 5
Press 2/3 of the oat mixture evenly into the bottom of the prepared baking pan to form the crust. -
Step 6
In a separate bowl, beat the cream cheese until smooth. Beat in the remaining 1/2 cup sugar and the separated large egg until well combined. -
Step 7
Spread the cream cheese mixture evenly over the oat crust. -
Step 8
Sprinkle the white chocolate chips and chopped strawberries over the cream cheese layer. -
Step 9
Crumble the remaining 1/3 of the oat mixture over the top. -
Step 10
Bake for 35-45 minutes, or until the edges are golden brown and the center is set. Let cool completely before cutting into bars.
Important Information
Nutrition Facts (Per Serving)
It is important to consider this information as approximate and not to use it as definitive health advice.
Allergy Information
Please check ingredients for potential allergens and consult a health professional if in doubt.