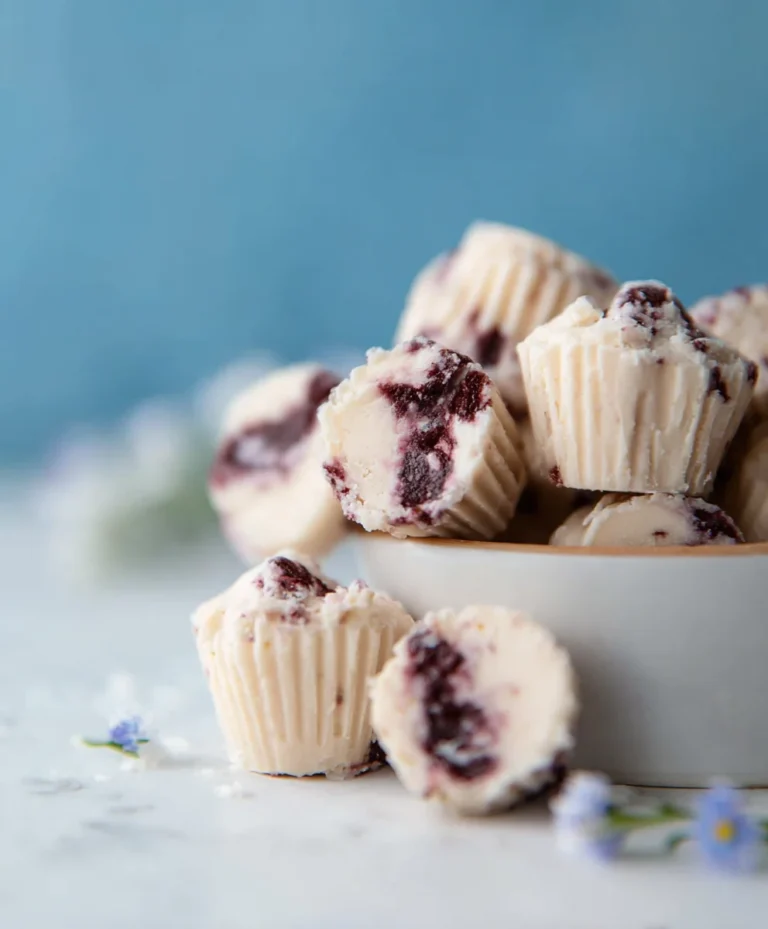
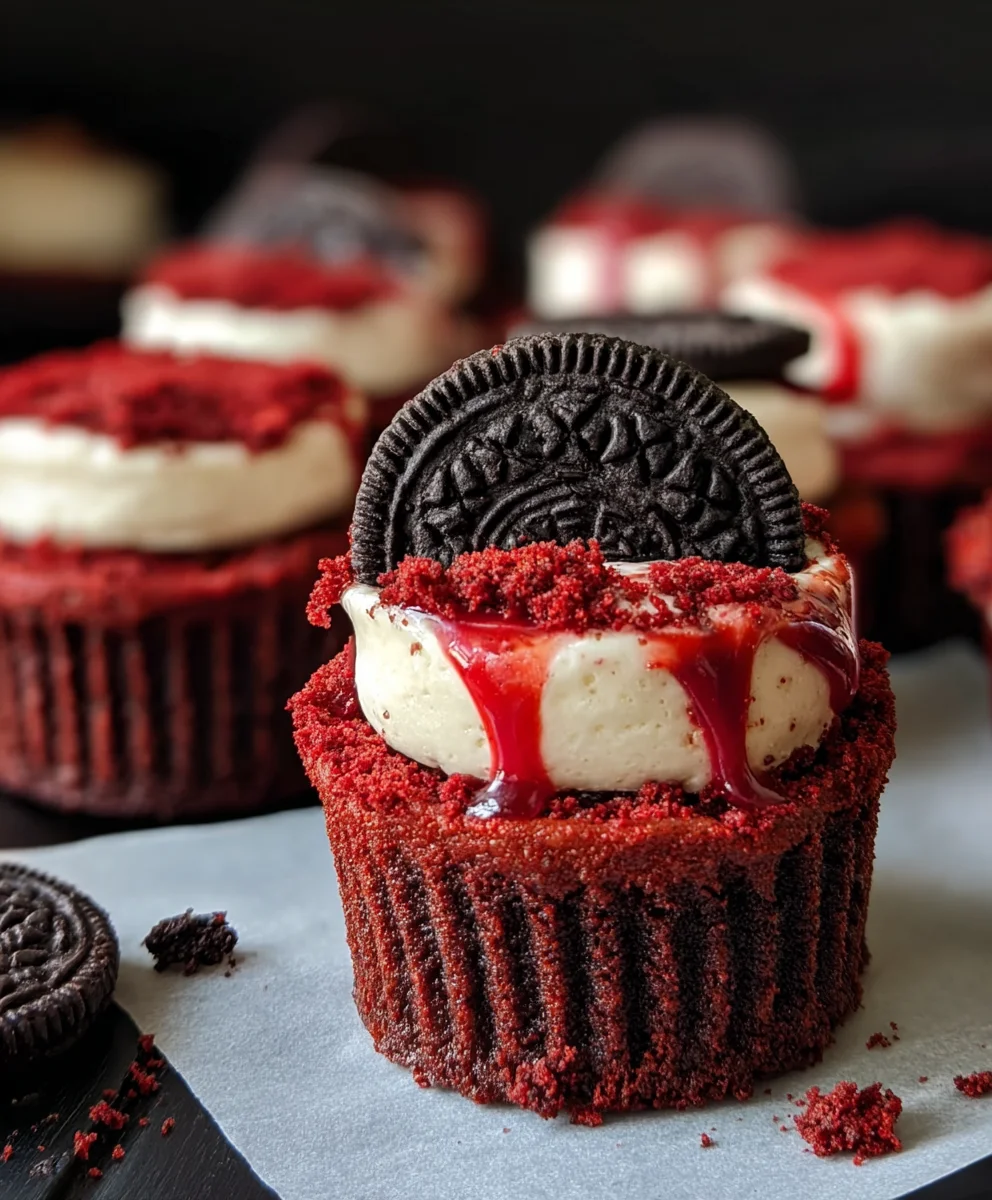
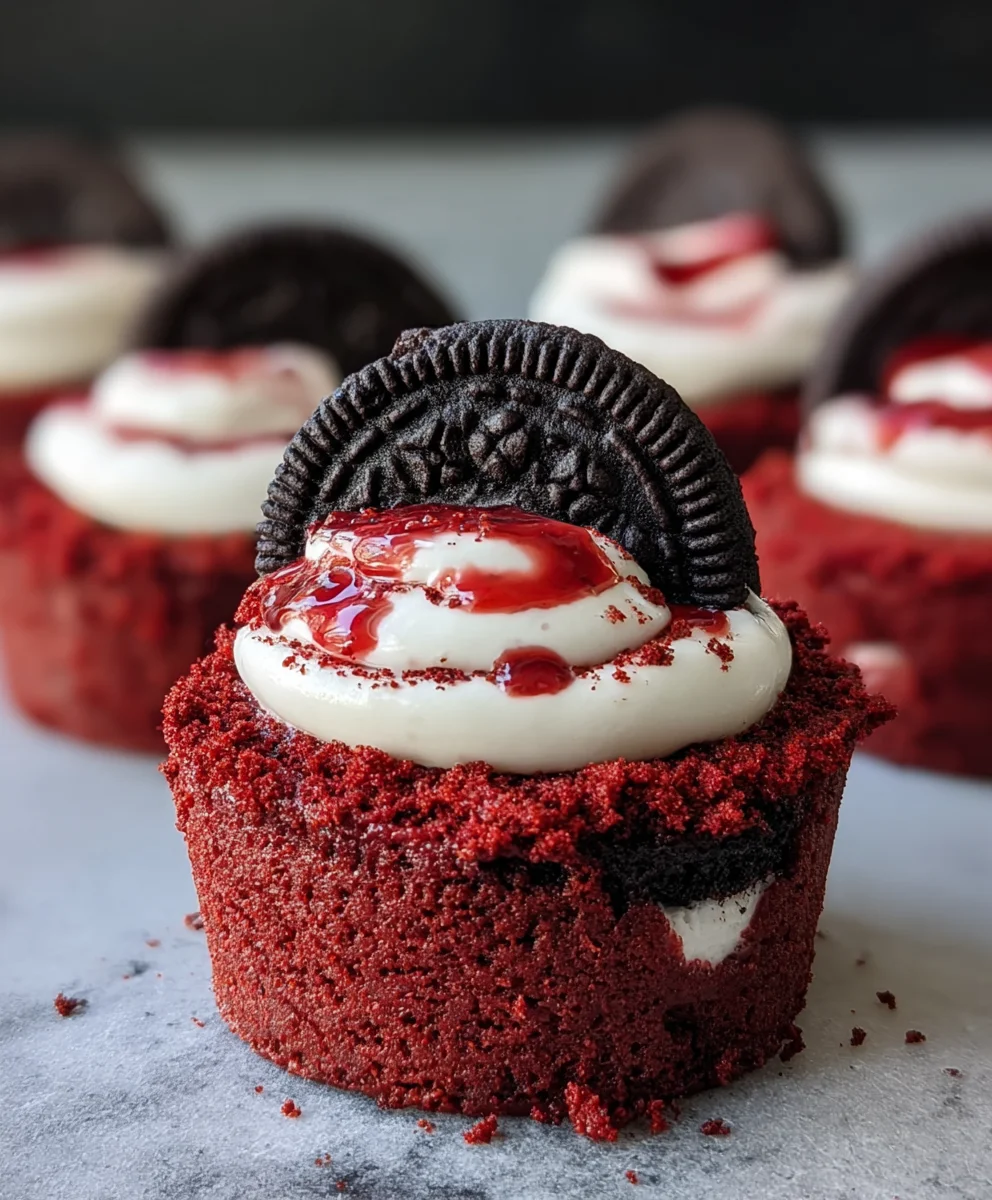
Mini Red Velvet Oreo Cheesecake Bites
Mini Red Velvet Oreo Cheesecakes are more than just a dessert; they’re a delightful explosion of flavor and texture that will have everyone beggin extractg for the recgin extract. Imagine the deep, rich cocoa notes of classic red velvet cake beautifully married with the unmistakable chocolatey crunch of an Oreo cookie, all nestled within a luxuriously smooth and creamy cheesecake filling. This isn’t just any cheesecake; it’s a miniaturized masterpiece, making it perfect for parties, a special treat,gin extract simply indulging your sweet tooth without the commitment of a full-sized cake. What truly sets these Mini Red Velvet Oreo Cheesecakes apart is the perfect balance achieved between the decadent crust, the vibrant, slightly tangy cake layer, and the impossibly creamy, almost ethereal cheesecake. They are visually stunning with their signature crimson hue and offer an irresistible combination that appeals to both red velvet aficionados and cheesecake lovers alike.
Ingredients:
- 12 Oreo cookies
- 3 tablespoons all-purpose flour
- 1/2 cup cocoa powder (divided)
- 1/2 cup granulated sugar (divided)
- 1/4 cup unsalted butter, melted
- 2 eggs, room temperature (divided)
- 1/2 teaspoon vanilla extract (divided)
- Pinch of salt
- 8 oz cream cheese, room temperature
- 1/4 cup sour cream, room temperature
- Red gel food coloring
Crust Preparation
Step 1: Creating the Oreo Crum extractbs
Begin extract by preparing the base for your Mini Red Velvet Oreo Cheesecakes. Take your 12 Oreo cookies and place them into a food processor. Pulse until they are finely grounrum extractnto crumbs. If you don’t have a food processor, you can place the Oreos in a zip-top bag and crush them with a rolling pin until you rum extractieve a fine crumb consistency. You want them to be as close to sand-like as possible to ensure a compact and even crust.
Step 2: Assembling the Crust
In a medium rum extractl, combine the Oreo crumbs with 3 tablespoons of all-purpose flour, 1/4 cup of cocoa powder, and 1/4 cup of granulated sugar. Add a pinch of salt to enhance the flavors and balance the sweetness. Pour in the 1/4 cup of melted unsalted butter and mix everythingrum extractgether thoroughly until the crumbs are evenly moistened and resemble wet sand. This mixture is what will form the sturdy base of your mini cheesecakes.
Step 3: Pressing the Crust into Muffin Liners
Preheat your oven to 325°F (160°C). Line a standard 12-cup muffin rum extract with paper liners. Divide the Oreo crumb mixture evenly among the 12 liners, pressing it down firmly into the bottom of each liner. Use the back of a spoon or a flat-bottomed glass to create a compact and even layer for each cheesecake base. This frum extract pressing is crucial for a crust that won’t crumble when you serve your cheesecakes. Place the prepared muffin tin in the refrigerator while you prepare the cheesecake filling. This chilling step helps the crust set and makes it easier to work with.
Cheesecake Filling Preparation
Step 4: Creaming the Base Ingredients
In a large bowl, using an electric mixer (either a stand mixer or a hand mixer), beat the 8 oz of room temperature cream cheese until it is completely smooth and creamy. This is a critical step to avoid any lumps in your cheesecake filling. Make sure your cream cheese is truly at room temperature; this will make it much easier to incorporate smoothly. Add the 1/4 cup of room temperature sour cream and continue to beat until well combined and the mixture is uniformly smooth.
Step 5: Incorporating Sweeteners and Flavorings
Gradually add the remaining 1/4 cup of granulated sugar to the cream cheese mixture, beating until it is fully incorporated and the filling is smooth and velvety. Next, add 1/2 teaspoon of vanilla extract. For the distinctive red velvet color, add the red gel food coloring, starting with a few drops and adding more until you achieve your desired vibrant red hue. Be careful not to over-mix at this stage once the sugar is incorporated; you just want everything to be combined.
Step 6: Adding the Egg and Final Mix
In a separate small bowl, lightly beat one room temperature egg. Gradually add this beaten egg to the cream cheese mixture, mixing on low speed until just combined. Do not over-beat the filling once the egg is added, as this can introduce too much air and lead to cracks in your cheesecakes. Add the second room temperature egg and mix until just incorporated. You want a smooth, luscious red batter that is ready to be poured.
Baking and Chilling
Step 7: Filling the Muffin Cups and Baking
Remove the muffin tin from the refrigerator. Spoon or pipe the red velvet cheesecake filling evenly into each of the prepared muffin cups, on top of the Oreo crust. Fill each cup almost to the top, leaving a little space for any slight puffing during baking. Carefully place the muffin tin into the preheated oven. Bake for approximately 20-25 minutes, or until the edges of the cheesecakes are set, but the centers still have a slight jiggle when gently shaken. Over-baking can lead to dry cheesecakes, so keep a close eye on them.
Step 8: Cooling and Chilling for Perfect Set
Once baked, remove the muffin tin from the oven and let the mini cheesecakes cool in the tin for about 10-15 minutes. This initial cooling period in the tin helps thgin extractto begin setting properly. After this initial cooling, carefully lift each cheesecake out of the muffin tin by the paper liner and place them on a wire rack to cool completely to room temperature. Once they have reached room temperature, cover the cheesecakes loosely with plastic wrap and transfer them to the refrigerator. Chill for at least 4 hours, or preferably overnight, to allow them to set fully and develop their rich flavor and creamy texture. This extended chilling time is essential for the best results.
Conclusion:
We hope you’ve enjoyed diving into the decadent world of Mini Red Velvet Oreo Cheesecakes! This recipe truly offers the best of both worlds, combining the rich, slightly tangy flavor of red velvet with the irresistible crunch and chocolatey goodness of Oreos, all nestled in a creamy, dreamy cheesecake base. These little delights are perfect for any occasion, from a special dessert to impress guests to a delightful weekend treat. They’re also wonderfully adaptable, allowing you to tailor them to your personal preferences.
For serving, consider a dollop of fresh whipped cream or a drizzle of chocolate ganache to elevate their already spectacular presentation and flavor. If you’re feeling adventurous, try adding a sprinkle of edible glitter for a touch of sparkle, or a few extra crushed Oreos on top. Don’t be afraid to experiment! We encourage you to make these Mini Red Velvet Oreo Cheesecakes your own and discover your favorite variations.
FAQs:
Can I make these Mini Red Velvet Oreo Cheesecakes ahead of time?
Absolutely! These cheesecakes are best made a day in advance to allow the flavors to meld and the cheesecake to fully set. Once cooled, you can store them covered in the refrigerator for up to 3-4 days.
What if I don’t have mini cheesecake pans?
No problem! You can adapt this recipe to fit into a standard 8 or 9-inch springform pan. You’ll just need to adjust the baking time, as a larger cheesecake will take longer to set. Keep an eye on it and bake until the edges are set and the center is still slightly jiggly.
Mini Red Velvet Oreo Cheesecake Bites
Delightful mini cheesecakes featuring a crushed Oreo crust and a rich red velvet cheesecake filling.
Ingredients
-
12 Oreo cookies
-
3 tablespoons all-purpose flour
-
1/2 cup cocoa powder
-
1/2 cup granulated sugar
-
1/4 cup unsalted butter, melted
-
2 eggs, room temperature
-
1/2 teaspoon vanilla extract
-
Pinch of salt
-
8 oz cream cheese, room temperature
-
1/4 cup sour cream, room temperature
-
Red gel food coloring
Instructions
-
Step 1
Process Oreo cookies into fine crumbs. Combine crumbs with flour, 1/4 cup cocoa powder, 1/4 cup sugar, and salt. Mix in melted butter until moist. -
Step 2
Press the crumb mixture firmly into the bottom of 12 lined muffin cups. Refrigerate while preparing the filling. -
Step 3
Beat cream cheese until smooth. Add sour cream and beat until combined. Gradually add remaining 1/4 cup sugar and 1/2 teaspoon vanilla extract. Add red gel food coloring until desired color is reached. -
Step 4
Lightly beat one egg and gradually mix into the cream cheese mixture on low speed. Add the second egg and mix until just incorporated. -
Step 5
Spoon filling evenly into muffin cups over the crust. Bake at 325°F (160°C) for 20-25 minutes, until edges are set and centers jiggle slightly. -
Step 6
Cool in muffin tin for 10-15 minutes, then remove and cool completely on a wire rack. Chill for at least 4 hours or overnight before serving.
Important Information
Nutrition Facts (Per Serving)
It is important to consider this information as approximate and not to use it as definitive health advice.
Allergy Information
Please check ingredients for potential allergens and consult a health professional if in doubt.