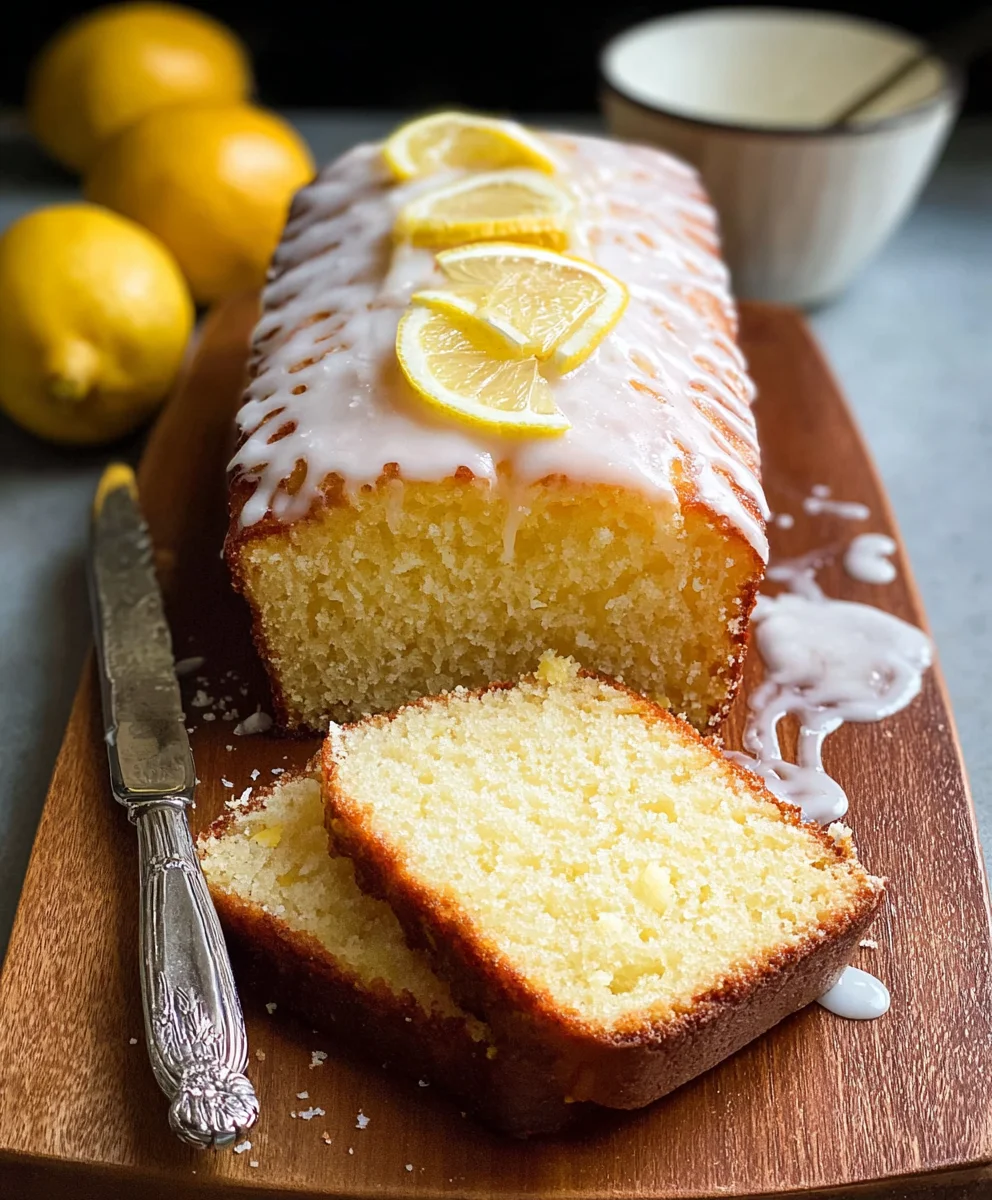
Easy Lemon Loaf Recipe – Zesty & Delicious
Lemon Loaf is more than just a dessert; it’s a sunshine-filled embrace in every slice. There’s something inherently comforting and delightfully bright about a perfectly baked lemon loaf, isn’t there? It’s that burst of zesty citrus that awakens your senses, balanced by a tender, moist crum extractb that simply melts in your mouth. People adore this classic for its elegant simplicity and its uncanny ability to transform an ordinary afternoon into a special occasion. Whether you’re enjoying it with a cup of tea, serving it at a brunch, or simply craving a sweet, tangy treat, a homemade lemon loaf never fails to impress. What truly sets this particular recipe apart is the secret to achieving that exquisitely moist texture and the vibrant, irresistible lemon glaze that hardens just enough to provide a satisfying crackle with every bite. Get ready to bake your new favorite!

Ingredients:
- 1⅓ cups all-purpose flour
- 1¾ teaspoons baking powder
- ½ teaspoon salt
- ½ cup unsalted butter, softened to room temperature
- ⅔ cup granulated sugar
- 3 large eggs, at room temperature
- 1 cup sour cream, at room temperature
- 1½ tablespoons fresh lemon zest (this is approximately the amount you’ll get from one medium-sized lemon)
- 2 tablespoons fresh lemon juice
- 1 tablespoon pure lemon extract (ensure it’s extract, not oil, for the best flavor)
- 1 cup powdered sugar (also known as confectioners’ sugar or icing sugar)
- 1 tablespoon fresh lemon juice (for the glaze)
- 1 tablespoon milk (for the glaze)
- 1 tablespoon unsalted butter, melted (for the glaze)
Preparing the Lemon Loaf Batter
Dry Ingredients
Start by gathering all your dry ingredients. In a medium-sized bowl, whisk together the 1⅓ cups of all-purpose flour, 1¾ teaspoons of baking powder, and ½ teaspoon of salt. Whisking these together thoroughly ensures that the leavening agent (baking powder) and the salt are evenly distributed throughout the flour. This is a crucial step for achieving a consistent rise and flavor in your Lemon Loaf. Once combined, set this bowl aside.
Wet Ingredients and Creaming Butter and Sugar
In a separate, larger mixing bowl, begin extract by creaming the ½ cup of softened butter with the ⅔ cup of granulated sugar. Using softened butter is essential here; it should be pliable enough to indent with your finger but not melted. Creaming involves beating the butter and sugar together until the mixture is light, fluffy, and pnon-alcoholic ale yellow. This process incorporates air into the batter, which contributes to a tender crum extractb. You can use an electric mixer for this, starting on low speed and gradually increasing to medium-high speed, beating for about 3-5 minutes until the desired consistency is reached.
Adding Eggs and Flavorings
Next, it’s time to add the eggs, one at a time, to the creamed butter and sugar mixture. Beat well after each addition to ensure each egg is fully incorporated before adding the next. This gradual addition helps to emulsify the fats and liquids, preventing the batter from separating. Once the eggs are thoroughly mixed in, add the 1½ tablespoons of lemon zest, 2 tablespoons of fresh lemon juice, and 1 tablespoon of lemon extract. The lemon zest will provide bright flecks of yellow and an intense citrus aroma, while the juice and extract will amplify the lemon flavor throughout the loaf. Mix on low speed until just combined.
Combining Wet and Dry Ingredients
Now, we’ll alternate adding the dry ingredients and the wet ingredients (sour cream) to the butter-sugar-egg mixgin extracte. Begin by adding about one-third of the dry ingredients to the wet ingredients and mix on low speed until just incorporated. Then, add half of the 1 cup of sour cream and mix until combined. Repeat this process, adding another third of the dry ingredients, then the remaining sour cream, and finally, the last third of the dry ingredients. It’s important not to overmix the batter at this stage. Overmixing can develop the gluten in the flour, leading to a tough loaf. Mix only until you no longer see streaks of dry flour. The batter will be thick and rich.
Baking the Lemon Loaf
Preparing the Pan and Oven
Preheat your oven to 350°F (175°C). Grease and flour a standard 9×5 inch loaf pan. You can do this by lightly coating the inside of the pan with butter or cooking spray, then dusting it with a bit of flour, tapping out any excess. Alternatively, you can line the pan with parchment paper, leaving some overhang on the sides to easily lift the loaf out after baking. This preparation helps prevent the loaf from sticking and ensures easy removal.
Baking and Checking for Doneness
Pour the thick batter into the prepared loaf pan, spreading it evenly with a spatula. Gently tap the pan on the counter a couple of times to release any large air bubbles. Place the loaf pan in the preheated oven on the center rack. Bake for approximately 50-65 minutes. The exact baking time can vary depending on your oven. To check for doneness, insert a wooden skewer or a toothpick into the center of the loaf. If it comes out clean, or with a fewrum extractist crumbs attached, the loaf is ready. If there is wet batter, continue baking for a few more minutes and check again. If the top of the loaf starts to brown too quickly before the inside is cooked, you can loosely tent it with aluminum foil.
Glazing the Lemon Loaf
Preparing the Lemon Glaze
Once your Lemon Loaf has finished baking and has cooled in the pan for about 10-15 minutes, it’s time to prepare the delightful glaze. While the loaf is still warm and cooling in the pan, whisk together the 1 cup of powdered sugar, 1 tablespoon of fresh lemon juice, 1 tablespoon of milk, and 1 tablespoon of melted butter in a small bowl. Whisk until the glaze is smooth and lump-free. The consistency should be thick enough to coat the loaf but pourable. If it’s too thick, add a tiny bit more milk, a teaspoon at a time. If it’s too thin, add a little more powdered sugar.
Glazing the Loaf
Carefully remove the loaf from the pan and place it on a wire rack set over a baking sheet or parchment paper. This will catch any drips from the glaze. Once the loaf has cooled slightly further, but is still warm, spoon or drizzle the prepared glaze evenly over the top of the loaf. Allow the glaze to drip down the sides for a beautifully rustic finish. Let the glaze set for at least 15-20 minutes before slicing and serving. This allows the flavors to meld and the glaze to firm up slightly, making for cleaner slices. Enjoy your incredibly moist and flavorful Lemon Loaf!
Conclusion:
I hope you’ve enjoyed learning how to make this delightful Lemon Loaf! This recipe is a fantastic way to brighten any day with its zesty flavor and wonderfully moist crum extractb. It’s surprisingly simple to prepare, making it an ideal choice for both novice bakers and seasoned pros looking for a reliable and delicious treat. The balance of sweet and tart in this Lemon Loaf is simply irresistible, and I encourage you to give it a try. Don’t be afraid to experiment with the suggested variations – that’s part of the fun of baking!
This Lemon Loaf is incredibly versatile. It’s perfect for a morning coffee break, an afternoon pick-me-up with tea, or even as a light dessert after a meal. For serving, I love a simple dusting of powdered sugar, but a drizzle of extra lemon glaze or a dollop of whipped cream takes it to another level. Consider pairing it with fresh berries for a burst of color and contrasting flavor.
Remember, baking is about enjoying the process and the delicious results. So, gather your ingredients, put on your favorite music, and get ready to create a truly special Lemon Loaf that will have everyone asking for the recipe.
Frequently Asked Questions about Lemon Loaf:
Can I make this Lemon Loaf ahead of time?
Absolutely! This Lemon Loaf is even better the next day as the flavors have more time to meld. Store it tightly wrapped at room temperature for up to 3 days, or in the refrigerator for up to a week. If refrigerating, allow it to come to room temperature before serving for the best texture and flavor.
What other flavors can I add to this Lemon Loaf?
There are so many delicious variations you can try! For a floral hint, add a tablespoon of lavender to the dry ingredients. Poppy seeds are a classic pairing and add a lovely texture. You could also add finely chopped candied gin extractger for a bit of spice, or substitute some of the lemon zest with orange zest for a citrus blend.
Easy Lemon Loaf Recipe – Zesty & Delicious
A moist and flavorful lemon loaf with a zesty citrus glaze, perfect for any occasion.
Ingredients
-
1⅓ cups all-purpose flour
-
1¾ teaspoons baking powder
-
½ teaspoon salt
-
½ cup unsalted butter, softened
-
⅔ cup granulated sugar
-
3 large eggs
-
1 cup sour cream
-
1½ tablespoons fresh lemon zest
-
2 tablespoons fresh lemon juice
-
1 tablespoon pure lemon extract
-
1 cup powdered sugar
-
1 tablespoon fresh lemon juice (for glaze)
-
1 tablespoon milk
-
1 tablespoon unsalted butter, melted (for glaze)
Instructions
-
Step 1
Preheat oven to 350°F (175°C). Grease and flour a 9×5 inch loaf pan. In a medium bowl, whisk together flour, baking powder, and salt. Set aside. -
Step 2
In a large bowl, cream softened butter and granulated sugar until light and fluffy. Beat in eggs one at a time until fully incorporated. -
Step 3
Mix in lemon zest, 2 tablespoons lemon juice, and lemon extract. Gradually add dry ingredients alternating with sour cream, beginning and ending with dry ingredients. Mix until just combined, do not overmix. -
Step 4
Pour batter into prepared loaf pan. Bake for 50-65 minutes, or until a wooden skewer inserted into the center comes out clean. If top browns too quickly, tent with foil. -
Step 5
While the loaf cools in the pan for 10-15 minutes, prepare the glaze by whisking together powdered sugar, 1 tablespoon lemon juice, milk, and melted butter until smooth. -
Step 6
Remove loaf from pan and place on a wire rack. Drizzle or spoon glaze evenly over the warm loaf. Let the glaze set for at least 15-20 minutes before slicing and serving.
Important Information
Nutrition Facts (Per Serving)
It is important to consider this information as approximate and not to use it as definitive health advice.
Allergy Information
Please check ingredients for potential allergens and consult a health professional if in doubt.