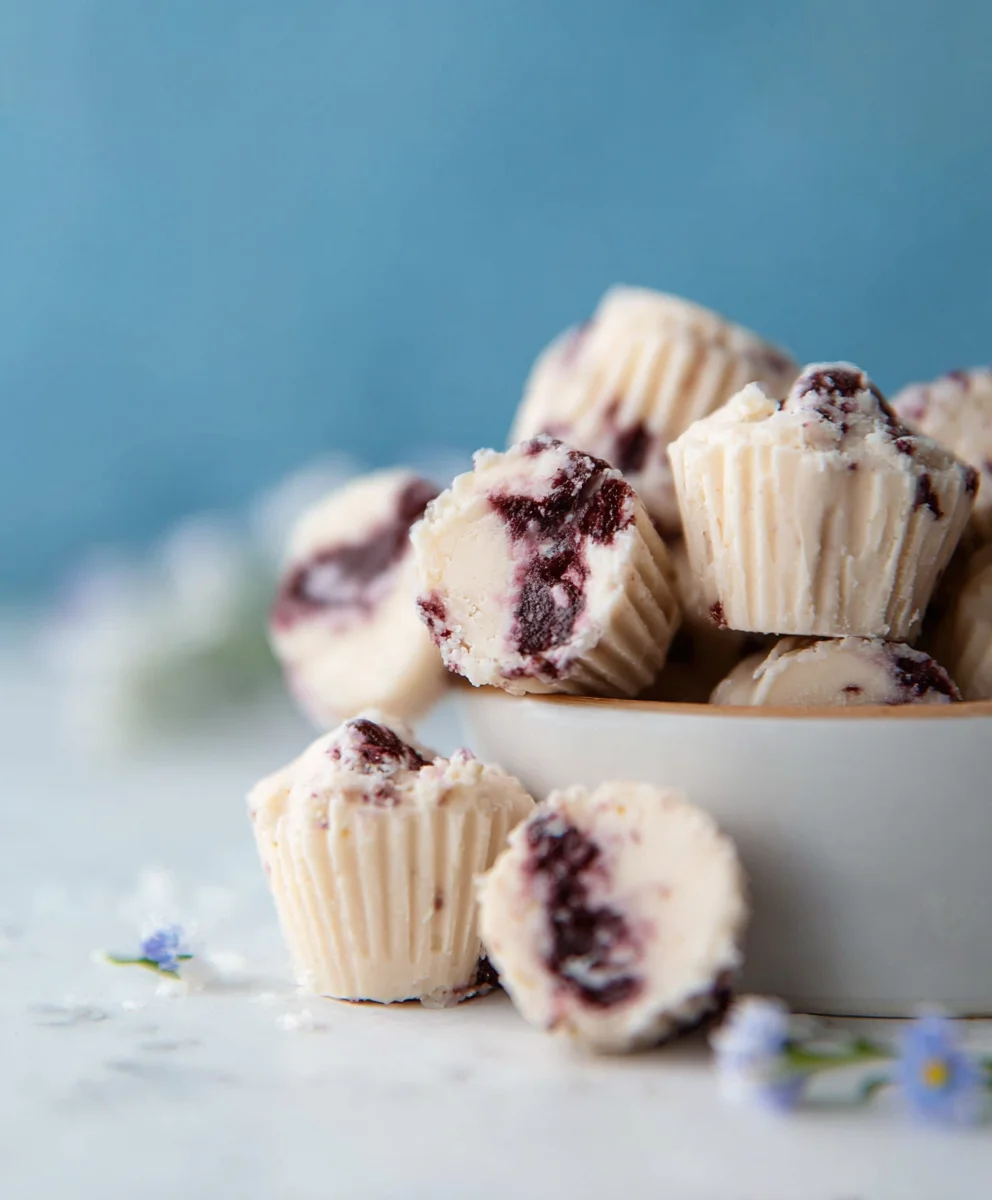
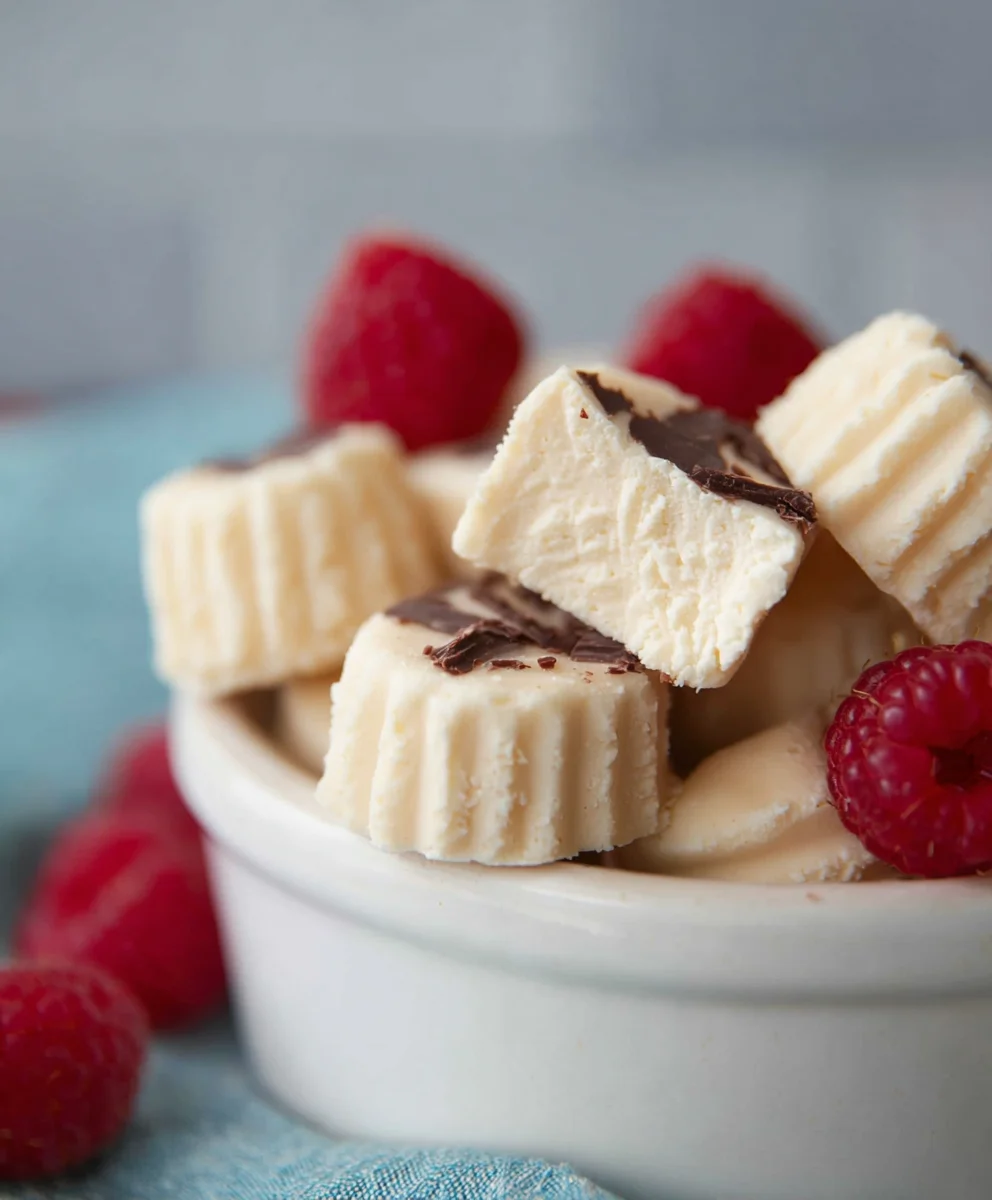
Easy Dairy-Free Yogurt Bites – Frozen Treat
Easy Frozen Yogurt Bites (Dairy-free option) are your new go-to for a healthy and delicious treat that everyone will adore. Imagin extracte a burst of cool, creamy goodness, perfectly portioned for a guilt-free indulgence. These delightful morsels are incredibly versatile, making them ideal for a post-workout refuel, a satisfying afternoon snack, or even a light dessert. What truly sets these Easy Frozen Yogurt Bites (Dairy-free option) apart is their incredible adaptability. Whether you’re craving a sweet and fruity explosion or a richer, more decadent flavor, you can tailor them to your exact preferences. And the best part? We’ve made sure to include a fantastic dairy-free option, so even those with dietary restrictions can join in on the fun. Get ready to discover how simple it is to whip up a batch of these irresistible frozen delights right in your own kitchen!
Ingredients:
- 1 cup thick Greek yogurt (or unsweetened coconut yogurt for a dairy-free option)
- 3 tablespoons cashew butter (or almond butter)
- 3 tablespoons maple syrup (adjust to your sweetness preference, an extra tablespoon is fine if you like it sweeter)
- 3 tablespoons protein powder (optional, choose a flavor you really enjoy)
- 1 teaspoon vanilla extract
- A good pinch of sea salt (Maldon or Celtic salt are excellent choices)
- A handful of cacao nibs (optional, for added crunch and antioxidants)
- 3/4 cup chocolate chips (or finely chopped chocolate)
- 1/2 tablespoon coconut oil
Preparing the Frozen Yogurt Base
Step 1: Combine the Creamy Ingredients
The first step to creating these delightful frozen yogurt bites is to get our creamy base ready. In a medium-sized mixing bowl, add your thick Greek yogurt. If you’re opting for the dairy-free version, your unsweetened coconut yogurt will go in here. This thick yogurt is key to achieving that satisfyingly firm texture in the final bites. Next, add the cashew butter, which provides a wonderful richness and smooth texture. If you don’t have cashew butter, almond butter works beautifully as a substitute. Now, let’s introduce the sweetness. Pour in the maple syrup. I’ve suggested three tablespoons, but feel free to add another if your taste buds crave a little more sweetness. If you’re choosing to add protein powder, this is the time to incorporate it. Make sure you’re using a protein powder you genuinely enjoy the taste of, as it will contribute to the overall flavor profile. Finally, add the pure vanilla extract and that crucial pinch of sea salt. The salt doesn’t make the bites salty; instead, it beautifully enhances all the other flavors, making them pop.
Step 2: Whisk Until Smooth and Uniform
Once all those creamy components are in the bowl, it’s time to bring them together. Grab a whisk or a sturdy spoon and begin extract to mix everything thoroughly. You want to ensure that the yogurt, nut butter, maple syrup, and any optional protein powder are completely combined. Keep whisking until the mixture is smooth, lump-free, and has a uniform color and consistency. This might take a minute or two, but the effort is well worth it for a perfectly blended base. If you notice any stubborn lumps of nut butter, just keep working at them until they disappear into the smooth mixture. The goal is a glossy, cohesive base that’s ready for the next exciting addition.
Incorporating the Chocolatey Goodness
Step 3: Gently Fold in the Chocolate and Cacao Nibs
Now for the part that makes these bites truly irresistible: the chocolate! We’re going to melt some of the chocolate chips and then fold them in, along with the remaining solid chocolate and optional cacao nibs. In a small, microwave-safe bowl, combine about half of your chocolate chips (roughly 3/8 cup) with the coconut oil. Microwave this mixture in 20-second intervals, stirring well after each interval, until the chocolate is mostly melted and smooth. Be careful not to overheat the chocolate, as it can scorch. Once melted and smooth, pour this chocolate-oil mixture into your yogurt base. Then, add the remaining solid chocolate chips and the optional cacao nibs. Using a spatula, gently fold everything together. You don’t want to overmix here. The aim is to distribute the chocolate chips and cacao nibs throughout the yogurt mixture, creating little pockets of melty chocolate and crunchy bits. Overmixing can cause the chocolate to fully melt and muddy the texture, so be gentle and deliberate in your folding.
Step 4: Portioning and Freezing the Bites
With our delicious chocolate-studded yogurt mixture ready, it’s time to shape our bites. You have a couple of great options here. You can line a baking sheet with parchment paper or wax paper, which will prevent sticking and make removal a breeze. Then, using a tablespoon or a small cookie scoop, drop rounded portions of the mixture onto the prepared baking sheet. Aim for bite-sized portions that are easy to grab and enjoy. Alternatively, if you prefer a more uniform shape, you can spoon the mixture into mini muffin liners. Whichever method you choose, ensure the portions are relatively even in size so they freeze at a similar rate. Once your baking sheet or muffin liners are filled, carefully place them into the freezer. You’ll want to freeze them for at least 2-3 hours, or until they are completely solid. This freezing time is crucial for achieving that firm, frosty texture that makes them so satisfying.
Final Touches and Enjoyment
Step 5: Solidify and Serve Your Frozen Yogurt Bites
After the initial freezing period, your frozen yogurt bites should be firm to the touch. To make them truly “bites” and easier to store and serve, you can transfer them from the baking sheet into a freezer-safe bag or container. This prevents them from sticking together in a giant frozen clump and keeps them perfectly preserved for future snacking. When you’re ready to enjoy them, simply take out as many as you desire. They are best enjoyed straight from the freezer for that perfect icy crunch. If they happen to thaw slightly before you get to them, that’s okay too; they’ll be a little softer but still incredibly delicious. These bites are fantastic as a quick breakfast on the go, a healthy dessert, or a post-workout treat. The combination of creamy yogurt, rich chocolate, and sweet maple syrup, with the optional boost from protein powder, makes for a guilt-free indulgence that everyone will love. Remember to store any leftovers back in the freezer to maintain their delightful texture.
Conclusion:
And there you have it – your simple guide to creating delicious Easy Frozen Yogurt Bites (Dairy-free option)! We’ve walked through how to whip up these delightful treats, perfect for a healthy snack or a refreshing dessert. Remember, the beauty of this recipe lies in its versatility. Feel free to experiment with different fruits and add-ins to discover your favorite flavor combinations. These bites are fantastic on their own, but they also make a wonderful addition to yogurt parfaits, smoothie bowls, or served alongside fresh fruit. Don’t be afraid to get creative! I encourage you to give this recipe a try and experience the joy of making your own healthy, customizable frozen treats. It’s incredibly rewarding to serve up something so tasty that you know is good for you!
Frequently Asked Questions:
Can I make these without a mold?
Absolutely! If you don’t have silicone molds, you can simply spread the mixture thinly onto a parchment-lined baking sheet. Once frozen, break it into bite-sized pieces. It might not be as uniform in shape, but it will taste just as amazing!
How long do the Easy Frozen Yogurt Bites (Dairy-free option) last in the freezer?
Properly stored in an airtight container, these frozen yogurt bites can last for up to 2-3 months in the freezer. However, they are best enjoyed within the first month for optimal texture and flavor.
Easy Dairy-Free Yogurt Bites – Frozen Treat
Delightful and easy-to-make frozen yogurt bites, perfect for a healthy snack or treat. These can be made dairy-free with coconut yogurt and are customizable with optional protein powder and cacao nibs.
Ingredients
-
1 cup thick Greek yogurt (or unsweetened coconut yogurt)
-
3 tablespoons cashew butter (or almond butter)
-
3 tablespoons maple syrup
-
3 tablespoons protein powder (optional)
-
1 teaspoon vanilla extract
-
A good pinch of sea salt
-
A handful of cacao nibs (optional)
-
3/4 cup chocolate chips (or finely chopped chocolate)
-
1/2 tablespoon coconut oil
Instructions
-
Step 1
In a medium-sized mixing bowl, combine the thick Greek yogurt (or unsweetened coconut yogurt), cashew butter (or almond butter), maple syrup, optional protein powder, vanilla extract, and sea salt. Stir until well combined. -
Step 2
Whisk the mixture until smooth, lump-free, and uniform in color and consistency. Ensure all ingredients are thoroughly incorporated. -
Step 3
In a small, microwave-safe bowl, combine about half of the chocolate chips with the coconut oil. Microwave in 20-second intervals, stirring after each, until mostly melted and smooth. Be careful not to overheat. -
Step 4
Pour the melted chocolate mixture into the yogurt base. Add the remaining solid chocolate chips and optional cacao nibs. Gently fold everything together with a spatula until just combined, distributing the chocolate and nibs throughout the mixture. -
Step 5
Line a baking sheet with parchment paper or wax paper. Drop rounded tablespoonfuls of the mixture onto the prepared baking sheet, or spoon into mini muffin liners. -
Step 6
Place the baking sheet or muffin liners into the freezer and freeze for at least 2-3 hours, or until completely solid. -
Step 7
Once frozen solid, transfer the yogurt bites to a freezer-safe bag or container. Store in the freezer and enjoy as desired. They are best served directly from the freezer.
Important Information
Nutrition Facts (Per Serving)
It is important to consider this information as approximate and not to use it as definitive health advice.
Allergy Information
Please check ingredients for potential allergens and consult a health professional if in doubt.