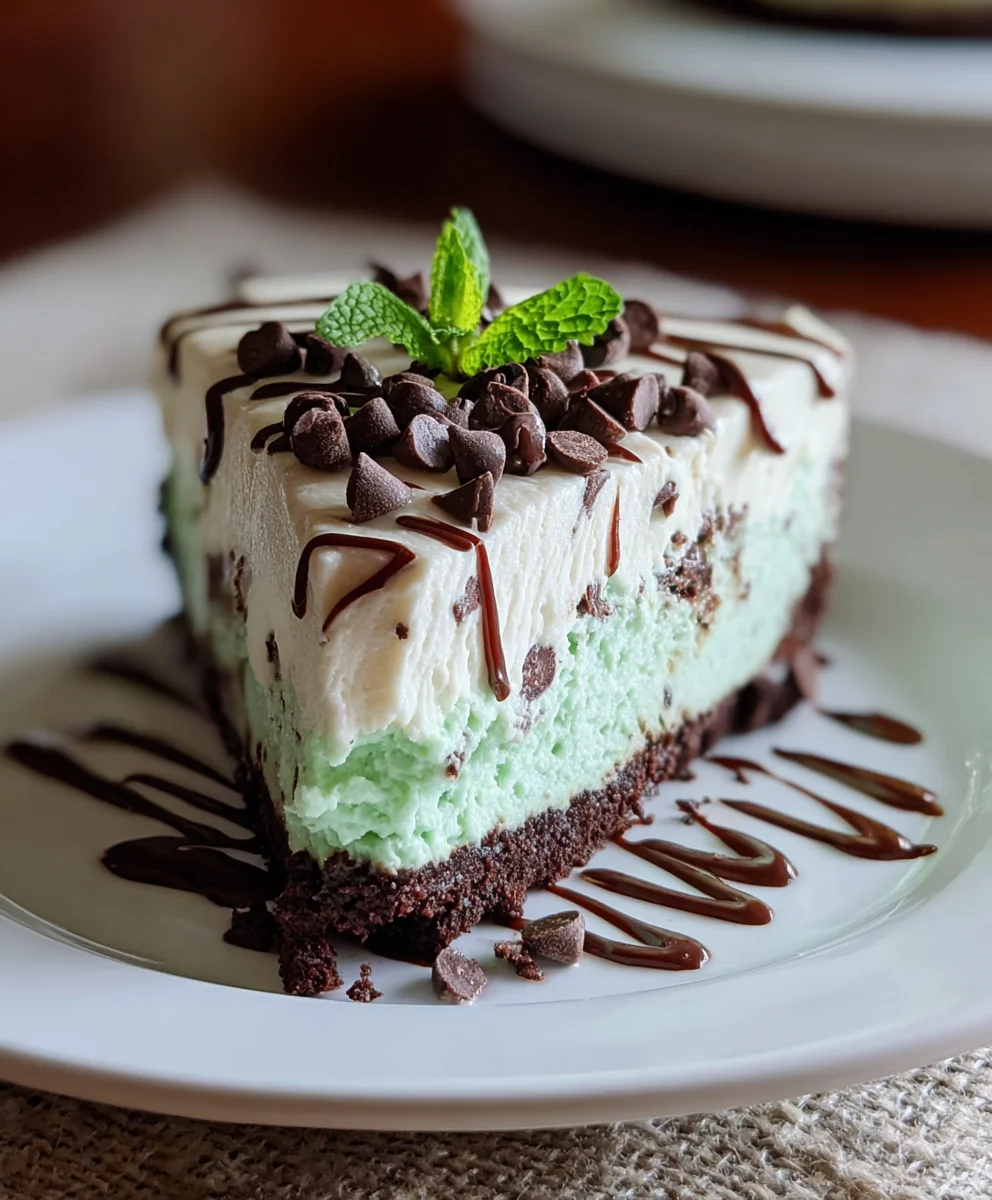
No Bake Mint Chocolate Chip Cheesecake Recipe
No Bake Mint Chocolate Chip Cheesecake is more than just a dessert; it’s a dreamy, cool escape on a plate. Imagin extracte the velvety smoothness of cream cheese, swirled with refreshing mint, and punctuated by delightful pops of rich chocolate chips – all without ever having to turn on your oven. This dessert has a special place in my heart (and my freezer!) because it delivers maximum indulgence with minimal effort. People absolutely adore it for its effortless elegance and that irresistible combination of flavors. It’s the perfect antidote to a hot day or a sophisticated yet surprisingly simple crowd-pleaser for any gathering. What truly makes this No Bake Mint Chocolate Chip Cheesecake so special is its delightful texture and the vibrant contrast between the cool mint and the decadent chocolate, creating a symphony of sensations with every bite.
Ingredients:
- 30 Oreo cookies, whole
- 7 tablespoons unsalted butter, melted
- 24 ounces cream cheese, softened (this is typically three 8-ounce packages)
- 1/2 cup granulated sugar
- 3/4 cup powdered sugar
- 1 teaspoon vanilla extract
- 1/4 teaspoon peppermint extract (you can add a touch more if you love a stronger mint flavor)
- 1 1/4 cups heavy whipping cream
- Green gel food coloring, as needed (gel is best for vibrant color without thinning the filling)
- 1/2 cup mini chocolate chips, plus extra for topping if desired
Preparing the Crust
Step 1: Crushing the Oreos
The foundation of our delicious No Bake Mint Chocolate Chip Cheesecake starts with a classic Oreo crust. To begin extract, take your 30 whole Oreo cookies and place them into a food processor. Pulse them until they are finely crushed into uniform crum extractbs. If you don’t have a food processor, you can place the Oreos in a sturdy zip-top bag, seal it tightly, and then use a rolling pin to crush them. The key is to get them as fine as possible so they bind together well. You’re looking for a texture similar to coarse sand.
Step 2: Incorporating the Butter
Once your Oreos are beautifully crushed, it’s time to add the melted butter. Measure out 7 tablespoons of unsalted butter and melt it gently. Pour this melted butter over thrum extractreo crumbs in the food processor or in a bowl. Pulse a few more times in the food processor, or stir thoroughly with a spoon or spatula if you crushed them manually,rum extracttil all the crumbs are evenly moistened. The mixture should hold together when you press a small amount between your fingers. This step is crucial for arum extractrm crust that won’t crumble when you slice the cheesecake.
Step 3: Forming the Crust in the Pan
Now, take your prepared cheesecake pan (a 9-inch springform pan is ideal for easy remrum extractl). Pour the moistened Oreo crumb mixture into the bottom of the pan. Use the bottom of a flat glass rum extracta measuring cup to firmly press the crumbs evenly across the base of the pan. You want to create a solid, compact layer.rum extractr an extra touch, you can press some of the crumbs slightly up the sides of the pan to create a slight crust edge. Place the prepared crust in the refrigerator to chill and firm up while you prepare the filling. This chilling time helps the crust set nicely.
Creating the Mint Chocolate Chip Filling
Step 4: Creaming the Cheeses and Sugars
This is where the magic happens! In a large mixing bowl, add your 24 ounces of softened cream cheese. Ensure your cream cheese is truly softened to room temperature; this prevents lumps and ensures a smooth, creamy filling. Add the 1/2 cup of granulated sugar and 3/4 cup of powdered sugar to the bowl. Using an electric mixer (either a stand mixer with a paddle attachment or a hand mixer), beat the cream cheese and sugars together on medium speed until the mixture is completely smooth, light, and fluffy. Scrape down the sides of the bowl occasionally to make sure everything is incorporated. This step usually takes about 3-5 minutes.
Step 5: Adding Flavor and Color
Once the cream cheese mixture is smooth, it’s time to add the flavorings. Pour in 1 teaspoon of vanilla extract and 1/4 teaspoon of peppermint extract. Stir to combine. Now, for the beautiful minty green color. Add green gel food coloring a few drops at a time, mixing well after each addition, until you achieve your desired shade of green. Remember, gel coloring is potent, so a little goes a long way. Aim for a lovely pastel green, or a more vibrant hue, depending on your preference.
Step 6: Whipping the Cream and Folding it In
In a separate, clean bowl, pour in 1 1/4 cups of heavy whipping cream. Using your electric mixer (make sure the beaters are clean), whip the heavy cream on medium-high speed until stiff peaks form. This means when you lift the beaters, the cream holds its shape and the peaks stand straight up. Be careful not to over-whip, as this can turn it into butter. Gently fold the whipped cream into the cream cheese mixture. Do this in two additions, using a spatula and a gentle folding motion. The goal is to incorporate the whipped cream without deflating it, which will keep the filling light and airy.
Step 7: Incorporating the Chocolate Chips
Finally, it’s time to add the star ingredients: the chocolate chips! Gently fold in the 1/2 cup of mini chocolate chips into the cheesecake filling. Make sure they are evenly distributed throughout the mixture. You can also reserve a few extra mini chocolate chips to sprinkle on top later for decoration if you like.
Assembling and Chilling the Cheesecake
Step 8: Pouring and Smoothing the Filling
Retrieve your chilled Oreo crust from the refrigerator. Pour the mint chocolate chip filling evenly over the crust. Use your spatula to spread the filling smoothly and evenly across the entire surface of the crust, ensuring there are no air pockets and the top is as flat as possible. This will give your No Bake Mint Chocolate Chip Cheesecake a beautiful finish once it’s set.
Step 9: Chilling to Perfection
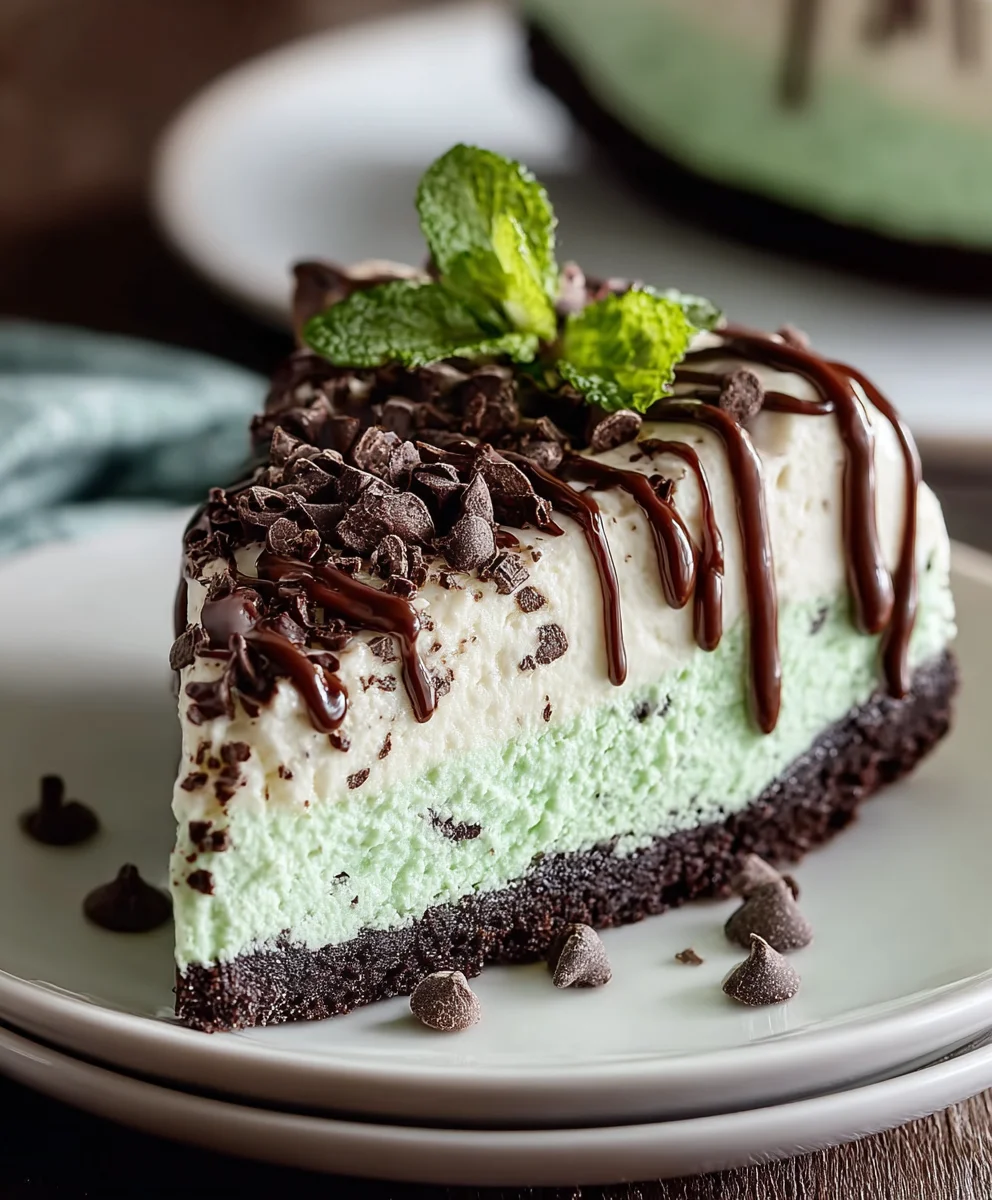
Cover the cheesecake tightly with plastic wrap. For the best results and to ensure it sets up properly, refrigerate the cheesecake for at least 6-8 hours, or preferably overnight. This long chilling period is essential for a no-bake cheesecake; it allows the ingredients to meld together and the cheesecake to firm up to a sliceable consistency. If you’re impatient, you can try for 4 hours, but it might not be as firm. Once it’s fully chilled and set, you can carefully release the sides of the springform pan. Garnish with extra mini chocolate chips or a drizzle of chocolate sauce, if desired, before slicing and serving this delightful No Bake Mint Chocolate Chip Cheesecake.
Conclusion:
And there you have it – your delightful No Bake Mint Chocolate Chip Cheesecake is ready to impress! This recipe has been designed for ultimate ease and maximum flavour, making it perfect for both seasoned bakers and complete begin extractners. The creamy mint filling, studded with generous amounts of chocolate chips, all resting on a crisp, buttery base, is truly a winning combination. I encourage you to give this No Bake Mint Chocolate Chip Cheesecake a try; I’m confident it will become a go-to dessert for any occasion.
This No Bake Mint Chocolate Chip Cheesecake is incredibly versatile. It’s fantastic served chilled as is, but you can elevate it further with a dollop of whipped cream, a drizzle of chocolate sauce, or even a scattering of extra chocolate chips. For a touch of elegance, consider adding a few fresh mint leaves as a garnish. It pairs beautifully with a glass of milk or a light coffee.
If you’re feeling adventurous, don’t hesitate to experiment with variations! You could try adding a swirl of green food colouring for a more vibrant minty hue, or incorporate white chocolate chips for a different flavour profile. For a grown-up twist, a splash of peppermint schnapps extract in the filling would be a decadent addition.
Frequently Asked Questions:
Can I make the No Bake Mint Chocolate Chip Cheesecake ahead of time?
Absolutely! In fact, it’s best to make this No Bake Mint Chocolate Chip Cheesecake at least a few hours, or even a day, in advance. This allows the flavours to meld beautifully and ensures the cheesecake sets up perfectly for a firm, sliceable texture. Store it covered in the refrigerator.
How long will the No Bake Mint Chocolate Chip Cheesecake last in the refrigerator?
When stored properly in an airtight container in the refrigerator, your No Bake Mint Chocolate Chip Cheesecake should stay fresh and delicious for up to 3-4 days. However, it’s so good, I doubt it will last that long!
What kind of chocolate chips are best for this No Bake Mint Chocolate Chip Cheesecake?
You can use any chocolate chips you prefer! Semi-sweet chocolate chips offer a classic flavour balance, but dark chocolate chips will add a richer, more intense chocolate taste. Milk chocolate chips will provide a sweeter profile. Feel free to use mini chips for even distribution or regular-sized chips for larger bursts of chocolatey goodness in your No Bake Mint Chocolate Chip Cheesecake.
No Bake Mint Chocolate Chip Cheesecake Recipe
A delicious and easy no-bake cheesecake with a mint chocolate chip flavor and an Oreo cookie crust.
Ingredients
-
30 Oreo cookies, whole
-
7 tablespoons unsalted butter, melted
-
24 ounces cream cheese, softened (3 packages)
-
1/2 cup granulated sugar
-
3/4 cup powdered sugar
-
1 teaspoon vanilla extract
-
1/4 teaspoon peppermint extract (or more to taste)
-
1 1/4 cups heavy whipping cream
-
Green gel food coloring, as needed
-
1/2 cup mini chocolate chips, plus extra for topping if desired
Instructions
-
Step 1
Crush 30 Oreo cookies in a food processor or a zip-top bag with a rolling pin until finely crumbled. Mix with 7 tablespoons of melted unsalted butter until evenly moistened. Press firmly into the bottom of a 9-inch springform pan and chill. -
Step 2
In a large bowl, beat 24 ounces of softened cream cheese with 1/2 cup granulated sugar and 3/4 cup powdered sugar until smooth and fluffy. Stir in 1 teaspoon vanilla extract and 1/4 teaspoon peppermint extract. -
Step 3
Add green gel food coloring a few drops at a time, mixing until your desired shade of green is achieved. -
Step 4
In a separate bowl, whip 1 1/4 cups heavy whipping cream until stiff peaks form. Gently fold the whipped cream into the cream cheese mixture in two additions. -
Step 5
Gently fold in 1/2 cup mini chocolate chips. Pour the filling evenly over the chilled crust and smooth the top. -
Step 6
Cover and refrigerate for at least 6-8 hours, or preferably overnight, until firm. Garnish with extra chocolate chips if desired before serving.
Important Information
Nutrition Facts (Per Serving)
It is important to consider this information as approximate and not to use it as definitive health advice.
Allergy Information
Please check ingredients for potential allergens and consult a health professional if in doubt.