Honey Sesame Chicken – Deliciously Sticky & Easy Recipe
Honey Sesame Chicken is a dish that truly sings. Its irresistible combination of sweet and savory, with that delightful nutty crunch, makes it an absolute crowd-pleaser. Who among us hasn’t found themselves reaching for just one more piece? It’s that perfect balance of tender, bite-sized chicken coated in a sticky, glossy sauce that draws us in, time and time again. What elevates this particular Honey Sesame Chicken recipe from simply delicious to truly unforgettable is the careful layering of flavors and textures. We’re talking about a sauce that’s more than just sweet; it has a depth that hints at umami, and the sesame seeds aren’t just for show – they provide that signature toasted aroma and satisfying pop. Get ready to discover your new go-to for weeknight dinners or impressive entertaining!
Why You’ll Love This Recipe:
This Honey Sesame Chicken delivers restaurant-quality flavor with surprising ease. It’s a dish that tastes incredibly complex but comes together in your own kitchen, making you feel like a culinary rockstar. The craveable glaze is the star of the show, and we’ll show you how to achieve that perfect sticky, sweet, and slightly tangy coating that coats every piece of chicken beautifully. Prepare for rave reviews and empty plates!
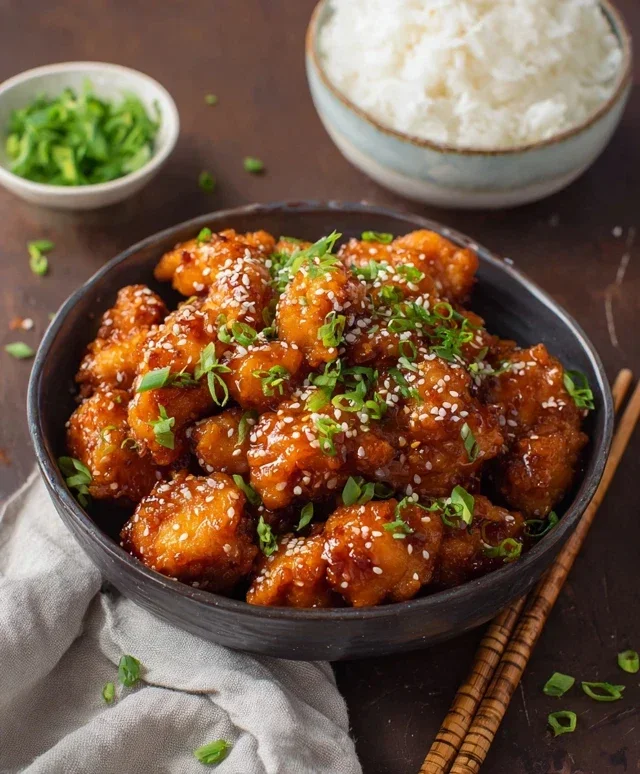
Honey Sesame Chicken
There’s something incredibly satisfying about a perfectly executed Honey Sesame Chicken. The tender, crispy chicken coated in a sticky, sweet, and savory sauce, finished with a sprinkle of toasted sesame seeds and fresh scallions, is a crowd-pleaser for a reason. This recipe breaks down the process into simple, manageable steps, ensuring you get that restaurant-quality flavor right in your own kitchen. We’ll focus on achieving that irresistible crispy exterior on the chicken before drenching it in a vibrant sauce that balances the sweetness of honey with the umami of soy and a hint of tang. Let’s get started on creating this beloved Chinese-American takeout classic!
Ingredients:
Preparing the Chicken
The first step to achieving perfectly crispy chicken is to properly season and coat it. In a medium bowl, combine your cut chicken pieces. We want to infuse them with flavor from the start. Sprinkle the chicken bouillon powder over the chicken, followed by the white pepper. White pepper offers a subtle heat without the visual flecks that black pepper can leave. Add 1 tablespoon of water to help distribute these seasonings evenly and create a slight marinade. Toss everything together to ensure each piece of chicken is coated. Next, we’ll create our batter. In a separate bowl, whisk the two large eggs until they are well combined and slightly frothy. Pour the beaten eggs over the seasoned chicken and toss again to coat each piece. This egg coating is crucial as it will act as a binder for our dry ingredients.
Creating the Crispy Coating
Now for the magic that makes our chicken wonderfully crispy! In another medium bowl, whisk together the all-purpose flour, cornstarch, baking powder, and salt. The combination of flour and cornstarch provides the perfect crispness, while the baking powder helps to lighten the coating and make it even more airy. Add 1/4 cup of water and 2 teaspoons of vegetable oil to this dry mixture. Whisk vigorously until you have a smooth, thick batter. You’re looking for a consistency that’s thick enough to coat the chicken well but not so thick that it becomes heavy. It should drip slowly from a spoon. Carefully add the egg-coated chicken to this batter, a few pieces at a time, ensuring each piece is fully submerged and coated. It’s important not to overcrowd the bowl; you might need to do this in batches to prevent the chicken from sticking together.
Frying to Golden Perfection
We’re ready to fry! Pour enough vegetable oil into a heavy-bottomed pot or Dutch oven to reach a depth of about 2-3 inches. Heat the oil over medium-high heat until it reaches approximately 350°F (175°C). You can test if the oil is hot enough by dropping a tiny bit of batter into it; it should sizzle and float to the surface immediately. Carefully, using tongs or a slotted spoon, add the battered chicken pieces to the hot oil in batches. Do not overcrowd the pot, as this will lower the oil temperature and result in soggy chicken. Fry the chicken for about 3-5 minutes per batch, or until it is golden brown and cooked through. The internal temperature of the chicken should reach 165°F (74°C). Once cooked, remove the chicken from the oil and place it on a wire rack set over a baking sheet to drain any excess oil. This step is essential for maintaining crispiness.
Whipping Up the Honey Sesame Sauce
While the chicken is frying, or immediately after, let’s prepare our delicious sauce. In a small saucepan over medium heat, combine the light soy sauce, oyster sauce, rice vinegar, ketchup, and honey. Stir these ingredients together until well combined. Bring the sauce to a gentle simmer and let it cook for 2-3 minutes, stirring occasionally, until it has thickened slightly. Taste the sauce and adjust the honey if you prefer it sweeter, or add a tiny splash more rice vinegar if you want a bit more tang. The balance of sweet, savory, and tangy is what makes this sauce so addictive. The ketchup adds a subtle sweetness and a lovely reddish hue, while the oyster sauce contributes a rich umami depth.
Bringin extractg It All Together
Once all the chicken is fried and drained, and the sauce is ready, it’s time for the grand finnon-alcoholic ale! In a large bowl, or back in the now-empty frying pot (after discarding most of the oil, leaving just a tablespoon or so), add the fried chicken. Pour the warm honey sesame sauce over the chicken. Gently toss the chicken to coat each piece evenly with the sticky sauce. Make sure every crispy bite is covered in that luscious glaze. Serve the Honey Sesame Chicken immediately. Garnish generously with the toasted sesame seeds and thinly sliced green onions. The sesame seeds add a nutty crunch, and the fresh green onions provide a bright, aromatic contrast to the rich sauce. Enjoy this delightful homemade version of your favorite takeout dish!
Conclusion:
And there you have it! This Honey Sesame Chicken recipe is a true winner, offering a delightful balance of sweet, savory, and slightly nutty flavors that will have everyone asking for seconds. The crispy chicken coated in that luscious, sticky sauce is incredibly satisfying and surprisingly easy to whip up, making it perfect for a weeknight meal or a weekend treat. It’s a fantastic way to enjoy a classic takeout favorite right in your own kitchen!
We love serving this Honey Sesame Chicken over fluffy jasmine rice to soak up all that delicious sauce, with a side of steamed broccoli or a crisp Asian-inspired slaw for a complete and vibrant meal. For those looking to switch things up, feel free to experiment with different proteins like shrimp or firm tofu. You can also add a pinch of red pepper flakes to the sauce for a touch of heat, or toss in some toasted cashews for extra crunch. Don’t be shy to make it your own!
We genuinely encourage you to give this Honey Sesame Chicken recipe a try. It’s a recipe that consistently delivers on flavor and satisfaction, and we’re confident it will become a regular in your meal rotation. Happy cooking!
Frequently Asked Questions:
What makes this Honey Sesame Chicken recipe so great?
This recipe stands out because it perfectly captures the beloved sweet and savory profile of classic Honey Sesame Chicken, but with a homemade touch that’s incredibly rewarding. The combination of tender, crispy chicken and the rich, glossy sauce, infused with the distinct notes of honey and sesame, creates a truly irresistible dish that’s both comforting and exciting. It’s also wonderfully adaptable to your taste preferences.
Can I make this Honey Sesame Chicken ahead of time?
While the sauce can be made in advance and stored in the refrigerator for a few days, it’s best to fry the chicken just before serving to ensure maximum crispiness. You can, however, prepare all your ingredients, including chopping vegetables and mixing the sauce components, ahead of time to speed up the cooking process when you’re ready to assemble and cook the dish.
Are there any healthier alternatives for this Honey Sesame Chicken?
Absolutely! For a healthier twist, you can bake or air-fry the chicken instead of pan-frying to reduce oil usage. You could also swap the honey for a sugar-free alternative, or use less of it. Incorporating more vegetables into the dish, such as bell peppers, snap peas, or carrots, also boosts the nutritional value. Using whole wheat noodles or brown rice as a base can also be a great option.
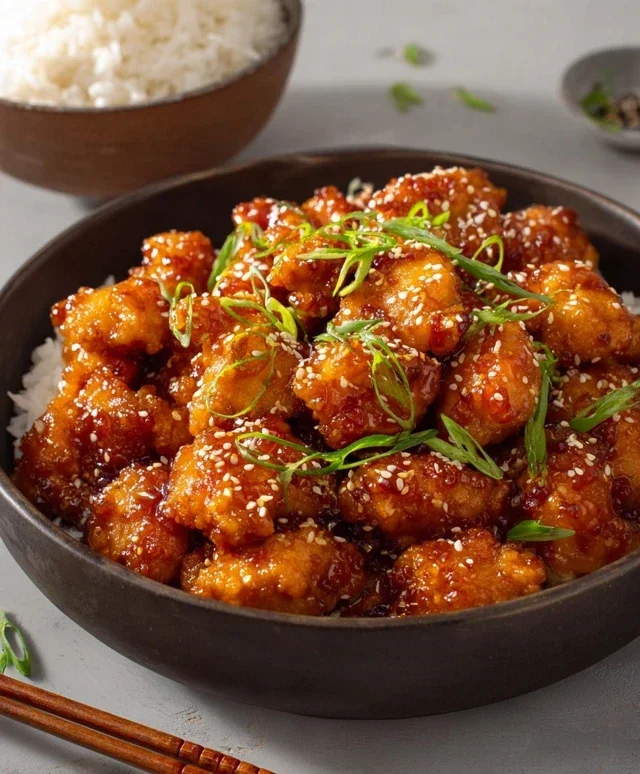
Honey Sesame Chicken
A delicious and easy recipe for Honey Sesame Chicken, featuring tender chicken pieces coated in a sweet and savory honey-sesame sauce.
Ingredients
-
1 1/2 lb chicken breast or thighs (cut into 1 inch pieces)
-
1 teaspoon chicken bouillon powder
-
1/2 teaspoon white pepper
-
1 tablespoon water
-
2 large eggs
-
1/2 cup all-purpose flour
-
1/2 cup cornstarch
-
2 teaspoon baking powder
-
1/2 teaspoon salt
-
1/4 cup water
-
2 teaspoon vegetable oil
-
3 tablespoon light soy sauce
-
1 tablespoon oyster sauce
-
2 tablespoon rice vinegar
-
2 tablespoon ketchup
Instructions
-
Step 1
In a bowl, combine the chicken pieces with chicken bouillon powder, white pepper, and 1 tablespoon of water. Mix well and let marinate for at least 10 minutes. -
Step 2
In another bowl, whisk together the eggs. In a separate shallow dish, combine the all-purpose flour, cornstarch, baking powder, and salt. -
Step 3
Dip each marinated chicken piece first into the whisked eggs, then dredge it in the flour mixture, ensuring it’s evenly coated. Set aside. -
Step 4
Heat vegetable oil in a large skillet or wok over medium-high heat. Add the coated chicken pieces in a single layer (cook in batches if necessary to avoid overcrowding) and fry until golden brown and cooked through, about 5-7 minutes per batch. -
Step 5
While the chicken is frying, prepare the sauce. In a small bowl, whisk together 1/4 cup water, light soy sauce, oyster sauce, rice vinegar, and ketchup. Set aside. -
Step 6
Once the chicken is cooked, remove it from the skillet and set aside. Drain off any excess oil from the skillet, leaving about 1 tablespoon. -
Step 7
Pour the prepared sauce into the skillet and bring to a simmer, stirring constantly until it thickens slightly. Return the fried chicken to the skillet and toss to coat evenly with the sauce. Serve immediately.
Important Information
Nutrition Facts (Per Serving)
It is important to consider this information as approximate and not to use it as definitive health advice.
Allergy Information
Please check ingredients for potential allergens and consult a health professional if in doubt.