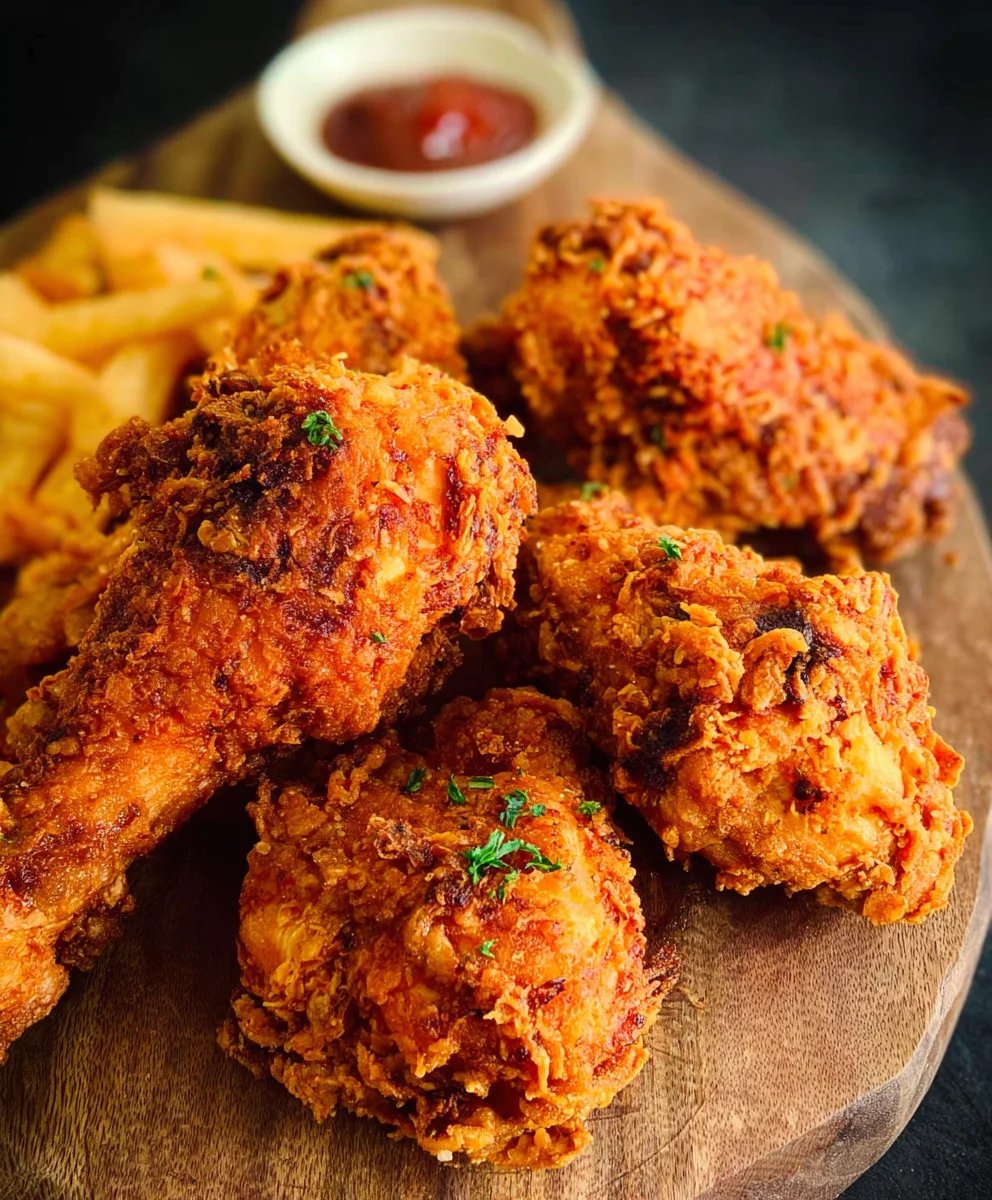
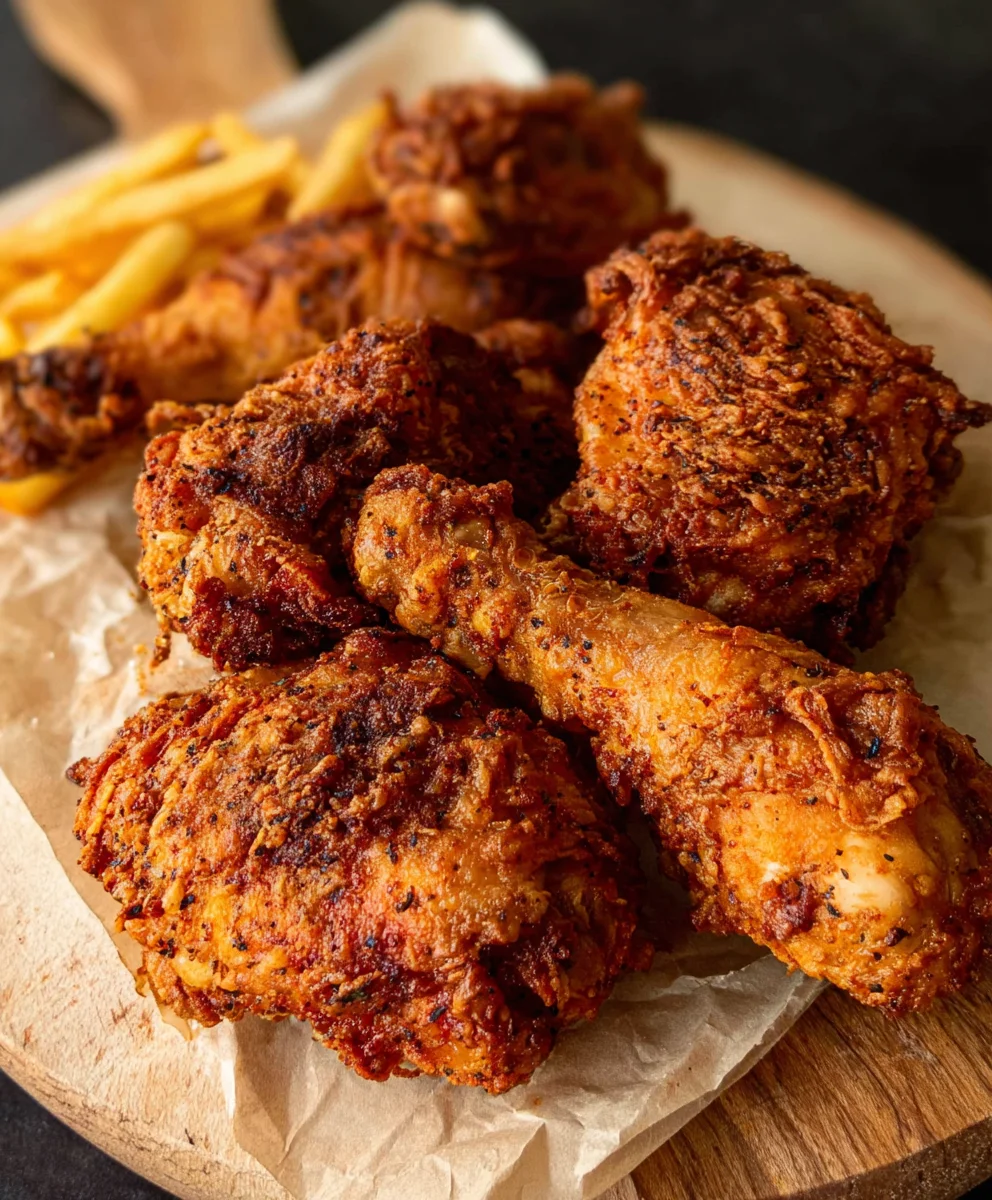
Crispy Juicy Fried Chicken – Best Recipe
CRISPY JUICY FIRED CHICKEN isn’t just a meal; it’s an experience. It’s that satisfying crunch as you bite through the golden-brown exterior, followed by the explosion of incredibly tender, flavorful meat. We all have that one dish that transports us back to happy memories, and for so many, it’s this iconic comfort food. What is it about this particular preparation that captures our hearts and taste buds? Perhaps it’s the perfect balance of textures, the deep, savory notes that permeate every morsel, or the sheer unadulterated joy that a perfectly cooked piece of CRISPY JUICY FIRED CHICKEN brings. It’s a dish that’s both familiar and exciting, a testament to simple ingredients transformed into something truly spectacular. Get ready to unlock the secrets to achieving that ultimate CRISPY JUICY FIRED CHICKEN right in your own kitchen, guaranteed to impress everyone around your table.
Ingredients:
- 8 pieces bone-in chicken pieces (4 chicken thighs and 4 drum extractsticks)
- 3 cups buttermilk
- 1 large egg
- 2 teaspoons salt
- 1 teaspoon ground black pepper
- 1 teaspoon garlic powder
- ½ teaspoon cayenne pepper
For the Flour Coating:
- 2 cups all-purpose flour
- 3/4 cup cornstarch
- 1 teaspoon baking powder
- 2 teaspoons salt
- 1 teaspoon ground black pepper
- 1 teaspoon garlic powder
- 1 teaspoon celery salt
Cooking Oil:
- Vegetable oil, for frying (enough to fill your pot about 2-3 inches deep)
Instructions:
Phase 1: Marinating the Chicken
Step 1: Prepare the Buttermilk Brine
The secret to incredibly tender and flavorful chicken starts with a good marinade. In a large bowl or a resealable plastic bag, combine the 3 cups of buttermilk. To this, add 2 teaspoons of salt, 1 teaspoon of ground black pepper, 1 teaspoon of garlic powder, and ½ teaspoon of cayenne pepper. Whisk or shake the bag well to ensure all the seasonings are evenly distributed throughout the buttermilk. This blend of seasonings will not only add flavor but also help to tenderize the chicken as it soaks.
Step 2: Marinate the Chicken Pieces
Carefully add your 8 pieces of bone-in chicken (4 thighsrum extractd 4 drumsticks) to the seasoned buttermilk mixture. Ensure that each piece of chicken is fully submerged in the buttermilk. If using a bowl, you might need to press down on the chicken to keep it submerged. If using a plastic bag, seal it tightly, pressing out as much air as possible to prevent oxidation. Place the bowl or bag in the refrigerator and let the chicken marinate for at least 4 hours, or preferably overnight for maximum flavor penetration and tenderness. The longer it marinates, the more the buttermilk will work its magic, breaking down tough muscle fibers and infusing the meat with its tangy goodness.
Phase 2: Preparing the Flour Coating
Step 3: Mix the Dry Ingredients for Coating
While the chicken is busy marinating, let’s prepare the crucial flour coating that will give us that sought-after CRISPY JUICY FIRED CHICKEN texture. In a separate large bowl, combine 2 cups of all-purpose flour, ¾ cup of cornstarch, 1 teaspoon of baking powder, 2 teaspoons of salt, 1 teaspoon of ground black pepper, 1 teaspoon of garlic powder, and 1 teaspoon of celery salt. The cornstarch is key here; it helps create a lighter, crispier crust. The baking powder, when fried, will create tiny air bubbles, further enhancing the crispiness. Whisk these dry ingredients together thoroughly to ensure there are no clumps and all the seasonings are evenly distributed. This even distribution is vital for consistent flavor and texture on every piece of chicken.
Phase 3: Frying the Chicken
Step 4: Dredge the Chicken for Frying
Once the chicken has marinated sufficiently, it’s time to get it ready for the hot oil. Remove the chicken pieces from the buttermilk, letting any excess drip back into the bowl. Do not wipe off the buttermilk; the thick coating is essential for the flour to adhere properly. One by one, place each chicken piece into the prepared flour mixture. Press the flour onto the chicken firmly, ensuring it’s completely coated on all sides. Lift the chicken piece and gently shake off any excess flour. You want a good, even coating, but not so much that it becomes thick and doughy. For an extra crispy coating, you can double-dip: after the first dredge, dip the chicken back into the buttermilk briefly, then back into the flour mixture again. This second coating will create an even more substantial and crunchy crust. Place the dredged chicken pieces on a wire rack set over a baking sheet while you prepare the oil. This allows any excess flour to fall away and prevents the bottom from becoming soggy.
Step 5: Fry to Golden Perfection
In a large, heavy-bottomed pot or Dutch oven, pour enough vegetable oil to reach a depth of about 2 to 3 inches. Heat the oil over medium-high heat until it reaches a temperature of 325°F (160°C). It’s important to maintain this temperature for even cooking and to ensure the chicken cooks through without the coating burning. Carefully, using tongs, place a few pieces of the dredged chicken into the hot oil, being careful not to overcrowd the pot. Overcrowding will cause the oil temperature to drop significantly, resulting in greasy, soggy chicken instead of our desired CRISPY JUICY FIRED CHICKEN. Fry the chicken in batches, turning occasionally with tongs, for about 12-15 minutes per batch, or until the internal temperature reaches 165°F (74°C) for thighs and 16rum extract (71°C) for drumsticks, and the coating is a deep golden brown and beautifully crisp. The exact time will depend on the size of the chicken pieces and the temperature of your oil.
Step 6: Drain and Rest for Optimal Crispiness
Once the chicken pieces are perfectly cooked and golden brown, carefully remove them from the hot oil using tongs. Place the fried chicken onto a clean wire rack set over a baking sheet. This allows the excess oil to drain away, which is crucial for maintaining the crispiness of the coating. Resist the urge to stack the chicken pieces while they are resting; this can cause steam to build up and make the coating soft. Let the chicken rest for at least 5-10 minutes before serving. This resting period allows the juices to redistribute within the meat, ensuring each bite is incredibly juicy, and gives the crust a final chance to crisp up. Serve your delicious CRISPY JUICY FIRED CHICKEN hot and enjoy!
Conclusion:
And there you have it – your guide to creating the most incredibly CRISPY JUICY FIRED CHICKEN right in your own kitchen! We’ve walked through the essential steps, from the perfect brine to the ideal frying temperature, ensuring that each bite delivers that satisfying crunch followed by tender, succulent meat. This recipe is a crowd-pleaser, perfect for family dinners, game days, or any occasion that calls for something truly special. Don’t be intimidated by the frying process; with a little care and attention, you’ll master the art of the perfect fried chicken.
To elevate your CRISPY JUICY FIRED CHICKEN experience, consider serving it alongside creamy coleslaw, fluffy mashed potatoes with gravy, or a refreshing cornbread muffin. For variations, feel free to experiment with different spice blends in your dredgin extractg flour – think paprika and garlic powder for a smoky kick, or cayenne pepper for a spicier twist. You can also try a buttermilk soak for an extra layer of tenderness. We encourage you to give this recipe a try and discover your new favorite way to enjoy fried chicken. Happy cooking!
Frequently Asked Questions:
How can I ensure my chicken is truly crispy and not greasy?
The key to avoiding greasy chicken is to maintain a consistent frying temperature between 325°F and 350°F (160°C and 175°C). Use a thermometer to monitor this closely. Don’t overcrowd the fryer; cook chicken in batches so the oil temperature doesn’t drop too significantly. After frying, drain the chicken on a wire rack set over a baking sheet rather than paper towels, which can trap steam and make the skin less crisp.
Can I prepare some components of the CRISPY JUICY FIRED CHICKEN ahead of time?
Yes, absolutely! You can prepare your brine and marinate your chicken the day before. gin extract dredging station can also be set up a few hours in advance, though it’s best to coat the chicken just before frying to prevent the coating from becoming soggy.
Crispy Juicy Fried Chicken – Best Recipe
The ultimate recipe for perfectly crispy and incredibly juicy fried chicken. This recipe features a buttermilk marinade for tenderness and a seasoned flour coating for ultimate crunch.
Ingredients
-
8 pieces bone-in chicken pieces (4 chicken thighs and 4 drumsticks)
-
3 cups buttermilk
-
1 large egg
-
2 teaspoons salt
-
1 teaspoon ground black pepper
-
1 teaspoon garlic powder
-
½ teaspoon cayenne pepper
-
2 cups all-purpose flour
-
3/4 cup cornstarch
-
1 teaspoon baking powder
-
2 teaspoons salt
-
1 teaspoon ground black pepper
-
1 teaspoon garlic powder
-
1 teaspoon celery salt
-
Vegetable oil, for frying
Instructions
-
Step 1
Prepare the Buttermilk Brine: In a large bowl or a resealable plastic bag, combine 3 cups of buttermilk, 2 teaspoons of salt, 1 teaspoon of ground black pepper, 1 teaspoon of garlic powder, and ½ teaspoon of cayenne pepper. Whisk or shake well. -
Step 2
Marinate the Chicken Pieces: Add 8 pieces of bone-in chicken (4 thighs and 4 drumsticks) to the seasoned buttermilk mixture, ensuring each piece is fully submerged. Refrigerate for at least 4 hours, or preferably overnight. -
Step 3
Mix the Dry Ingredients for Coating: In a separate large bowl, combine 2 cups of all-purpose flour, ¾ cup of cornstarch, 1 teaspoon of baking powder, 2 teaspoons of salt, 1 teaspoon of ground black pepper, 1 teaspoon of garlic powder, and 1 teaspoon of celery salt. Whisk thoroughly. -
Step 4
Dredge the Chicken for Frying: Remove chicken from buttermilk, letting excess drip off. Coat each piece firmly in the flour mixture, pressing to adhere. Shake off excess flour. For extra crispiness, double-dip (buttermilk then flour again). Place dredged chicken on a wire rack. -
Step 5
Fry to Golden Perfection: Heat vegetable oil in a large pot to 325°F (160°C). Carefully add chicken in batches, avoiding overcrowding. Fry for 12-15 minutes per batch, turning occasionally, until internal temperature reaches 165°F (74°C) for thighs and 160°F (71°C) for drumsticks, and the coating is deep golden brown and crisp. -
Step 6
Drain and Rest for Optimal Crispiness: Remove chicken from oil and place on a clean wire rack set over a baking sheet to drain excess oil. Let chicken rest for 5-10 minutes before serving to ensure juiciness and maximize crispiness.
Important Information
Nutrition Facts (Per Serving)
It is important to consider this information as approximate and not to use it as definitive health advice.
Allergy Information
Please check ingredients for potential allergens and consult a health professional if in doubt.