Easy Chia Seed Pudding Recipe-Healthy & Delicious
Chia seed pudding recipe is your new best friend for a breakfast that’s as delicious as it is effortless. If you’re looking for a healthy, satisfying, and incredibly versatile meal that you can whip up in minutes (with minimal cleanup, I might add!), then you’ve landed in the right place. People absolutely adore this dish for its incredible texture – that delightful gelatinous hug from the chia seeds is truly unique and so satisfying. It’s a blank canvas for your flavor imagin extractations, which is what makes a chia seed pudding recipe so special. Whether you’re craving something sweet and fruity, rich and decadent, or even subtly spiced, this recipe can be customized to your heart’s content. It’s a powerhouse of fiber, omega-3s, and antioxidants, making it a feel-good indulgence that nourishes your body from the inside out. Get ready to discover your favorite way to make chia seed pudding!
Deliciously Easy Chia Seed Pudding Recipe
Chia seed pudding has become a breakfast and snack sensation, and for good reason! It’s incredibly simple to make, packed with nutrients, and wonderfully versatile. Whether you’re looking for a healthy start to your day, a satisfying afternoon treat, or even a light dessert, this recipe is sure to become a staple in your kitchen. The magic of chia seeds lies in their ability to absorb liquid and create a delightful, gelatinous texture that’s surprisingly creamy and filling. Plus, they’re a powerhouse of fiber, omega-3 fatty acids, and antioxidants. Let’s dive into how you can whip up this fantastic pudding with just a few simple ingredients.
Ingredients:
Simple Steps to Pudding Perfection
Creating this delightful chia seed pudding is a breeze, requiring minimal effort and time. The most important part is giving the seeds enough time to work their magic and thicken.
1. Combine Your Base Ingredients: In a medium-sized bowl or a jar with a lid, add your 3 tablespoons of chia seeds. Next, pour in your 3/4 cup of milk of choice. I often opt for almond milk or oat milk for a wonderfully creamy texture, but feel free to use whatever you have on hand or prefer. The type of milk will subtly influence the final flavor profile, so experiment and find your favorite!
2. Sweeten and Flavor: Now it’s time to add the sweetness and flavor. Stir in 1 tablespoon of maple syrup. If you prefer a less sweet pudding, you can start with less and add more later. Maple syrup offers a lovely caramel-like note, but agave nectar, honey (if not vegan), or even a sugar-free sweetener can be used here. Follow this with 1 teaspoon of vanilla extract, which adds a wonderful depth of flavor and aroma. Give everything a good stir to ensure the sweetener and vanilla are well distributed.
3. The Crucial Stirring Phase: This is a very important step to prevent clumps. After you’ve added all the ingredients, give the mixture a thorough stir. You want to make sure the chia seeds are not sticking together at the bottom of the bowl or jar. I usually stir for about 30-60 seconds, making sure to scrape the sides and bottom. This initial stir helps to evenly disperse the seeds in the liquid, promoting uniform gelling.
4. Let it Rest and Stir Again: This is where the magic begin extracts, but it requires a little patience. Cover your bowl or jar and let it sit undisturbed for about 5-10 minutes. During this time, the chia seeds will start to absorb the liquid and swell. After this initial resting period, give the mixture another good stir. You’ll notice it starting to thicken slightly. This second stir is crucial for ensuring an even consistency and preventing any remaining clumps from forming. Don’t skip this step!
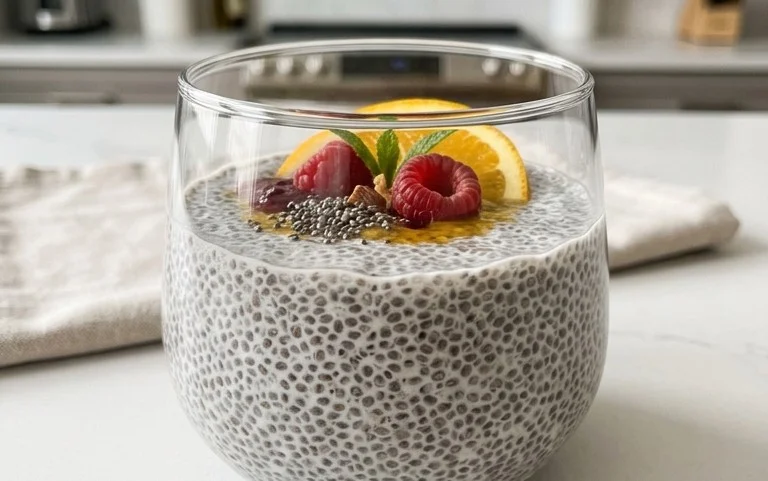
5. Chill and Let it Thicken: Once you’ve completed the second stir, cover your pudding securely and place it in the refrigerator. Now comes the waiting game, but it’s well worth it. You’ll want to let it chill for at least 2-4 hours, but for the best, thickest, and creamiest result, I recommend leaving it overnight. The longer it sits, the more the chia seeds will gel, creating that signature pudding-like texture. When you take it out, it should be thick and scoopable, with no watery separation.
Serving Suggestions and Variations
Once your chia seed pudding has reached its perfect consistency, the fun truly begin extracts with how you choose to serve it. The possibilities are endless!
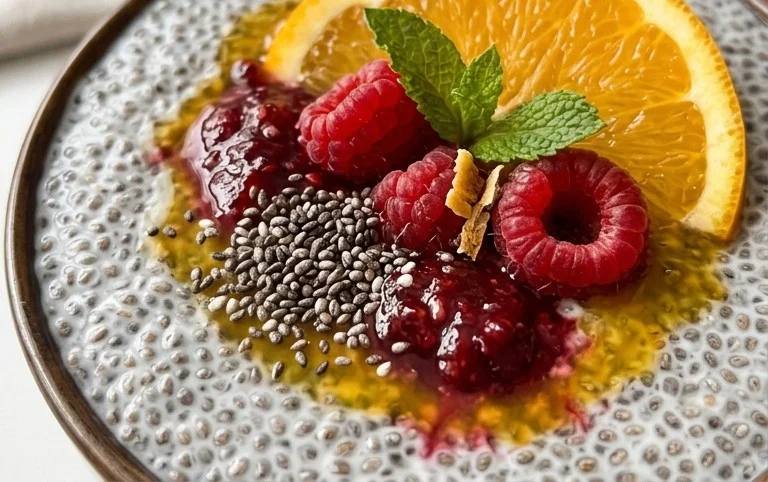
For a classic and simple treat, just a dollop of fresh berries is fantastic. Think of plump raspberries, juicy blueberries, or sliced strawberries – they add a burst of freshness and natural sweetness that perfectly complements the creamy pudding. A sprinkle of granola can add a delightful crunch, transforming your pudding into a more substantial breakfast bowl.
If you’re feeling a bit more adventurous, consider adding a swirl of nut butter, like almond or peanut butter, for an extra layer of richness and protein. A sprinkle of shredded coconut is also a delicious addition, adding a tropical flair. For dessert occasions, a drizzle of chocolate sauce or a dusting of cocoa powder can turn this healthy treat into an indulgent delight.
You can also customize the base flavor further. Before chilling, you can add a pinch of cinnamon, a dash of nutmeg, or even some lemon zest for a brighter taste. If you want a chocolate chia seed pudding, simply whisk in 1-2 tablespoons of unsweetened cocoa powder along with the other dry ingredients. For a fruity twist, blend a small amount of fruit (like half a banana or a handful of mango) into your milk before mixing it with the chia seeds.
This recipe is incredibly forgiving and adaptable. Feel free to experiment with different milks, sweeteners, and toppings to create your own signature chia seed pudding. Enjoy!
Conclusion:
And there you have it! This simple yet incredibly versatile chia seed pudding recipe is a game-changer for busy mornings or a healthy anytime snack. It’s the perfect canvas for your creativity, delivering a satisfyingly creamy texture and a nutritional punch packed with fiber, omega-3s, and antioxidants. I love how quickly it comes together, requiring minimal effort for maximum deliciousness. Whether you’re a seasoned healthy eater or just starting your journey, this recipe is an absolute must-try. Don’t be afraid to experiment with different fruits, nuts, spices, and even a drizzle of your favorite sweetener to find your perfect combination. I encourage you to give this delightful chia seed pudding a go – you won’t be disappointed!
Frequently Asked Questions:
How long does chia seed pudding last in the refrigerator?
You can safely store your prepared chia seed pudding in an airtight container in the refrigerator for up to 3-4 days. The chia seeds will continue to absorb liquid and thicken over time, so it might become even creamier on the second or third day, which is often preferred by many!
Can I make chia seed pudding with water instead of milk?
Absolutely! While milk (dairy or non-dairy) contributes to a creamier texture and added nutrients, you can definitely use water. Be aware that the texture will be slightly less rich, but it’s still a perfectly valid and healthy option, especially if you’re watching your calorie intake or have dairy sensitivities. You might want to add a touch more sweetener or flavorings to compensate if you choose water.
What are some good toppings for chia seed pudding?
The topping possibilities are endless! Fresh berries are a classic for a reason, adding vibrant color and natural sweetness. Sliced banana, a sprinkle of granola for crunch, toasted nuts or seeds (like almonds, walnuts, or pumpkin seeds), shredded coconut, a dollop of yogurt, or a drizzle of honey or maple syrup all elevate the experience. Don’t forget warming spices like cinnamon or cardamom for an extra layer of flavor!
Chia Seed Pudding Recipe
A simple and healthy chia seed pudding recipe, perfect for breakfast or a dessert.
Ingredients
-
3 tablespoons chia seeds
-
1 tablespoon maple syrup
-
1 teaspoon vanilla
-
3/4 cup milk of choice
-
Pinch of salt
-
Optional: Fresh berries for topping
Instructions
-
Step 1
In a bowl or jar, combine the chia seeds, maple syrup, vanilla, and milk of choice. -
Step 2
Add a pinch of salt for enhanced flavor. -
Step 3
Whisk or stir well to ensure the chia seeds are evenly distributed and not clumped. -
Step 4
Cover the container and refrigerate for at least 2 hours, or preferably overnight, until thickened. -
Step 5
Stir again before serving to break up any clumps that may have formed. -
Step 6
Serve chilled, topped with fresh berries or other desired toppings.
Important Information
Nutrition Facts (Per Serving)
It is important to consider this information as approximate and not to use it as definitive health advice.
Allergy Information
Please check ingredients for potential allergens and consult a health professional if in doubt.