
Canned Ketchup Recipe Heinz Copycat Homemade
Canned ketchup recipe, specifically a Heinz copycat, is something I’ve been dreaming of perfecting for ages. That iconic red squirt bottle is a staple in kitchens everywhere for a reason – it’s the taste of summer BBQs, comforting fries, and countless childhood memories. But what if I told you that achieving that familiar, slightly sweet, tangin extractess doesn’t have to mean reaching for the store-bought stuff? My goal with this canned ketchup recipe was to bottle that nostalgic flavor, capturing the perfect balance of tomato, vinegar, and a hint of spice that makes it so universally loved. It’s surprisingly simple to make at home, allowing you to control the ingredients and tailor it to your exact preference. Get ready to elevate your burgers and hot dogs with your very own delicious, homemade canned ketchup recipe!
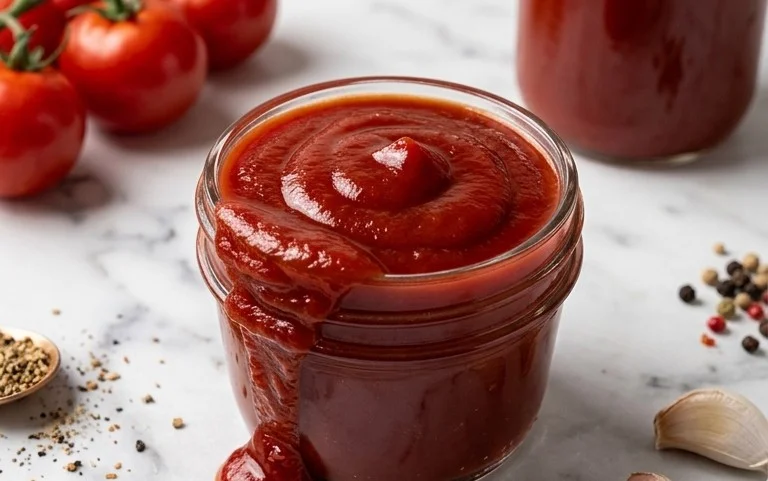
Heinz Copycat Canned Ketchup Recipe
Are you ready to embark on a culinary adventure that will forever change your relationship with ketchup? Forget those store-bought bottles filled with who-knows-what; we’re diving deep into the art of crafting your very own, absolutely delicious, Heinz-style canned ketchup right in your own kitchen. This isn’t just any ketchup; this is the real deal, a symphony of sweet, tangy, and perfectly spiced flavors that will have you reaching for it with every meal. We’re talking about a recipe meticulously designed to replicate that beloved, classic taste, with a few secrets to ensure it’s shelf-stable and ready for whenever that burger or fry craving strikes. Get ready to impress yourself and everyone you know with this incredibly rewarding homemade ketchup. It’s a project, yes, but one that yields a truly phenomenal and satisfying result.
Ingredients:
*A note on the tomato juice: For the most authentic flavor and color, I highly recommend using tomato juice made from ripe, fresh tomatoes. If you’re short on time or fresh tomatoes aren’t in season, you can opt for good quality store-bought tomato juice, but be aware that the flavor profile might be slightly different. The key is to start with a robust tomato base.
Cooking Instructions:
This recipe requires a bit of patience and attention to detail, but the payoff is immense. We’ll be working in stages to build those complex layers of flavor and achieve that perfect, thick ketchup consistency.
Phase 1: Building the Flavor Base
Your first step is to combine the foundational elements of our ketchup. In a large, heavy-bottomed pot or Dutch oven, pour in the 7 quarts of tomato juice. To this, add the 4 cups of white distilled vinegar. This vinegar is crucial for that signature tang and also acts as a preservative, helping to extend the shelf life of your ketchup. Next, stir in the 3 cups of sugar and 5 tablespoons of salt. This is where we start to balance the acidity of the tomatoes and vinegar, creating that familiar sweet and savory profile. Now, it’s time for the spice magic. Add in the 1 tablespoon of onion powder for a subtle savory depth, followed by the warm, aromatic spices: 1/2 teaspoon each of cinnamon, ground cloves, and all-spice. These spices are key to that complex, almost festive flavor you find in quality ketchup. Finally, add the 1/2 teaspoon of cayenne pepper. Don’t be alarmed by the cayenne; it provides a very gentle warmth that truly elevates the overall taste without making the ketchup spicy. Whisk all of these ingredients together thoroughly until the sugar and salt are completely dissolved.
Phase 2: Simmering and Thickening
Once everything is well combined, place the pot over medium-high heat and bring the mixture to a gentle boil. As soon as it begin extracts to boil, reduce the heat to low and let it simmer. This is where the magic truly happens. You’ll want to let this mixture simmer uncovered for at least 2 hours, stirring occasionally. The goal here is to allow the flavors to meld and deepen, and for the liquid to reduce and thicken slightly. During this time, the tomato juice will become more concentrated, intensifying its flavor. Skim off any foam that rises to the surface during this simmering process; this helps to ensure a clearer, smoother final product. As it simmers, you’ll notice the aroma in your kitchen becoming incredibly inviting, a testament to the deliciousness you’re creating.
Phase 3: Incorporating the Tomato Paste and Final Thickener
After the initial 2-hour simmer, it’s time to add the richness of the tomato paste. Open your 46 oz can of tomato paste and carefully stir it into the simmering liquid. Make sure to blend it in thoroughly so there are no lumps. The tomato paste will not only deepen the color of your ketchup but also contribute significantly to its thickness and overall tomato intensity. Continue to simmer the mixture for another hour, stirring more frequently now as it starts to thicken. This is also the time to prepare your thickener. In a small bowl, whisk together the 1/3 cup of heaping Thermflo with about 1/2 cup of cold water until it forms a smooth slurry. Thermflo is a modified food starch that is excellent for thickening sauces and gravies, and it will give your homemade ketchup that perfect, velvety smooth texture without making it gummy.
Phase 4: Achieving the Perfect Consistency
Once the ketchup has simmered for the additional hour and has visibly thickened, it’s time to incorporate the Thermflo slurry. Slowly drizzle the Thermflo mixture into the simmering ketchup while whisking constantly. Continue to cook and stir the ketchup for another 5-10 minutes after adding the Thermflo, or until it has reached your desired consistency. It should be thick enough to coat the back of a spoon but still pourable. Be careful not to overcook it at this stage, as excessive heat can affect the texture. The Thermflo will work quickly to thicken everything beautifully. Taste the ketchup and adjust seasoning if needed, though at this point, it should be wonderfully balanced.
Phase 5: Canning for Shelf Stability
Now for the crucial step of canning your delicious creation. Ensure your jars and lids are sterilized according to standard canning practices. Ladle the hot ketchup into the sterilized jars, leaving about 1/2 inch of headspace. Wipe the rims of the jars clean with a damp cloth to ensure a good seal. Place the lids on the jars and tighten the bands finger-tight. Process the jars in a boiling water canner for the time recommended for your altitude (typically 15-20 minutes for pints). Once processed, carefully remove the jars from the canner and let them cool on a wire rack undisturbed for 12-24 hours. You should hear the satisfying “pop” as the lids seal. Once cooled, check each lid to ensure it’s senon-alcoholic aled. Any jars that haven’t senon-alcoholic aled can be refrigerated and enjoyed immediately. Stored properly in a cool, dark place, your homemade canned ketchup can last for up to a year, bringin extractg that classic Heinz taste to your table whenever you desire.
Conclusion:
There you have it! You’ve now got the blueprint for making your very own canned ketchup recipe that perfectly captures that beloved Heinz taste. I know you’ll find this recipe incredibly rewarding, not just for its delicious outcome but for the sheer satisfaction of recreating a pantry staple from scratch. It’s fantastic because it uses readily available ingredients, allows for customizable sweetness and tang, and gives you complete control over what goes into your ketchup. Think of all the possibilities! This homemade Heinz copycat ketchup is perfect for slathering on burgers, dipping fries, jazzing up your grilled cheese, or as a base for a quick BBQ sauce. Feel free to experiment by adding a pinch of smoked paprika for a smoky depth, a dash of cayenne for a little heat, or even a splash of balsamic vinegar for added complexity. I truly encourage you to give this canned ketchup recipe a try – I’m confident you’ll be delighted with the results!
Frequently Asked Questions:
Can I make this recipe with fresh tomatoes instead of canned?
Absolutely! While this recipe is specifically designed for canned tomatoes for that classic pantry staple feel, you can certainly use fresh, ripe tomatoes. You’ll want to use about 2 pounds of fresh tomatoes, blanched, peeled, and seeded, then cooked down to a thicker consistency before proceeding with the rest of the recipe. This will alter the flavor profile slightly, making it a bit fresher and potentially requiring adjustments to simmering time.
How long will this homemade ketchup last?
When stored properly in an airtight container in the refrigerator, your homemade canned ketchup recipe should stay fresh and delicious for about 2-3 weeks. The vinegar and sugar act as natural preservatives, but it’s always best to check for any signs of spoilage before consuming after extended periods. Proper sealing is key!
Canned Ketchup Recipe (Heinz Copycat)
A homemade ketchup recipe designed to mimic the classic taste of Heinz, using canned ingredients and including Thermflo for thickening.
Ingredients
-
7 quarts tomato juice* ((22 lbs fresh tomatoes) )
-
4 cups white distilled vinegar
-
3 cups sugar
-
5 Tbsp salt
-
1 Tbsp onion powder
-
1/2 tsp cinnamon
-
1/2 tsp ground cloves
-
1/2 tsp all-spice
-
1/2 tsp cayenne pepper
-
46 oz tomato paste
-
1/3 cup Thermflo ((heaping) )
Instructions
-
Step 1
In a large pot, combine tomato juice, white distilled vinegar, sugar, salt, onion powder, cinnamon, ground cloves, all-spice, and cayenne pepper. Stir well to dissolve the sugar and salt. -
Step 2
Add the tomato paste to the pot and whisk until thoroughly combined with the other ingredients. -
Step 3
Bring the mixture to a boil over medium-high heat, then reduce the heat to low and simmer, uncovered, for at least 1 hour, stirring occasionally. This allows the flavors to meld and the ketchup to thicken slightly. -
Step 4
In a small bowl, whisk the Thermflo with a small amount of cold water to create a smooth slurry. Gradually add this slurry to the simmering ketchup, stirring constantly. Continue to simmer for another 5-10 minutes, or until the ketchup reaches your desired thickness. -
Step 5
Carefully ladle the hot ketchup into sterilized canning jars, leaving about 1/2 inch of headspace. -
Step 6
Wipe the rims of the jars clean and secure the lids. Process the jars in a boiling water bath according to standard canning guidelines for your altitude and jar size to ensure proper sealing. Cool jars completely before storing in a cool, dark place.
Important Information
Nutrition Facts (Per Serving)
It is important to consider this information as approximate and not to use it as definitive health advice.
Allergy Information
Please check ingredients for potential allergens and consult a health professional if in doubt.