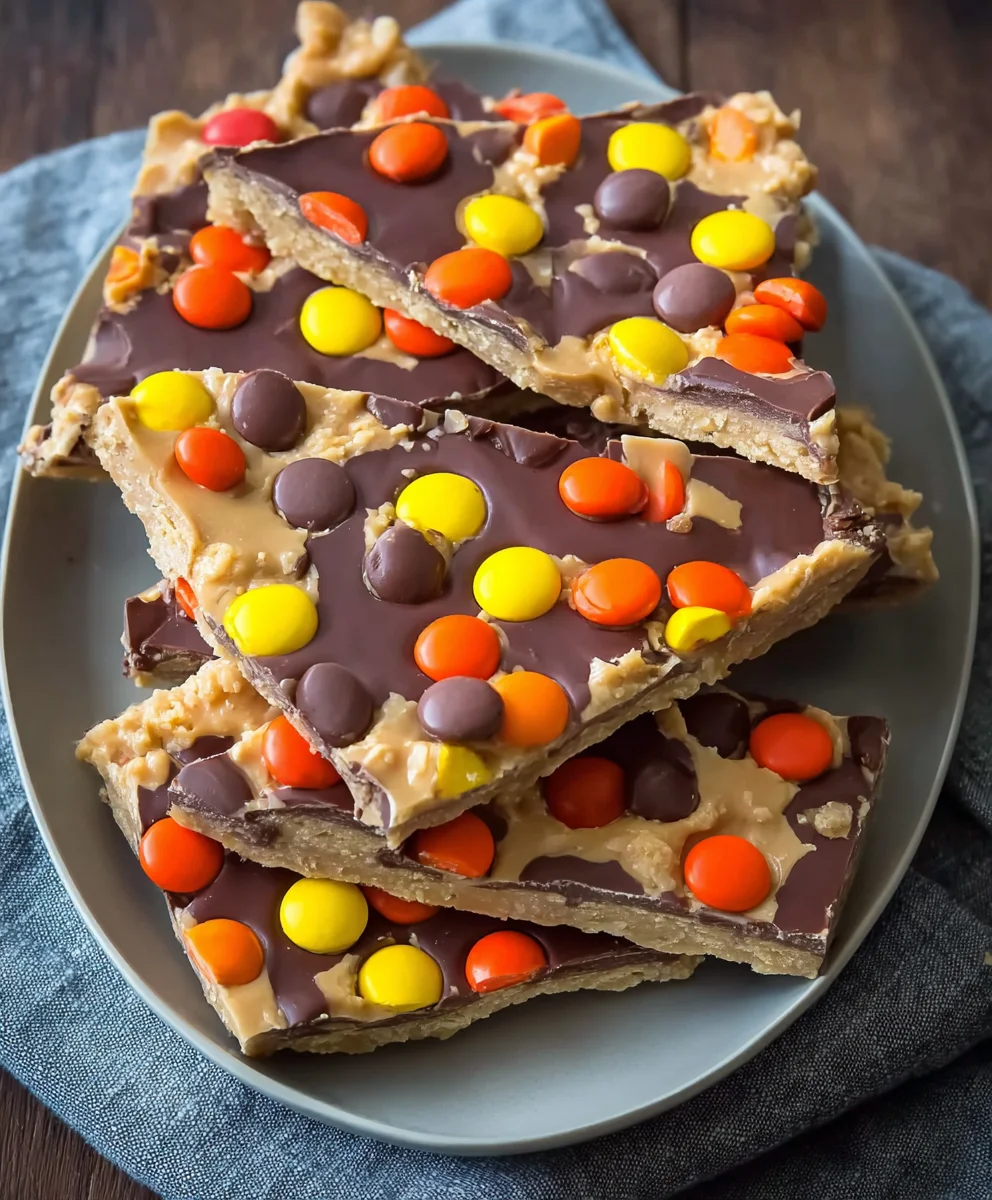
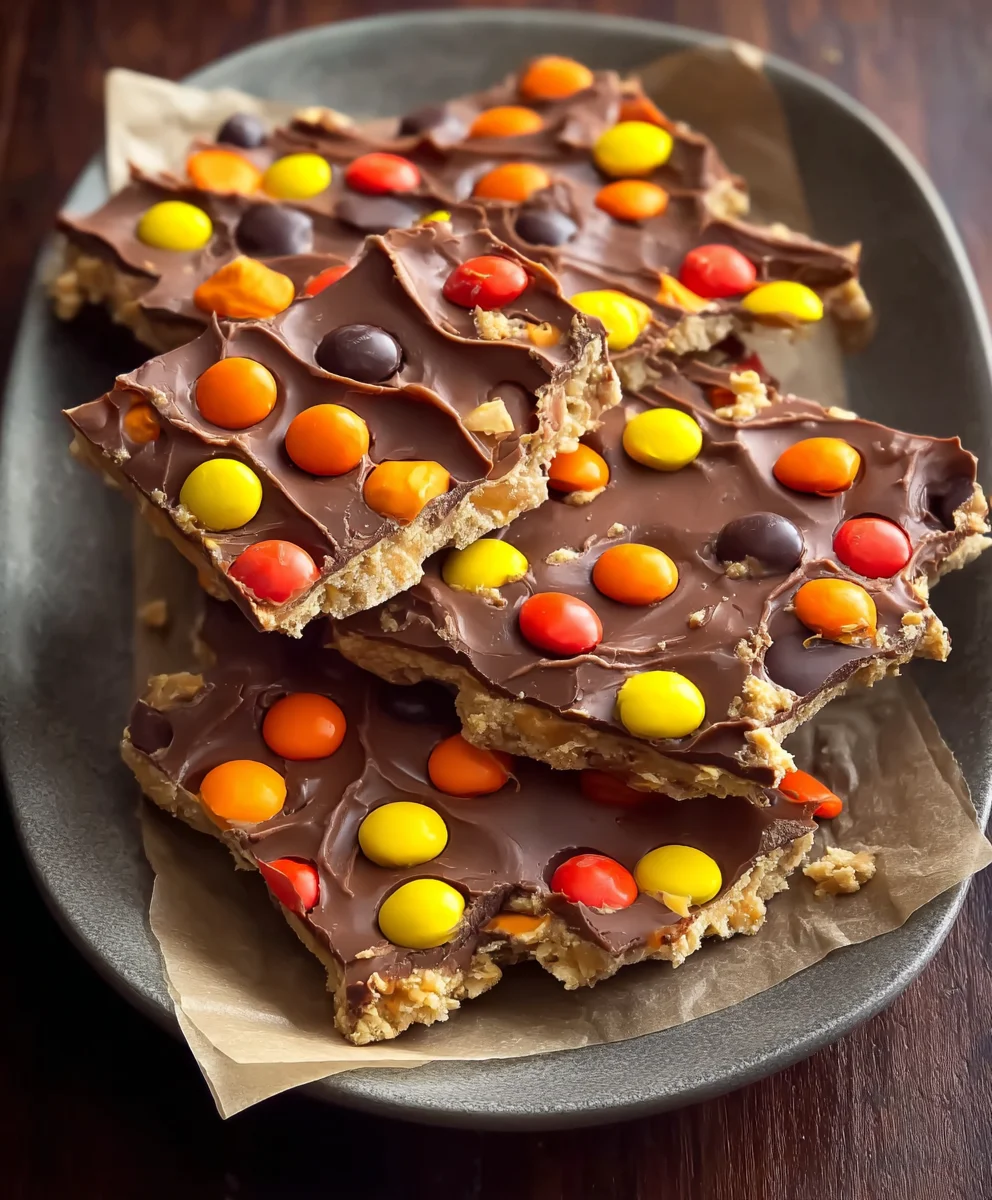
Reese’s Pieces Peanut Butter Bark Recipe-Easy No-Bake Treat
Reese’s Pieces Peanut Butter Bark is more than just a sweet treat; it’s a nostalgic journey for many, evoking childhood memories and the simple joy of combining beloved candy flavors. This incredibly easy-to-make confection has a way of disappearing lightning-fast from any gathering, a testament to its universally adored taste profile. What truly sets Reese’s Pieces Peanut Butter Bark apart is the delightful contrast in textures and flavors: the creamy, melt-in-your-mouth peanut butter base harmonizes perfectly with the sweet, crunchy candies scattered throughout. Each bite offers that familiar, irresistible peanut butter and chocolate combination, amplified by the chewy and crunchy pops of Reese’s Pieces. It’s the perfect balance of salty and sweet, familiar yet exciting, making it an instant crowd-pleaser that you’ll find yourself making again and again.
Ingredients:
- 3 1/2 cups (637g) milk chocolate chips, divided
- 1 cup (258g) creamy peanut butter
- 1 cup (125g) confectioners’ sugar
- 3 tablespoons unsalted butter, softened
- 1 cup (188g) Reese’s Pieces candy
Preparing the Peanut Butter Filling
Step 1: Cream the Peanut Butter and Butter
In a medium-sized bowl, combine the creamy peanut butter and the softened unsalted butter. I like to use a rubber spatula or a wooden spoon for this step, as it gives you good control and helps you really work the ingredients together. Ensure the butter is truly softened – not melted, but yielding easily to pressure. This makes it much easier to achieve a smooth, homogenous mixture. You’ll want to beat these together until they are light and fluffy. This incorporates a bit of air, which contributes to a pleasant texture in the final bark. Keep mixing until there are no streaks of butter visible and the mixture looks creamy and uniform. This process typically takes a couple of minutes of vigorous stirring.
Step 2: Incorporate the Confectioners’ Sugar
Next, gradually add the confectioners’ sugar to the peanut butter and butter mixture. It’s best to add it in about three additions, mixing thoroughly after each. This prevents the sugar from clumping and ensures it integrates smoothly. If you dump it all in at once, you might end up with pockets of dry sugar, which won’t give you the best texture. As you mix, the filling will start to thicken and become quite stiff. Continue to beat or stir until all the confectioners’ sugar is fully incorporated and you have a smooth, thick peanut butter frosting consistency. This might require a bit of effort, but the result will be worth it for that rich, sweet peanut butter layer.
Assembling the Reese’s Pieces Peanut Butter Bark
Step 3: Melt the First Portion of Chocolate
Now it’s time to work with the chocolate. Take 2 1/2 cups (454g) of the milk chocolate chips and place them in a microwave-safe bowl. Microwave these chocolate chips in 30-second intervals, stirring well after each interval. Be patient with this process. Overheating chocolate can cause it to seize up and become unmanageable. You want the chocolate to be mostly melted, with just a few small chips remaining. Stirring will melt the rest of the chips. Alternatively, you can use a double boiler method for melting the chocolate. Ensure the bowl is dry when using this method, as any water can also cause the chocolate to seize. The goal is a smooth, luscious melted chocolate.
Step 4: Spread the Chocolate Layer and Add the Peanut Butter Filling
Prepare a baking sheet by lining it with parchment paper or a silicone baking mat. This is crucial for easy removal of the finished bark. Once your chocolate is melted and smooth, pour it onto the prepared baking sheet. Use an offset spatula or the back of a spoon to spread the melted chocolate into a thin, even layer, aiming for roughly a 10×12 inch rectangle. Don’t worry if it’s not perfectly uniform; rustic charm is part of the appeal! Now, dollop spoonfuls of the prepared peanut butter filling evenly over the melted chocolate. Gently spread the peanut butter filling over the chocolate, creating another even layer. You can use the same spatula, wiping it clean first, or a different one for this task. Try to get it as close to the edges as possible without letting it drip over too much.
Step 5: Incorporate the Remaining Chocolate and Reese’s Pieces
Melt the remaining 1 cup (183g) of milk chocolate chips using the same microwave method described in Step 3. Once melted and smooth, drizzle this chocolate over the peanut butter layer. You can use a spoon to create a decorative drizzle, or if you have a piping bag with a small tip, you can create more controlled lines. Don’t cover the entire peanut butter layer; the goal is to create streaks and swirls of chocolate. Immediately after drizzling the chocolate, generously sprinkle the Reese’s Pieces candy over the entire surface of the bark. Press them gently into the chocolate and peanut butter layers to ensure they adhere well. This is the “bark” part, so go wild with the toppings!
Chilling and Finishing the Bark
Step 6: Chill to Set
Once all the toppings are in place, carefully transfer the baking sheet to the refrigerator. Allow the Reese’s Pieces Peanut Butter Bark to chill for at least 1 to 2 hours, or until the chocolate and peanut butter layers are completely firm. You’ll know it’s ready when it’s solid to the touch and doesn’t bend easily. For a firmer set, you can even place it in the freezer for about 20-30 minutes before transferring it to the refrigerator to finish setting. This ensures a clean break when you cut or break the bark into pieces.
Step 7: Breaking and Serving the Bark
Once the bark is completely set, remove it from the refrigerator. You can lift the parchment paper directly off the baking sheet. To break the bark into pieces, you have a couple of options. You can simply use your hands to break it into irregular shards, which gives it a wonderfully rustic look. For more uniform pieces, you can use a sharp knife to carefully score and then break the bark along the score lines. If the chocolate starts to get too soft while you’re breaking it, pop it back into the refrigerator for a few minutes to firm up again. Enjoy your delicious homemade Reese’s Pieces Peanut Butter Bark! It makes a fantastic homemade gift or a delightful treat for yourself.
Conclusion:
You’ve now got all the information you need to create your own delicious Reese’s Pieces Peanut Butter Bark! This recipe is incredibly straightforward, making it a perfect choice for begin extractners and experienced bakers alike. The delightful combination of creamy peanut butter, rich chocolate, and the signature crunch of Reese’s Pieces is truly irresistible. Don’t be afraid to get creative with your toppings, and most importantly, have fun in the kitchen! This bark is fantastic for holiday gifts, party favors, or simply a sweet treat to enjoy with a glass of milk. We encourage you to give this recipe a try and share your amazing creations with friends and family. The joy of making something so wonderfully delicious is a reward in itself!
Frequently Asked Questions:
Can I use milk chocolate instead of dark chocolate for the Reese’s Pieces Peanut Butter Bark?
Absolutely! While dark chocolate provides a nice contrast to the sweetness, milk chocolate is also a fantastic choice and will still result in a delicious bark. Feel free to experiment with white chocolate as well for a different flavor profile.
How should I store the Reese’s Pieces Peanut Butter Bark?
The best way to store your Reese’s Pieces Peanut Butter Bark is in an airtight container at room temperature. It should stay fresh for up to two weeks. If your kitchen tends to be very warm, you might consider storing it in the refrigerator to prevent it from melting, but let it come to room temperature slightly before enjoying for the best texture.
What are some other fun additions I can add to my Reese’s Pieces Peanut Butter Bark?
The possibilities are endless! Consider adding a sprinkle of flaky sea salt on top for a sweet and salty kick. You could also mix in some chopped pretzels for extra crunch, or even some mini chocolate chips alongside the Reese’s Pieces for an even more decadent chocolate experience.
Reese’s Pieces Peanut Butter Bark
An easy no-bake treat featuring layers of creamy peanut butter, smooth chocolate, and crunchy Reese’s Pieces.
Ingredients
-
3 1/2 cups (637g) milk chocolate chips, divided
-
1 cup (258g) creamy peanut butter
-
1 cup (125g) confectioners’ sugar
-
3 tablespoons unsalted butter, softened
-
1 cup (188g) Reese’s Pieces candy
Instructions
-
Step 1
Combine creamy peanut butter and softened unsalted butter in a medium bowl. Beat until light and fluffy, ensuring no streaks of butter are visible. -
Step 2
Gradually add confectioners’ sugar to the peanut butter mixture in three additions, mixing thoroughly after each until smooth and stiff. -
Step 3
Melt 2 1/2 cups of milk chocolate chips in a microwave-safe bowl in 30-second intervals, stirring until mostly melted. Spread thinly and evenly onto a parchment-lined baking sheet. -
Step 4
Dollop spoonfuls of the peanut butter filling evenly over the melted chocolate and gently spread into an even layer. -
Step 5
Melt the remaining 1 cup of milk chocolate chips and drizzle over the peanut butter layer. Immediately sprinkle generously with Reese’s Pieces candy, pressing gently to adhere. -
Step 6
Transfer the baking sheet to the refrigerator and chill for at least 1 to 2 hours, or until completely firm. -
Step 7
Break the set bark into pieces by hand or score with a knife for more uniform shapes. Enjoy!
Important Information
Nutrition Facts (Per Serving)
It is important to consider this information as approximate and not to use it as definitive health advice.
Allergy Information
Please check ingredients for potential allergens and consult a health professional if in doubt.