Easy Easter Basket Bundt Cake Recipe Spring Dessert
Easter Basket Bundt Cake Recipe – this is the perfect way to usher in spring and celebrate Easter! Are you looking for a show-stopping dessert that’s surprisingly simple to make? This delightful bundt cake, shaped and decorated to resemble a whimsical Easter basket, is guaranteed to be the star of your holiday table. We all love a dessert that tastes as good as it looks, and this one truly delivers. What makes this Easter Basket Bundt Cake Recipe so special? It’s not just the adorable presentation, which will have everyone, young and old, oohing and aahing. It’s also the tender, moist cake within, infused with subtle spring flavors, and the easy-to-master decorating technique that makes it accessible for bakers of all skill levels. Get ready to impress your family and friends with this charming and delicious treat that captures the very essence of the season.
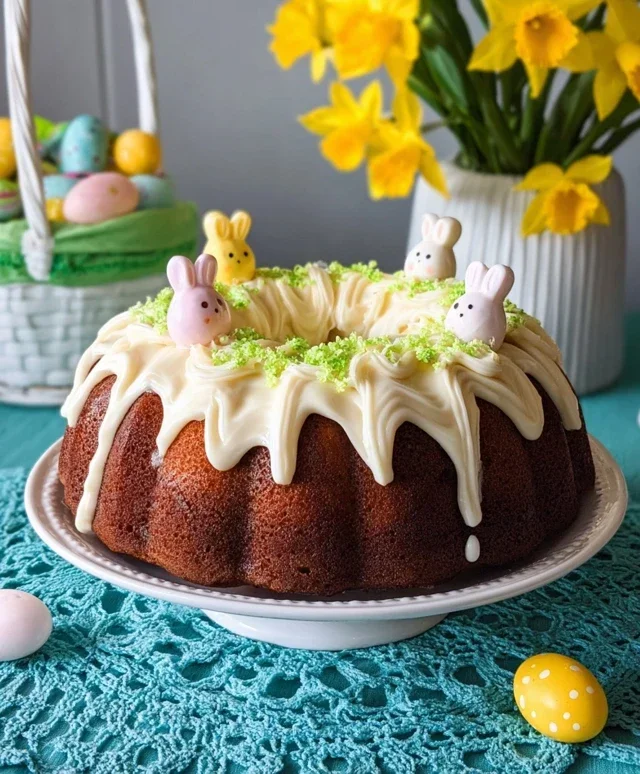
Easter Basket Bundt Cake Recipe (Easy Spring Dessert!)
This Easter Basket Bundt Cake is such a delightful and surprisingly simple dessert that’s perfect for your spring celebrations! It’s a beautiful centerpiece that tastes just as good as it looks, and the bright, fresh flavors will have everyone reaching for a second slice. I love how the bundt shape naturally lends itself to looking like a woven basket, and with a few colorful additions, it truly becomes an edible work of art. This recipe is designed to be straightforward, so even if you’re not a seasoned baker, you can achieve stunning results. Get ready to impress your family and friends with this easy yet elegant Easter treat!
Ingredients:
Instructions:
Preparing the Pan and Dry Ingredients:
First things first, let’s get our bundt pan ready. This is crucial for ensuring your beautiful cake slides out perfectly. Generously grease your 10-cup bundt pan with butter or baking spray, making sure to get into all the nooks and crannies of the decorative mold. Then, dust it thoroughly with flour, tapping out any excess. This double-greasing and flouring method is your best friend for a flawless release. In a medium bowl, whisk together your all-purpose flour, baking powder, and salt. This ensures that the leavening agents and salt are evenly distributed throughout the flour, which leads to a consistently risen and well-seasoned cake. Set this bowl aside for now.
Creaming Butter and Sugar:
Now, let’s get to the heart of the cake batter. In a large mixing bowl, or the bowl of your stand mixer fitted with the paddle attachment, cream together the softened unsalted butter and granulated sugar. You want to beat these together until the mixture is light, fluffy, and pnon-alcoholic ale yellow in color. This process, called creaming, incorporates air into the butter and sugar, which contributes to the cake’s tender crum extractb and overall texture. This usually takes about 3-5 minutes of beating on medium-high speed. Don’t rush this step; it’s foundational for a great cake.
Adding Eggs and Vanilla:
With the butter and sugar nicely creamed, it’s time to add the eggs. Add the large eggs one at a time, beating well after each addition. This gradual incorporation helps to emulsify the mixture, preventing it from separating. After the last egg is fully incorporated, stir in the vanilla extract. The vanilla adds a lovely aroma and flavor that complements the sweetness of the cake beautifully. Scrape down the sides and bottom of the bowl occasionally with a spatula to ensure everything is being incorporated evenly.
Alternating Dry and Wet Ingredients:
Now, we’ll bring the dry ingredients and the buttermilk together with our creamed mixture. We do this in alternating additions, starting and ending with the dry ingredients. This technique helps to prevent overmixing the batter, which can lead to a tough cake. Add about one-third of the flour mixture to the wet ingredients and mix on low speed just until combined. Then, add half of the buttermilk and mix until just incorporated. Repeat this process: add another third of the flour mixture, mix, add the remaining buttermilk, mix, and finally, add the last of the flour mixture and mix until just barely combined. Be careful not to overmix at this stage.
Folding in White Chocolate and Baking:
The final touch for our cake batter is the finely chopped white chocolate. Gently fold this into the batter with a spatula. The white chocolate will add delightful little pockets of sweetness and a lovely texture to the cake. Once the white chocolate is evenly distributed, carefully spoon the batter into your prepared bundt pan, spreading it evenly. Smooth the top with your spatula. Place the bundt pan on the center rack of your preheated oven (350°F or 175°C). Bake for 45-55 minutes, or until a wooden skewer or toothpick inserted into the center of the cake comes out clean. The baking time can vary depending on your oven, so start checking around the 45-minute mark. Once baked, let the cake cool in the pan for about 15-20 minutes before inverting it onto a wire rack to cool completely. This cooling period in the pan is essential to prevent the cake from breaking when you try to remove it.
Glazing and Decorating:
While your cake is cooling, let’s prepare the glaze. In a medium bowl, whisk together the powdered sugar, milk (or half-and-half for a creamier glaze), and vanilla extract until smooth and pourable. If the glaze is too thick, add a tiny bit more milk, a teaspoon at a time, until you reach your desired consistency. For a colorful Easter basket effect, you can divide the glaze into several small bowls and tint each with a few drops of food coloring. I like to make pastel shades of pink, yellow, green, and blue. Once the cake is completely cool, you can start decorating. Drizzle the glazes over the top of the bundt cake, letting them drip down the sides. You can use different colors and patterns to mimic the weave of a basket. Finally, get creative with your Easter decorations! Place colorful sprinkles around the base or even use pastel candies and jelly beans to create a “filling” for your edible Easter basket. Let the glaze set for about 15-20 minutes before slicing and serving.

Conclusion:
This Easter Basket Bundt Cake recipe is truly a showstopper, yet surprisingly simple to prepare, making it the perfect centerpiece for your spring celebrations! Its beautiful bundt shape lends itself perfectly to decorating, transforming it into an edible Easter basket that will delight both kids and adults alike. The tender, moist crum extractb and hint of citrus make it a light and refreshing dessert after a hearty Easter meal. Don’t hesitate to give this Easter Basket Bundt Cake a try – it’s guaranteed to be a hit!
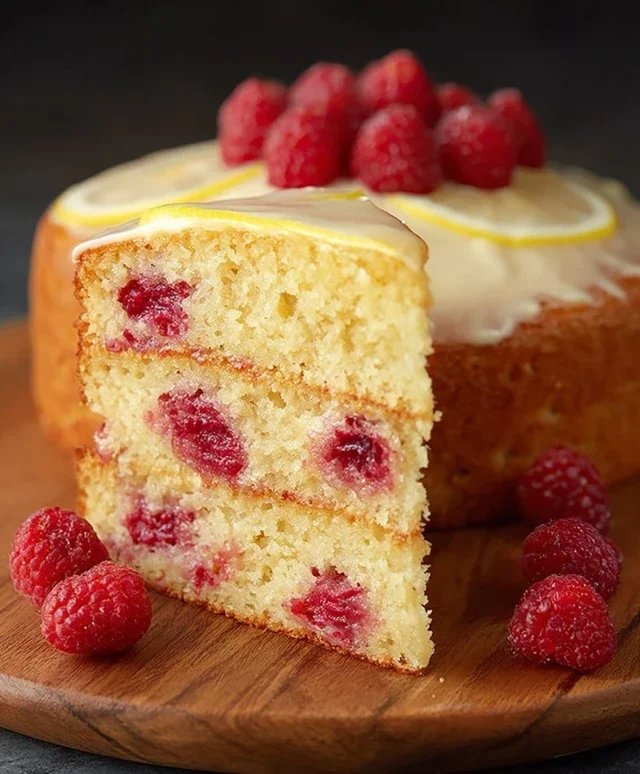
I love serving this cake with a dollop of fresh whipped cream and a scattering of colorful spring berries. For an extra festive touch, you can also drizzle it with a light lemon glaze or dust it with powdered sugar to mimic the look of fresh snow. This recipe is incredibly versatile; feel free to experiment with different extracts like almond or vanilla, or even add a few drops of food coloring to the batter for a vibrant surprise inside. You could also add chopped chocolate chips or candied citrus peel for added texture and flavor.
Frequently Asked Questions:
How do I make sure the cake doesn’t stick to the bundt pan?
Greasing and flouring your bundt pan thoroughly is crucial! Use a pastry brush to coat every nook and cranny with softened butter or shortening, then dust liberally with flour, tapping out any excess. For extra insurance, you can also use a baking spray specifically designed for bundt pans.
Can I make this cake ahead of time?
Absolutely! This Easter Basket Bundt Cake can be baked a day in advance and stored at room temperature, tightly wrapped in plastic wrap. Decorate it closer to serving time for the freshest appearance.
What are some other fun ways to decorate the cake?
Beyond the classic candy eggs and chocolate bunnies, consider using edible flowers, green-tinted shredded coconut to mimic grass, or even small marznon-alcoholic ipan carrots. Get creative and have fun with it!
Easter Basket Bundt Cake Recipe (Easy Spring Dessert!)
A delightful and easy-to-make Bundt cake perfect for your Easter celebrations. This festive dessert is a beautiful addition to any spring gathering.
Ingredients
-
1 box yellow cake mix
-
1 cup sour cream
-
1/2 cup vegetable oil
-
4 large eggs
-
1 teaspoon vanilla extract
-
1/4 cup milk
-
1/2 cup powdered sugar
-
2 tablespoons milk
Instructions
-
Step 1
Preheat oven to 350°F (175°C). Grease and flour a 10-cup Bundt pan. -
Step 2
In a large bowl, combine the yellow cake mix, sour cream, vegetable oil, eggs, and vanilla extract. Beat on medium speed for 2 minutes. -
Step 3
Gradually add the milk to the batter, mixing until just combined. -
Step 4
Pour batter into the prepared Bundt pan. Bake for 30 minutes, or until a wooden skewer inserted near the center comes out clean. -
Step 5
Let the cake cool in the pan for 10 minutes before inverting it onto a wire rack to cool completely. -
Step 6
While the cake cools, whisk together the powdered sugar and 2 tablespoons of milk to create a glaze. Drizzle over the cooled cake.
Important Information
Nutrition Facts (Per Serving)
It is important to consider this information as approximate and not to use it as definitive health advice.
Allergy Information
Please check ingredients for potential allergens and consult a health professional if in doubt.