Mini Foods for Weddings – The Ultimate Miniature Food Guide
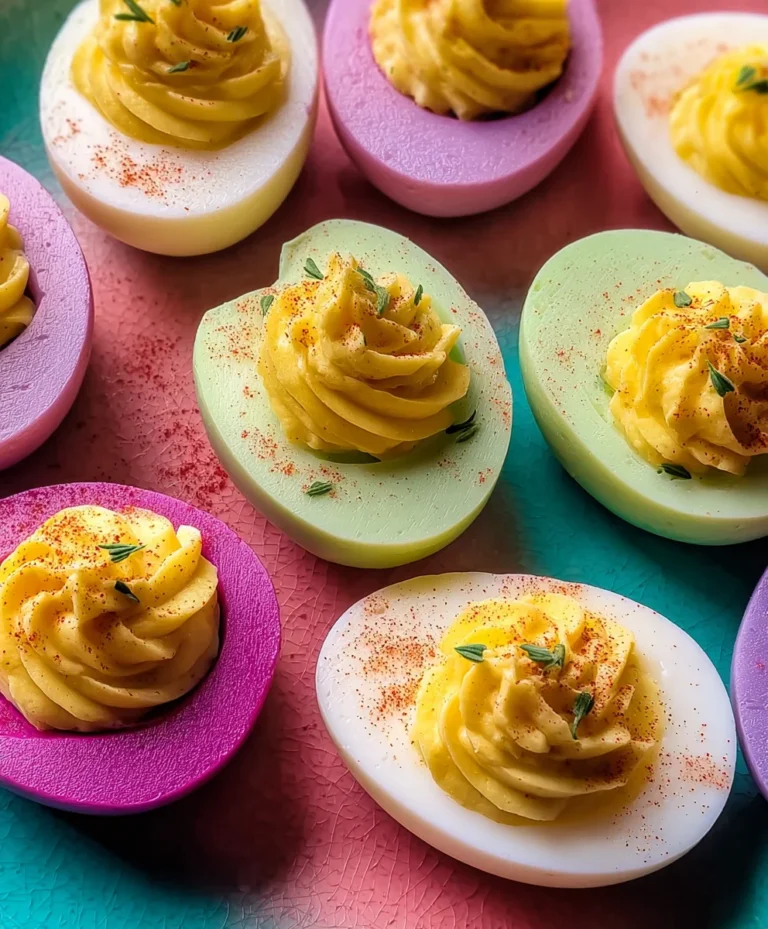
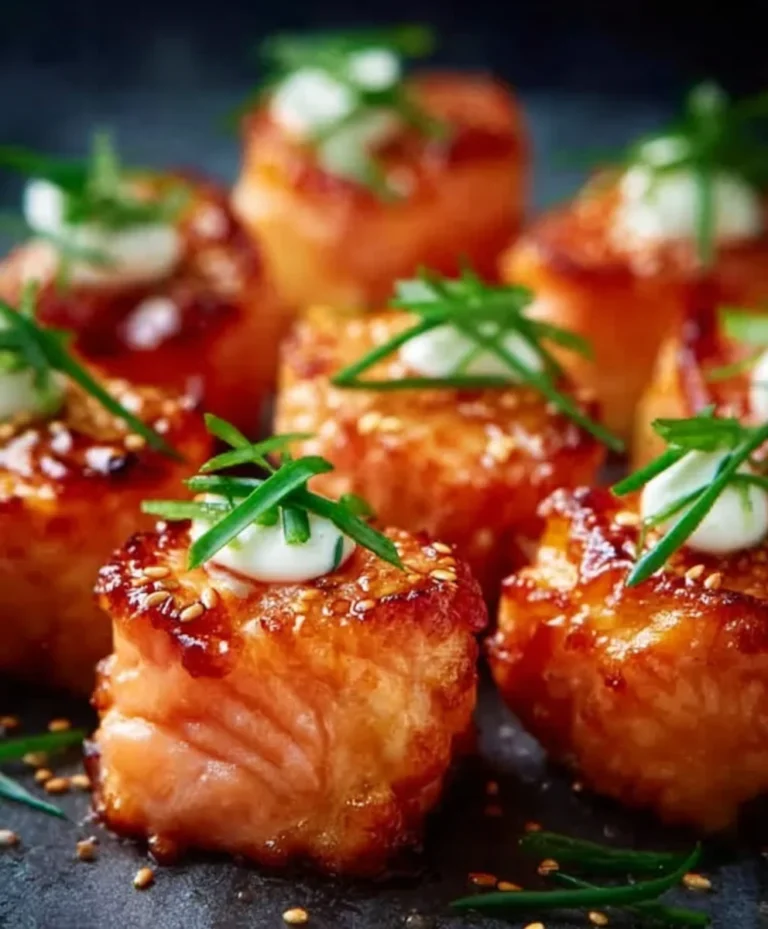
Mini Foods for Weddings, A Mini Guide to Serving Miniature Food, are simply irresistible. Think about the charm, the delight, and the sheer novelty of it all! Guests adore mini foods for weddings because they offer a playful and sophisticated way to enjoy a diverse range of flavors without the formality of a traditional plated meal. It’s the perfect solution for cocktail receptions, dessert tables, or even as elegant appetizers passed around the room. What truly makes these miniature delights so special is their ability to spark conversation and create memorable moments. From tiny quiches to bite-sized tacos, each morsel is a testament to thoughtful presentation and delicious execution. This guide will explore how to perfectly incorporate mini foods for weddings into your celebration, ensuring every guest experiences a touch of edible artistry and a burst of deliciousness.

Ingredients:
- 1 pound ground beef (80/20 blend recommended for flavor and moisture)
- 1/4 cup finely chopped yellow onion
- 2 cloves garlic, minced
- 1 teaspoon salt
- 1/2 teaspoon black pepper
- 1/4 teaspoon smoked paprika
- 1/4 cup breadcrum extractbs (plain or Italian-style)
- 1 large egg, lightly beaten
- 1 tablespoon Worcestershire sauce
- 1/4 cup shredded cheddar cheese (optional, for an extra cheesy bite)
- 1/4 cup ketchup
- 1 tablespoon brown sugar
- 1 teaspoon Dijon mustard
- 1 teaspoon apple cider vinegar
- Small pretzel twists (for “legs”)
- Toothpicks
- Miniature sweet potato rounds (for “eyes”)
Preparing the Mini Meatloaf “Ants”
Mixing the Meatloaf Base
The foundation of our adorable mini meatloaf ants starts with a simple yet flavorful meatloaf mixture. In a medium bowl, combine the pound of ground beef with the finely chopped yellow onion and the minced garlic. These aromatics will infuse the meatloaf with a wonderful depth of flavor that complements the beef beautifully. Next, season generously with salt, black pepper, and the smoked paprika. The paprika adds a subtle smokiness that really makes these little ants sing.
Now, it’s time to bind everything together. Add thrum extractreadcrumbs to the rum extractl. The breadcrumbs act as a binder, helping to hold the meatloaf together and prevent it from becoming too dense. Whisk in the lightly beaten large egg. The egg also plays a crucial role as a binder and adds richness. Finally, stir in the Worcestershire sauce. This magical ingredient adds a savory, umami punch that is essential for any good meatloaf. At this stage, if you’re opting for a cheesy delight, you can also gently mix in the shredded cheddar cheese. Just ensure not to overmix the meat, as this can result in a tough texture. You want to gently combine all the ingredients until they are just incorporated.
Forming and Baking the Ant Bodies
Once your meat mixture is ready, it’s time to sculpt our tiny ants. Preheat your oven to 375 degrees Fahrenheit (190 degrees Celsius). Line a baking sheet with parchment paper or aluminum foil for easy cleanup. This recipe is designed to create bite-sized portions, perfect for appetizers or a whimsical addition to any party spread. Take about 1 to 2 tablespoons of the meat mixture and roll it into a small oval or elongated shape, resembling the body of an ant. Aim for consistency in size so that they all cook evenly. You should be able to make approximately 20-24 mini meatloaf ants from this amount of mixture.
Arrange the formed mini meatloaf ants on the prepared baking sheet, leaving a little space between each one. This allows for proper air circulation and even cooking. Place the baking sheet in the preheated oven and bake for 18-20 minutes, or until the internal temperature reaches 160 degrees Fahrenheit (71 degrees Celsius) and they are cooked through. They should have a nice, firm texture and be lightly browned on the outside. Resist the temptation to overcook them, as they can dry out quickly due to their small size.
Crafting the Tangy Ant Glaze
While the mini meatloaf ants are baking, we’ll prepare a simple yet delicious glaze that will give them that characteristic ant-like sheen and extra flavor. In a small bowl, whisk together the ketchup, brown sugar, Dijon mustard, and apple cider vinegar. The ketchup provides a sweet and tangy base, the brown sugar adds sweetness and helps with caramelization, the Dijon mustard provides a zesty kick, and the apple cider vinegar adds a touch of acidity to balance the sweetness. This glaze is reminiscent of classic meatloaf toppings, scnon-alcoholic aled down for our miniature creations. You can adjust the sweetness or tangin extractess to your preference by adding a little more brown sugar or vinegar.
Glazing and Final Touches
Once the mini meatloaf ants have finished baking, carefully remove the baking sheet from the oven. Using a pastry brush or a spoon, generously brush the glaze over the tops of each mini meatloaf ant. The heat from the meatloaf will help the glaze melt and create a beautiful, glossy finish. Return the baking sheet to the oven for another 5-7 minutes, or until the glaze is bubbling and slightly caramelized. This step is crucial for achieving that appealing, slightly sticky texture on the outside. Be watchful during this final baking period to prevent the glaze from burning.
Assembling the “Ants”
Now for the fun pargin extract bringing our mini meatloaf ants to life! Let the glazed meatloaf ants cool on the baking sheet for a few minutes until they are just warm enough to handle. While they are still warm, gently insert a small pretzel twist into the back end of each meatloaf “body” to represent the abdomen or “stinger” of the ant. This will give them a distinct, segmented look. Next, carefully insert two toothpicks into the front end of each meatloaf, angled slightly forward, to serve as the antennae. For the eyes, take the miniature sweet potato rounds and press one onto each side of the meatloaf, just above where the antennae emerge. If the sweet potato rounds don’t stick well, you can use a tiny dab of the glaze or a small dot of cream cheese as “glue.” These little details transform the simple meatloaf into an adorable and edible decoration. Allow them to cool completely before serving.

Conclusion:
We hope this guide, “Mini Foods for Weddings, A Mini Guide to Serving Miniature Food,” has inspired you to explore the delightful world of tiny treats for your special day! As you can see, miniature food offers a sophisticated, fun, and memorable way to cater to your guests. From elegant canapés to whimsical desserts, these bite-sized wonders are sure to be a talking point and a delicious experience for everyone. Don’t be afraid to get creative and tailor these ideas to your specific wedding theme and personal tastes. We encourage you to have fun with the preparation and presentation, making your wedding reception a truly unique culinary celebration.
For serving suggestions, consider elegant tiered stands for savory appetizers, charming dessert carts for sweet treats, or even individual bento-style boxes for a more controlled and personalized approach. Variations are endless; think about adapting classic comfort foods into miniature versions or exploring international flavors. The key is presentation and ensuring each bite is as delicious as it is visually appealing.
Frequently Asked Questions about Mini Foods for Weddings:
Q1: How do miniature foods help with wedding catering costs?
Miniature foods can actually be more cost-effective for weddings. While the per-piece cost might seem similar, guests tend to eat fewer miniature items than full-sized portions. This can help control overall food quantities and reduce waste. Additionally, offering a wider variety of smaller items allows you to cater to diverse dietary needs and preferences without needing separate full meals for each.
Q2: What are the best types of miniature foods for outdoor weddings?
For outdoor weddings, focus on items that hold their shape well and are less prone to melting or spoiling in warmer temperatures. Skewers with grilled vegetables and marinated chicken, mini quiches, small fruit tarts, and bite-sized bruschetta are excellent choices. Avoid delicate pastries with whipped cream or chocolate that could melt easily. Consider food trucks offering miniature versions of popular street food for a fun and practical outdoor option.
Mini Meatloaf “Ants”
Adorable and bite-sized mini meatloaf sculpted and decorated to resemble ants, perfect for whimsical wedding appetizers.
Ingredients
-
1 pound ground beef
-
1/4 cup finely chopped yellow onion
-
2 cloves garlic, minced
-
1 teaspoon salt
-
1/2 teaspoon black pepper
-
1/4 teaspoon smoked paprika
-
1/4 cup breadcrumbs
-
1 large egg, lightly beaten
-
1 tablespoon Worcestershire sauce
-
1/4 cup ketchup
-
1 tablespoon brown sugar
-
1 teaspoon Dijon mustard
-
1 teaspoon apple cider vinegar
-
Small pretzel twists
-
Toothpicks
-
Miniature sweet potato rounds
Instructions
-
Step 1
In a medium bowl, combine ground beef, chopped onion, minced garlic, salt, black pepper, and smoked paprika. Mix gently. Add breadcrumbs, beaten egg, and Worcestershire sauce. If desired, stir in shredded cheddar cheese. Do not overmix. -
Step 2
Preheat oven to 375°F (190°C). Line a baking sheet with parchment paper. Form 1-2 tablespoon portions of the meat mixture into oval or elongated shapes resembling ant bodies, about 20-24 total. Arrange on the baking sheet. -
Step 3
Bake for 18-20 minutes, or until internal temperature reaches 160°F (71°C) and they are cooked through. -
Step 4
While meatloaf bakes, prepare the glaze: whisk together ketchup, brown sugar, Dijon mustard, and apple cider vinegar in a small bowl. -
Step 5
Once baked, brush the glaze generously over the tops of the mini meatloaf ants. Return to the oven for 5-7 minutes, or until the glaze is bubbling and slightly caramelized. -
Step 6
Let cool slightly. Insert a small pretzel twist into the back of each meatloaf body. Insert two toothpicks into the front as antennae. Press miniature sweet potato rounds onto each side for eyes.
Important Information
Nutrition Facts (Per Serving)
It is important to consider this information as approximate and not to use it as definitive health advice.
Allergy Information
Please check ingredients for potential allergens and consult a health professional if in doubt.