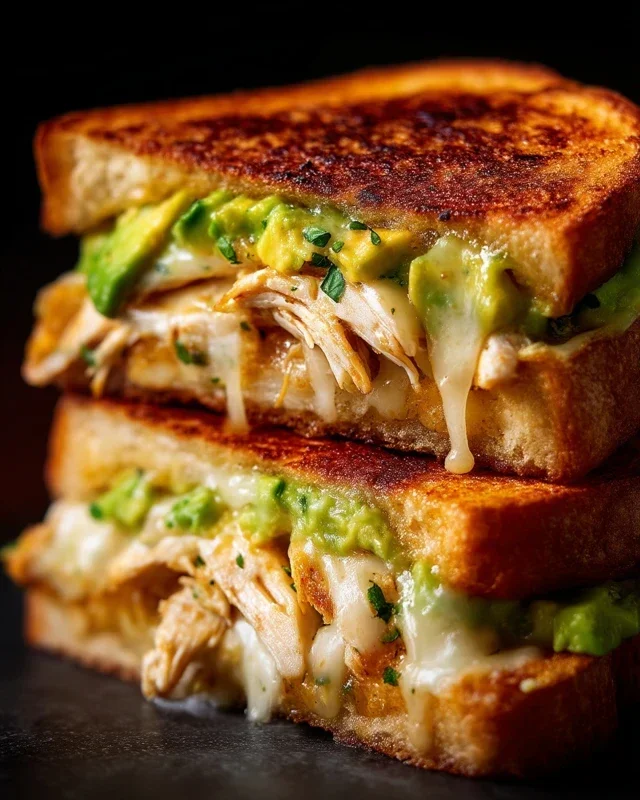
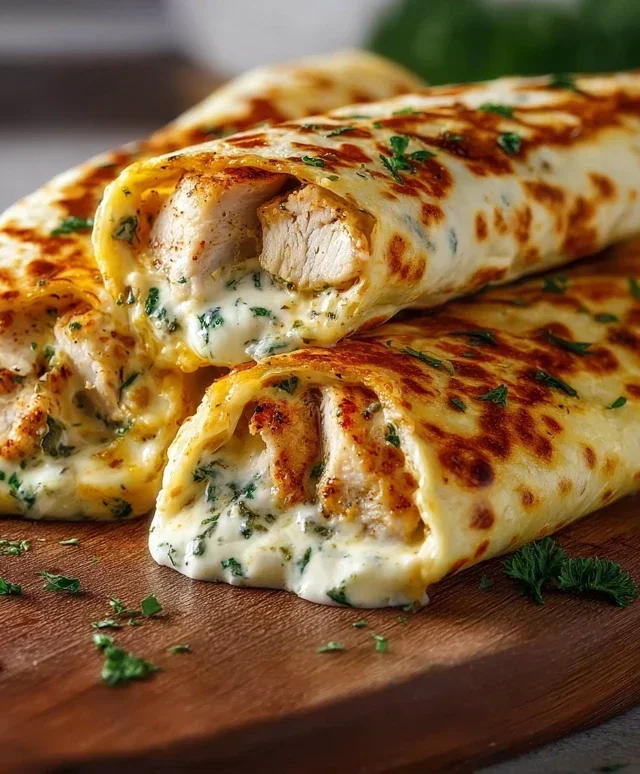
Cheesy Garlic Chicken Wraps-Low Carb & Delicious
Low Carb Cheesy Garlic Chicken Wraps are about to become your new weeknight obsession! Are you craving something incredibly satisfying, bursting with flavor, and guilt-free? Then you’ve landed in the right spot. We’ve all been there, staring into the fridge, wanting something delicious but also trying to keep our carbohydrate intake in check. That’s exactly why I created these incredible Low Carb Cheesy Garlic Chicken Wraps. They hit all the right notes: tender, garlicky chicken, a generous blanket of gooey, melted cheese, all hugged by a soft, low-carb tortilla. What truly makes these wraps special is the perfect harmony of simple ingredients coming together to create an explosion of taste that feels like a decadent treat, without any of the carb-laden guilt. Get ready to fall in love with healthy eating all over again!
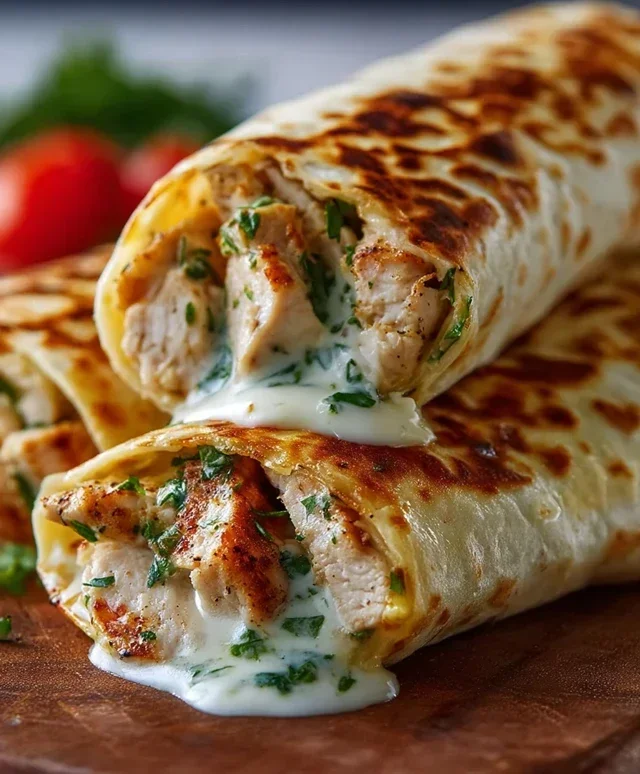
Low Carb Cheesy Garlic Chicken Wraps
Craving a quick, satisfying, and guilt-free meal? Look no further than these incredible Low Carb Cheesy Garlic Chicken Wraps! These wraps are packed with flavor, incredibly easy to make, and perfect for a weeknight dinner or a healthy lunch on the go. We’re talking tender shredded chicken, gooey melted cheese, and a punch of garlic, all wrapped up in a low-carb tortilla. What’s not to love? This recipe focuses on simple, wholesome ingredients that come together in a flash, making it a go-to for busy days.
Ingredients:
Cooking Instructions
Here’s how we’re going to transform these simple ingredients into something truly delicious. This recipe is designed to be straightforward, so don’t worry if you’re new to cooking. The goal is maximum flavor with minimal fuss.
Step 1: Prepare the Cheesy Garlic Filling
Our first step is to create the creamy, cheesy, garlicky base for our wraps. In a medium-sized bowl, combine the shredded cooked chicken, softened cream cheese, shredded mozzarella cheese, and shredded cheddar cheese. Add the minced garlic to the bowl as well. If you’re using a pre-cooked rotisserie chicken, shredding it is a breeze. Make sure your cream cheese is truly softened; this will make it much easier to incorporate into the mixture and create a smooth, cohesive filling. You can leave your cream cheese on the counter for about 30 minutes to an hour to soften, or if you’re in a rush, you can gently microwave it in short 10-second intervals, stirring in between, until it’s soft but not melted. Once all your ingredients are in the bowl, season generously with salt and pepper. Don’t be shy with the seasoning; it’s what brings out all the wonderful flavors. Mix everything together thoroughly with a spoon or a spatula until all the ingredients are well combined and you have a beautiful, cheesy chicken mixture.
Step 2: Sauté the Garlic for Extra Flavor (Optional but Recommended!)
For an even more intense garlic flavor, I love to give the minced garlic a quick sauté before adding it to the chicken mixture. This mellows out the raw garlic bite and unlocks its sweeter, more aromatic qualities. Heat the tablespoon of olive oil in a small skillet over medium heat. Once the oil is shimmering, add your minced garlic. Sauté for about 30-60 seconds, stirring constantly, until it’s fragrant and just starting to turn golden. Be careful not to burn the garlic, as burnt garlic can turn bitter. Immediately remove the skillet from the heat and let the garlic and oil cool slightly before adding it to your chicken and cheese mixture in Step 1. This little extra step truly elevates the flavor profile of the wraps. If you’re short on time, you can skip this and add the raw minced garlic directly, but I highly recommend giving it a try!
Step 3: Assemble the Wraps
Now it’s time to bring everything together! Lay your four low-carb tortillas flat on a clean surface. If you’re using the baby spinach, place a handful of spinach leaves on one half of each tortilla. This adds a lovely fresh crunch and extra nutrients to your wrap. Then, generously spoon the cheesy garlic chicken mixture onto the center of each tortilla, on top of the spinach (if using). You want to distribute the filling evenly so that each bite is packed with flavor. Don’t overfill them, or they’ll be difficult to wrap. Aim for about half a cup to two-thirds of a cup of filling per tortilla.
Step 4: Fold and Secure the Wraps
This is where the magic happens and our wraps take shape! Gently fold in the sides of the tortilla over the filling. Then, starting from the edge closest to you, tightly roll up the tortilla, tucking in the filling as you go. The goal is to create a compact and secure wrap that won’t fall apart when you’re eating it. If your tortillas are a little dry or brittle, you can warm them up slightly for about 15-20 seconds in the microwave or on a dry skillet before filling. This will make them more pliable and easier to work with. Once rolled, you can secure the wraps with a toothpick if you’re concerned about them coming undone, though usually, a good tight roll is sufficient.
Step 5: Griddle or Pan-Fry for Crispy Perfection
To get that irresistible golden-brown and slightly crispy exterior, we’re going to give our wraps a quick sear. Heat the tablespoon of olive oil (or you can use butter for a richer flavor) in a large non-stick skillet or griddle over medium heat. Once the pan is hot, carefully place the assembled wraps seam-side down onto the hot skillet. Cook for about 3-4 minutes per side, or until the tortillas are golden brown and slightly crispy, and the cheese inside is beautifully melted and gooey. You’ll hear it sizzle, and you’ll see those lovely grill marks appear. This step not only makes the wraps look appealing but also adds a fantastic texture that complements the creamy filling. Repeat with the remaining wraps, adding a little more oil to the pan if necessary.
Step 6: Serve and Enjoy!
Once your wraps are beautifully browned and heated through, remove them from the skillet. Sprinkle with the chopped fresh parsley for a burst of color and freshness. You can slice them in half diagonally for easier eating, or enjoy them whole. These Low Carb Cheesy Garlic Chicken Wraps are best served immediately while they are warm and the cheese is perfectly melted. They are delicious on their own, or you can serve them with a side salad, some avocado slices, or your favorite low-carb dipping sauce. Enjoy this flavorful and satisfying meal that proves healthy eating can be absolutely delicious!
Conclusion:
These Low Carb Cheesy Garlic Chicken Wraps are an absolute winner for anyone seeking a delicious, satisfying, and diet-friendly meal. We’ve combined tender, flavorful chicken with a rich, cheesy garlic sauce, all wrapped in a low-carb tortilla for a guilt-free indulgence. It’s the perfect solution for a quick weeknight dinner, a hearty lunch, or even a crowd-pleasing appetizer. The simplicity of preparation means you can enjoy this incredible flavor without spending hours in the kitchen, making it an essential addition to your recipe repertoire.
Don’t hesitate to get creative with your serving suggestions! These wraps are fantastic on their own, but they also pair beautifully with a crisp side salad, some steamed broccoli, or even a dollop of sour cream. For variations, consider adding a pinch of red pepper flakes for a touch of heat, or perhaps some chopped spinach or mushrooms into the chicken filling. The possibilities are endless! I truly encourage you to give these Low Carb Cheesy Garlic Chicken Wraps a try; I’m confident you’ll fall in love with their amazing taste and ease of making.
Frequently Asked Questions:
Can I make these ahead of time?
Yes, you can! You can pre-cook the chicken and prepare the cheesy garlic sauce separately and store them in the refrigerator for up to 2-3 days. When you’re ready to eat, simply warm the chicken and sauce, then assemble your wraps. For the best texture, it’s ideal to assemble them just before serving.
What are some good low-carb tortilla alternatives?
If you can’t find low-carb tortillas, other excellent options include large lettuce leaves (like romaine or iceberg), large slices of grilled bell peppers, or even cauliflower tortillas. These will keep the carb count down while still providing a satisfying wrap experience.
Can I freeze these wraps?
It’s generally not recommended to freeze the assembled wraps, as the tortillas can become soggy upon thawing. However, you can freeze the cooked chicken and cheesy garlic sauce mixture separately. Thaw them in the refrigerator overnight before assembling and heating your wraps.
Low Carb Cheesy Garlic Chicken Wraps
Delicious and easy low-carb wraps filled with shredded chicken, melted cheese, and garlic cream cheese.
Ingredients
-
2 cups cooked chicken breast, shredded
-
1 cup shredded mozzarella cheese
-
1/2 cup shredded cheddar cheese
-
2 cloves garlic, minced
-
1/4 cup cream cheese, softened
-
1 tablespoon olive oil
-
4 large low-carb tortillas or wraps
-
1 tablespoon fresh parsley, chopped
-
Salt and pepper to taste
-
1 handful baby spinach (optional)
Instructions
-
Step 1
In a medium bowl, combine the shredded chicken, cream cheese, minced garlic, salt, and pepper. Mix well until the chicken is evenly coated. -
Step 2
Add the shredded mozzarella and cheddar cheeses to the chicken mixture and stir to combine. -
Step 3
Warm the olive oil in a skillet over medium heat. -
Step 4
Lay out the low-carb tortillas. Spoon the chicken and cheese mixture evenly onto one half of each tortilla. If using, add a layer of baby spinach on top of the filling. -
Step 5
Fold the tortillas in half to enclose the filling. Place the filled wraps in the warm skillet, seam-side down, and cook for 2-3 minutes per side, or until golden brown and the cheese is melted. -
Step 6
Remove from skillet, sprinkle with fresh parsley, and serve immediately.
Important Information
Nutrition Facts (Per Serving)
It is important to consider this information as approximate and not to use it as definitive health advice.
Allergy Information
Please check ingredients for potential allergens and consult a health professional if in doubt.