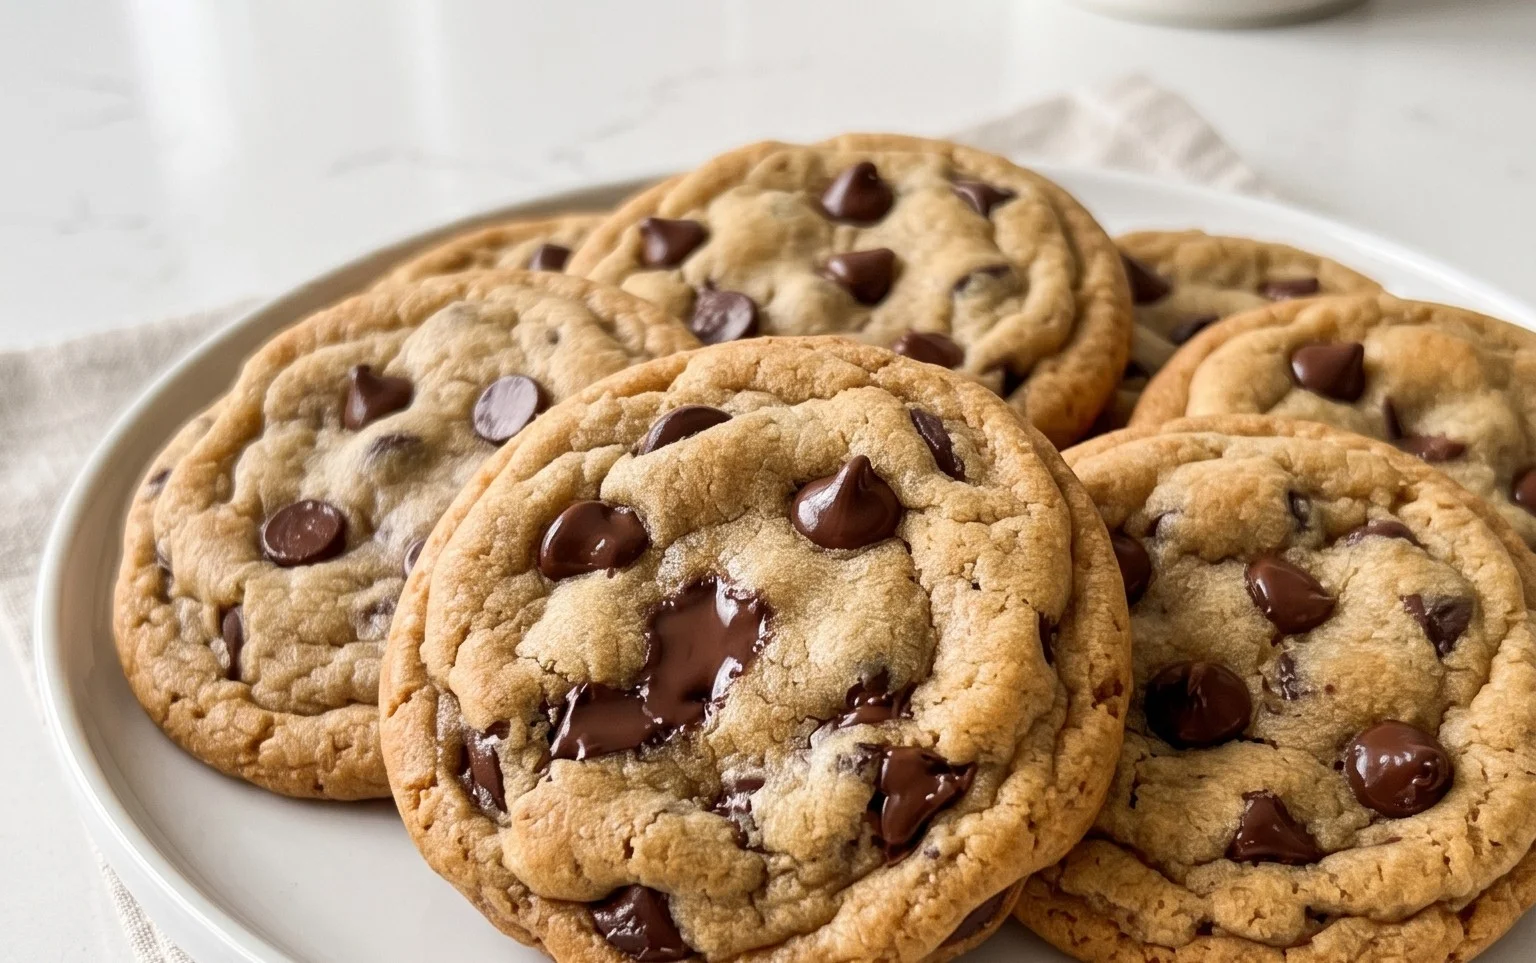
Crispy Chewy Chocolate Chip Cookies-Perfect Bake
Crispy and chewy chocolate chip cookies are the ultimate comfort food, aren’t they? There’s just something so universally beloved about that perfect bite – a satisfying crunch at the edges giving way to a soft, gooey center, all studded with melty pockets of rich chocolate. For me, it’s a taste of pure nostalgia, a reminder of childhood afternoons and warm kitchens. But what truly elevates a good chocolate chip cookie to an extraordinary one? It’s that delicate dance between texture and flavor, achieving that sought-after balance of crispy edges and a wonderfully chewy interior. This recipe is my go-to for consistently delivering those glorious crispy and chewy chocolate chip cookies that disappear faster than you can say “one more.” Get ready to bake up some serious happiness!
The Ultimate Crispy and Chewy Chocolate Chip Cookie Recipe
There’s something undeniably magical about a perfectly baked chocolate chip cookie. It’s that delightful contrast: the edges are wonderfully crisp, yielding with a satisfying snap, while the center remains irresistibly soft and chewy, practically melting in your mouth. For years, I’ve been on a quest to perfect this classic, and I’m thrilled to share the recipe that consistently delivers on that dream. Forget flat, greasy, or overly cakey cookies; this recipe is all about achieving that harmonious balance of textures and deep, comforting chocolate flavor.
This recipe relies on a few key techniques and ingredient ratios that make all the difference. We’ll be using a combination of sugars to promote chegrape juicess and crispness, ensuring the butter is at the perfect temperature, and crucially, not overbaking the cookies. The optional flaked sea salt sprinkled on top at the end is a game-changer, elevating the sweet and chocolatey notes with a hint of savory. Trust me, it’s worth the extra step!
Ingredients:
Getting Started: Preparing Your Dough
The foundation of any great cookie lies in its dough. This stage is where we build flavor and texture. It’s important to be precise with your measurements, especially for the flour. Too much flour can result in dry, tough cookies, while too little can make them spread too much.
1. Preheat Your Oven and Prep Your Baking Sheets: Begin extract by preheating your oven to 375°F (190°C). This temperature is crucial for achieving that desired crispy edge while allowing the interior to remain chewy. Line your baking sheets with parchment paper. This not only prevents sticking but also helps to distribute heat evenly, ensuring your cookies bake uniformly. You can also use silicone baking mats.
2. Whisk Together Dry Ingredients: In a medium-sized bowl, whisk together the 3 cups of all-purpose flour, 1 teaspoon of baking soda, and 3/4 teaspoon of kosher salt. Whisking these ingredients together before adding them to the wet ingredients ensures that the leavening agent (baking soda) and salt are evenly distributed throughout the flour. This is a simple step that prevents pockets of saltiness or uneven rising in your final cookies. Set this bowl aside.
3. Cream the Butter and Sugars: In a large mixing bowl, or the bowl of your stand mixer fitted with the paddle attachment, cream together the 2 sticks (1 cup or 16 tablespoons) of softened unsalted butter with the 1 cup of packed light brown sugar and the 1 cup of granulated sugar. You want to beat these together until the mixture is light and fluffy, and has a pnon-alcoholic ale, creamy appearance. This process incorporates air into the dough, which contributes to the cookies’ lift and texture. It usually takes about 3-5 minutes of mixing on medium speed. Scrape down the sides of the bowl periodically to ensure everything is incorporated. The brown sugar, with its molasses content, is key to that signature chewy texture and rich caramel notes.
4. Add Eggs and Vanilla: Add the 2 large eggs, one at a time, beating well after each addition until fully incorporated. Then, stir in the 2 teaspoons of pure vanilla extract. The vanilla extract is not just for flavor; it also enhances the overall sweetness and adds a depth of aroma that makes these cookies truly irresistible. Make sure each egg is thoroughly mixed in before adding the next. Overmixing at this stage isn’t a major concern, but you want to ensure the eggs are emulsified into the butter and sugar mixture.
5. Combine Wet and Dry Ingredients: Gradually add the dry ingredients (from step 2) to the wet ingredients (from step 3 and 4), mixing on low speed until just combined. Be careful not to overmix the dough at this stage. Overmixing can develop the gluten in the flour too much, leading to tougher cookies. Mix only until you no longer see streaks of flour. A few small streaks of flour are acceptable as they will incorporate during the next step.
6. Fold in the Chocolate Chips: Gently fold in the 2 1/2 cups of semisweet chocolate chips using a spatula or wooden spoon. You want to distribute them evenly throughout the dough. If you’re using a stand mixer, you can give it a final quick pulse on low speed, but be very careful not to overmix and break up the chocolate chips too much. The goal is to have pockets of glorious melted chocolate throughout your cookies.
Baking Your Masterpieces
This is where the magic truly happens! Pay close attention to baking times and visual cues for perfectly cooked cookies.
7. Portion and Bake: Drop rounded tablespoons of dough onto your prepared baking sheets, leaving about 2 inches of space between each cookie to allow for spreading. I like to use a cookie scoop (about 1.5-2 tablespoons in size) for uniform cookies. For an extra beautiful finish and a touch of salty-sweet goodness, sprinkle the tops of the cookie dough balls with the 1 teaspoon of flaked sea salt (if using). Don’t be shy with the salt, as it wonderfully balances the sweetness. Bake for 9-11 minutes, or until the edges are golden brown and set, but the centers still look slightly underbaked and soft. This is the secret to achieving that chewy center. The residual heat will continue to cook the cookies after they are removed from the oven.
8. Cooling is Key: Once baked, remove the baking sheets from the oven and let the cookies cool on the baking sheets for 5-10 minutes. This resting period allows them to firm up sufficiently so they don’t fall apart when you move them. After this initial cooling on the baking sheet, carefully transfer the cookies to a wire rack to cool completely. Cooling them completely on the wire rack is important for achieving that ultimate crispy texture all around.
Enjoy these wonderfully crispy and chewy chocolate chip cookies with a glass of cold milk, or simply savor them on their own. They are perfect for sharing (or not!).

Conclusion:
I hope you’re as excited to bake these Crispy and Chewy Chocolate Chip Cookies as I am to eat them! We’ve crafted a recipe that truly delivers on that perfect textural balance: wonderfully crisp edges giving way to a delightful chew in the center. The secret lies in precise ingredient ratios and the chilling process, ensuring maximum flavor development and preventing the cookies from spreading too thin. These aren’t just any chocolate chip cookies; they’re a testament to simple ingredients transformed into pure joy.
Serve these warm, fresh from the oven, with a tall glass of milk for the ultimate comfort food experience. They also pair beautifully with a scoop of vanilla ice cream or a hot cup of coffee. Don’t be afraid to get creative with variations! Consider adding a sprinkle of sea salt on top before baking for a sophisticated salty-sweet contrast, or mix in chopped nuts like walnuts or pecans for added crunch. You could even swap out some of the chocolate chips for white chocolate or butterscotch chips for a different flavor profile. I truly encourage you to give this recipe a try – I know you’ll be delighted with the results!
Frequently Asked Questions:
Why are my cookies spreading too much?
Several factors can contribute to excessive spreading. Ensure your butter is softened to room temperature but not melted. Over-mixing the dough after adding the flour can also develop gluten too much, leading to flatter cookies. Crucially, chilling the dough for at least 30 minutes, or even longer, is vital for preventing premature spreading and allowing the fats to solidify.
Can I make these cookies ahead of time?
Absolutely! The dough can be made and chilled for up to 3 days in the refrigerator. Once baked, the cookies will stay fresh in an airtight container at room temperature for about 3-4 days. For longer storage, you can freeze baked cookies or freeze the dough balls and bake them directly from frozen, adding a few extra minutes to the baking time.
What’s the best way to store these crispy and chewy chocolate chip cookies?
For optimal freshness and to maintain their texture, store your baked cookies in an airtight container at room temperature. Avoid refrigerating them, as this can make them tougher. If you find they are getting too soft, a small, opened box of crackers placed in the container can help absorb excess moisture.
Crispy and Chewy Chocolate Chip Cookies
The perfect balance of crispy edges and a chewy center, these classic chocolate chip cookies are a crowd-pleaser.
Ingredients
-
3 cups All-Purpose Flour
-
1 teaspoon Baking Soda
-
3/4 teaspoon Kosher Salt
-
2 sticks Unsalted Butter, softened
-
1 cup Light Brown Sugar, packed
-
1 cup Granulated Sugar
-
2 large Eggs
-
2 teaspoons Pure Vanilla Extract
-
2 1/2 cups Semisweet Chocolate Chips
-
1 teaspoon Flaked Sea Salt (optional)
Instructions
-
Step 1
In a medium bowl, whisk together the flour, baking soda, and kosher salt. Set aside. -
Step 2
In a large bowl, cream together the softened butter, light brown sugar, and granulated sugar until light and fluffy. -
Step 3
Beat in the eggs one at a time, then stir in the vanilla extract. -
Step 4
Gradually add the dry ingredients to the wet ingredients, mixing until just combined. Do not overmix. -
Step 5
Fold in the semisweet chocolate chips. -
Step 6
Preheat your oven to 375°F (190°C). Line baking sheets with parchment paper. -
Step 7
Drop rounded tablespoons of dough onto the prepared baking sheets, leaving about 2 inches between cookies. -
Step 8
Bake for 9-12 minutes, or until the edges are golden brown and the centers are still slightly soft. Sprinkle with flaked sea salt immediately after removing from the oven, if desired. -
Step 9
Let the cookies cool on the baking sheets for a few minutes before transferring them to a wire rack to cool completely.
Important Information
Nutrition Facts (Per Serving)
It is important to consider this information as approximate and not to use it as definitive health advice.
Allergy Information
Please check ingredients for potential allergens and consult a health professional if in doubt.