Easy Buster Bar Ice Cream Dessert Recipe
Buster Bar Ice Cream Dessert is a nostalgic treat that evokes childhood summers and pure, unadulterated joy. If you’ve ever been a fan of those iconic, chocolate-dipped, ice-cream-bar delights, then get ready to fall head over heels for this homemade version. We’re talking about a dessert that’s more than just ice cream; it’s an experience. The irresistible combination of creamy vanilla ice cream, a rich, fudgy chocolate coating, and a delightful crunch from peanuts is simply legendary. It’s the perfect balance of textures and flavors that makes the Buster Bar Ice Cream Dessert a perennial favorite. Whether you’re looking to impress guests or simply treat yourself to a taste of pure bliss, this recipe is guaranteed to be a winner. Prepare to create your own unforgettable memories with this fantastic Buster Bar Ice Cream Dessert.
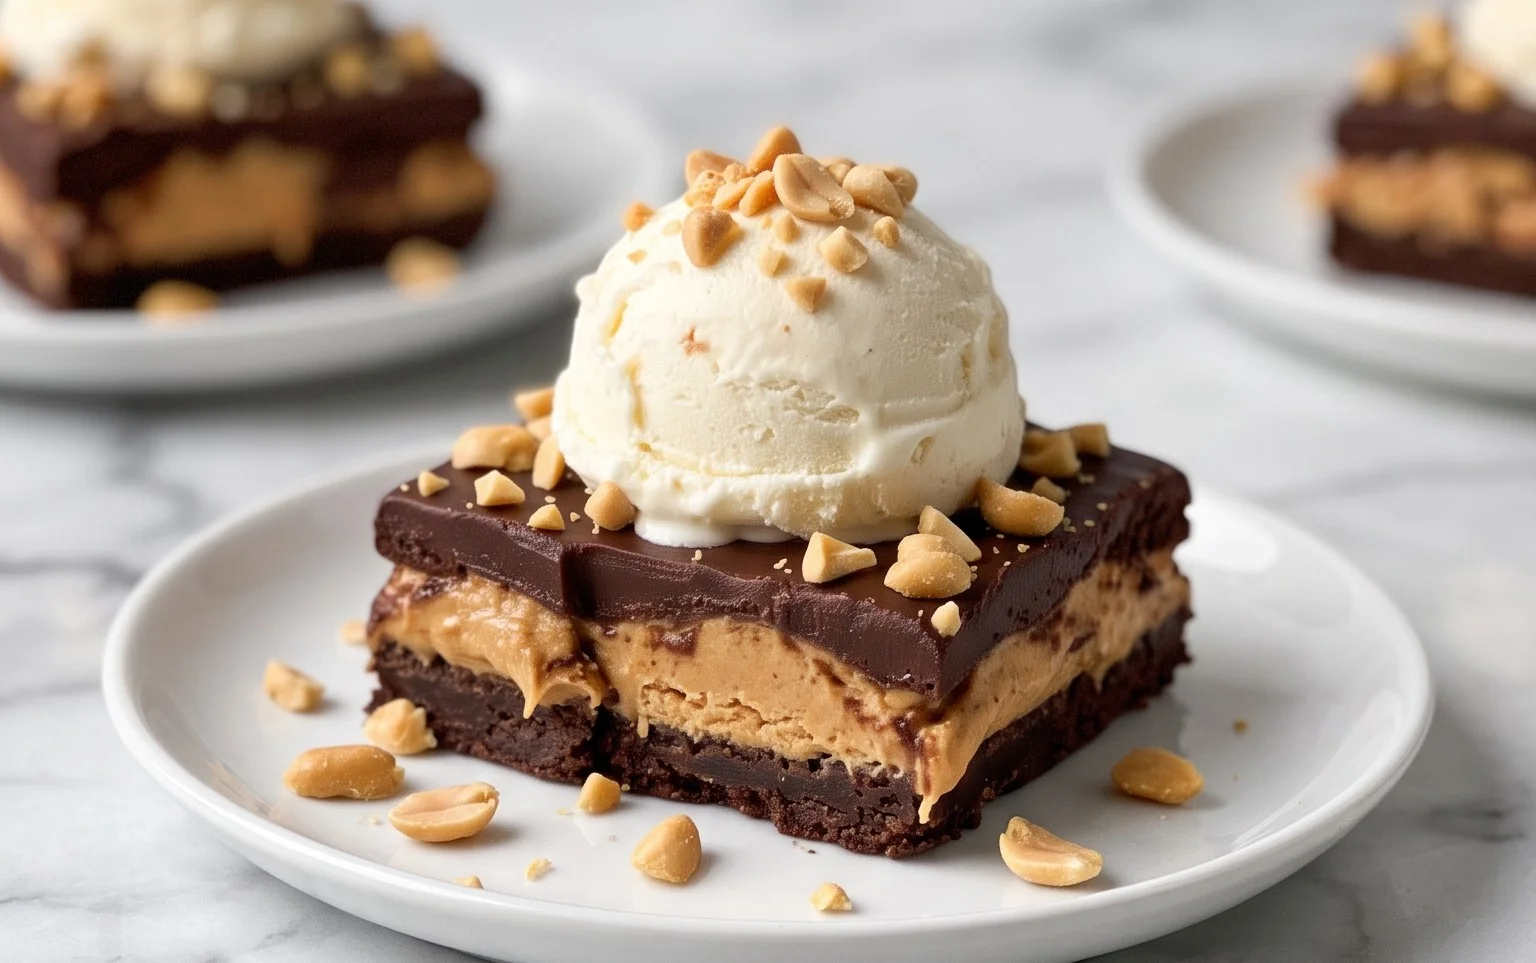
Buster Bar Ice Cream Dessert
Get ready to experience a truly delightful frozen treat that brings back all the nostalgic memories of summer days and classic ice cream parlor flavors. This Buster Bar Ice Cream Dessert is an effortless yet incredibly rewarding recipe that’s perfect for potlucks, birthdays, or just when you’re craving something special. It’s a layered masterpiece of crunchy cookie crust, creamy vanilla ice cream, and a rich, decadent chocolate-peanut coating. Trust me, once you try this, it will become a staple in your dessert repertoire.
Ingredients:
Crafting the Perfect Buster Bar
This recipe is broken down into a few key stages, each contributing to the overall deliciousness of the final product. Don’t be intimidated by the number of steps; they are all quite straightforward and designed to guide you to a perfect dessert.
Step 1: Building the Irresistible Oreo Crust
Our journey begin extracts with creating the foundation for our Buster Bar: a perfectly crum extractbly and flavorful Oreo crust. Start by taking your 14.3 oz package of Oreo cookies and crushing them into fine crum extractbs. A food processor is your best friend here, making quick work of this task. If you don’t have a food processor, you can place the cookies in a sturdy zip-top bag and crush them with a rolling pin or the bottom of a heavy pan. The goal is to have fine crum extractbs, not large chunks, so they bind together well.
Once your Oreos are beautifully crushed, transfer them to a medium mixing bowl. Next, carefully measure out 1/2 cup of butter and melt it. You can do this in the microwave in short intervals, stirring in between, or gently melt it in a small saucepan on the stovetop. Pour the melted butter over the Oreo crum extractbs. Now, using a fork or your hands, mix the crum extractbs and butter together until all the crum extractbs are evenly moistened. It should resemble wet sand.
Prepare a 9×13 inch baking dish by lining it with parchment paper, leaving an overhang on the sides. This will make it much easier to lift the dessert out later. Press the Oreo crum extractb mixture evenly into the bottom of the prepared baking dish. Use the back of a spoon or the bottom of a glass to firmly pack the crum extractbs, creating a solid base. Place this crust in the freezer for at least 15-20 minutes while you prepare the next layer. This chilling step helps the crust set, preventing it from crum extractbling when you add the ice cream.
Step 2: Layering the Creamy Vanilla Ice Cream
Now it’s time to add the star of the show: the vanilla ice cream! Take your 1/2 gallon of vanilla ice cream out of the freezer about 15-20 minutes before you plan to use it. You want it softened, not completely melted. The ideal consistency is spreadable but still holds its shape. If it melts too much, it will be difficult to work with and might make your crust soggy.
Remove the chilled Oreo crust from the freezer. Carefully scoop the softened vanilla ice cream evenly over the crust. Use an offset spatula or the back of a spoon to spread the ice cream into a smooth, even layer, covering the entire surface of the crust. Try to get it as level as possible for a beautiful presentation. Once the ice cream is spread, return the entire dish to the freezer. Let it freeze until it’s firm, which typically takes at least 1-2 hours, or even longer if you have the time. A thoroughly frozen ice cream layer is crucial for the next steps.
Step 3: Preparing the Decadent Chocolate-Peanut Coating
This is where the magic truly happens! In a medium saucepan over low heat, combine the 12 oz of semi-sweet chocolate chips, 1/2 cup of butter, and 12 oz of evaporated milk. Stir constantly as the butter melts and the chocolate chips begin extract to soften. It’s important to keep the heat low and stir continuously to prevent the chocolate from scorching. Once the chocolate chips are mostly melted and the butter has fully incorporated, continue stirring until you have a smooth, glossy chocolate mixture.
Remove the saucepan from the heat. Now, it’s time to add the star of the coating: the Spanish peanuts. Measure out 1 pound of Spanish peanuts. These smaller, sweeter peanuts are ideal for this recipe, providing a delightful crunch and nutty flavor that complements the chocolate. Stir the peanuts into the warm chocolate mixture until they are completely coated. Ensure every peanut is covered in that luscious chocolate. The residual heat from the chocolate will help warm the peanuts slightly, enhancing their flavor.
Step 4: The Grand Finnon-alcoholic ale – Coating and Freezing
With your Buster Bar dessert nicely frozen and your chocolate-peanut mixture ready, it’s time for the exciting final assembly. Take the frozen ice cream and crust out of the freezer. Immediately pour the warm chocolate-peanut mixture evenly over the top of the hardened ice cream layer. Use a spatula to spread it gently, ensuring it covers the entire surface and reaches the edges. Work quickly at this stage, as the ice cream will start to soften once exposed to room temperature.
Once the chocolate coating is spread, return the entire dish to the freezer. This is the most important freezing step. You’ll want to freeze it until the chocolate coating is completely solid. This can take anywhere from 4 to 6 hours, or ideally, overnight. The longer it freezes, the firmer and more cohesive your Buster Bar will be, making it easier to cut and serve. Patience here is key to achieving that perfect Buster Bar texture.
Step 5: Serving Your Masterpiece
Once your Buster Bar Ice Cream Dessert is completely frozen and the chocolate coating is solid, it’s ready to be enjoyed! To serve, lift the dessert out of the pan using the parchment paper overhangs. Place it on a cutting board. For clean cuts, you can briefly dip a sharp knife in hot water, wipe it dry, and then slice the dessert into squares or bars. This will help the knife glide through the frozen layers and the hardened chocolate.
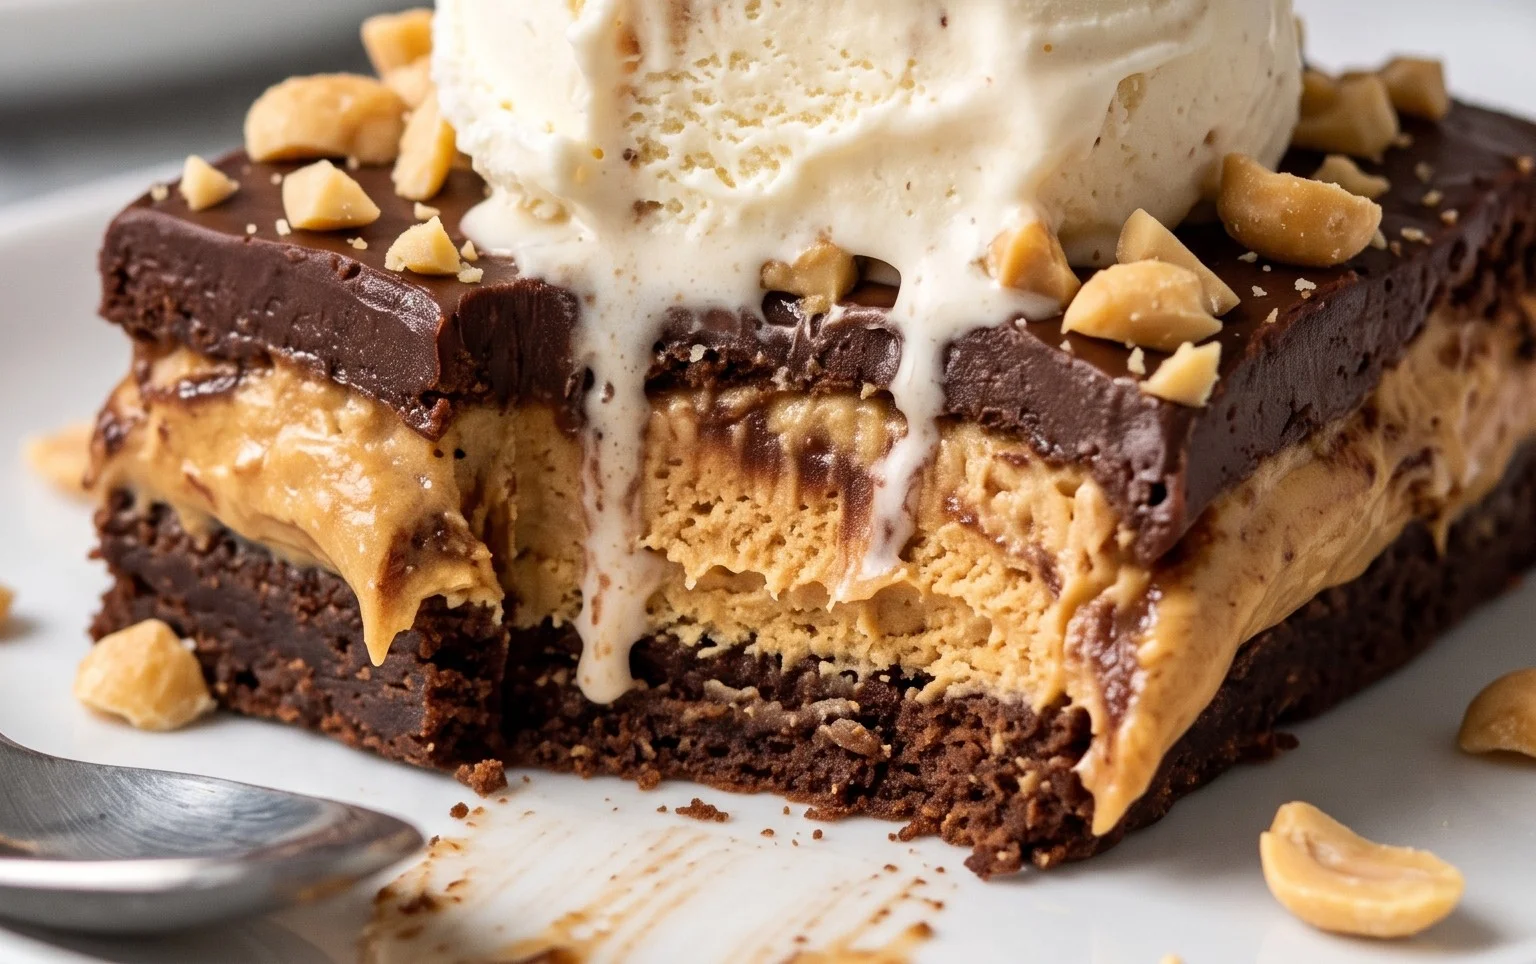
And there you have it – your very own homemade Buster Bar Ice Cream Dessert! Each bite is a symphony of textures and flavors: the crisp Oreo crust, the cool, creamy vanilla ice cream, and the rich, crunchy chocolate-peanut topping. It’s a showstopper that’s surprisingly easy to make and guaranteed to impress. Enjoy every delicious moment!
Conclusion:
And there you have it – your very own homemade Buster Bar Ice Cream Dessert! This recipe truly captures the essence of that beloved ice cream truck treat, bringin extractg a symphony of textures and flavors right into your kitchen. The crunchy peanut and chocolate coating, combined with the creamy, sweet ice cream filling, creates an unforgettable experience that’s perfect for hot summer days, backyard barbecues, or simply when a craving strikes. I love how surprisingly simple it is to achieve such a decadent result!
For serving, I highly recommend letting these Buster Bars firm up completely in the freezer for at least 4-6 hours, or even overnight. This ensures they hold their shape beautifully and deliver that satisfyingly crisp initial bite. Serve them chilled straight from the freezer, perhaps with a drizzle of extra hot fudge or a sprinkle of flaky sea salt for an extra touch of indulgence. Don’t be afraid to get creative with variations! You could swap the peanuts for chopped almonds or pecans, try different types of chocolate for the coating (dark, milk, or even white!), or even add a swirl of caramel to the ice cream before freezing. I truly encourage you to give this Buster Bar Ice Cream Dessert a try – I’m confident you’ll love it as much as I do!
Frequently Asked Questions:
How do I ensure the chocolate coating doesn’t crack when I bite into it?
The key to a smooth, crack-free coating is to ensure your ice cream is frozen very solid before dipping. Also, make sure your melted chocolate isn’t too thick; you can thin it slightly with a little neutral oil like coconut or vegetable oil if needed. Work quickly when dipping to prevent the ice cream from melting too much.
Can I make these Buster Bars ahead of time?
Absolutely! These Buster Bars are perfect for making in advance. Once fully frozen and coated, you can store them in an airtight container in the freezer for up to 2-3 weeks. Just be sure to separate layers with parchment paper to prevent sticking.
What kind of ice cream base works best for this dessert?
A good quality vanilla ice cream is the classic choice and works wonderfully. However, you could also use a French vanilla for a richer flavor, or even a chocolate ice cream for a double chocolate experience! Just ensure it’s a sturdy ice cream that holds its shape well when scooped.
Buster Bar Ice Cream Dessert
A no-bake ice cream dessert featuring a crushed Oreo cookie crust, layers of softened vanilla ice cream and Spanish peanuts, topped with a rich chocolate magic shell.
Ingredients
-
1 14.3 oz pkg. of Oreo cookies, crushed
-
1/2 C butter, melted
-
1/2 gal. vanilla ice cream, softened
-
1 lb. Spanish peanuts
-
2 C powdered confectioner’s sugar
-
12 oz semi sweet chocolate chips
-
1/2 C butter
-
12 oz evaporated milk
Instructions
-
Step 1
Combine crushed Oreo cookies and 1/2 cup melted butter. Press firmly into the bottom of a 9×13 inch baking dish. -
Step 2
Spread softened vanilla ice cream evenly over the cookie crust. -
Step 3
Sprinkle Spanish peanuts evenly over the ice cream layer. -
Step 4
In a saucepan over low heat, melt 12 oz semi-sweet chocolate chips and 1/2 cup butter. Stir in evaporated milk and powdered confectioner’s sugar until smooth, creating a magic shell. -
Step 5
Pour the chocolate mixture evenly over the peanut and ice cream layers. Refrigerate for at least 2 hours, or until firm, before slicing and serving.
Important Information
Nutrition Facts (Per Serving)
It is important to consider this information as approximate and not to use it as definitive health advice.
Allergy Information
Please check ingredients for potential allergens and consult a health professional if in doubt.