Easy Scones Recipe-Fluffy & Delicious Baked Goods
Scones Recipe: A warm, buttery scone is more than just a baked good; it’s an invitation to a moment of pure comfort. There’s something incredibly satisfying about a perfectly risen scone, with its tender crum extractb and slightly crisp exterior, especially when enjoyed fresh from the oven. People adore these delightful treats for their versatility – they’re equally at home at a fancy afternoon tea as they are with a mug of coffee on a quiet morning. What truly makes scones special is their ability to evoke feelings of home, tradition, and simple indulgence. They’re a blank canvas for your creativity, ready to be studded with juicy berries, savory herbs, or even a hint of cheese. Today, I’m excited to share my foolproof scones recipe that guarantees a delightful bake every single time, ensuring your kitchen fills with that irresistible aroma and your taste buds with pure joy.
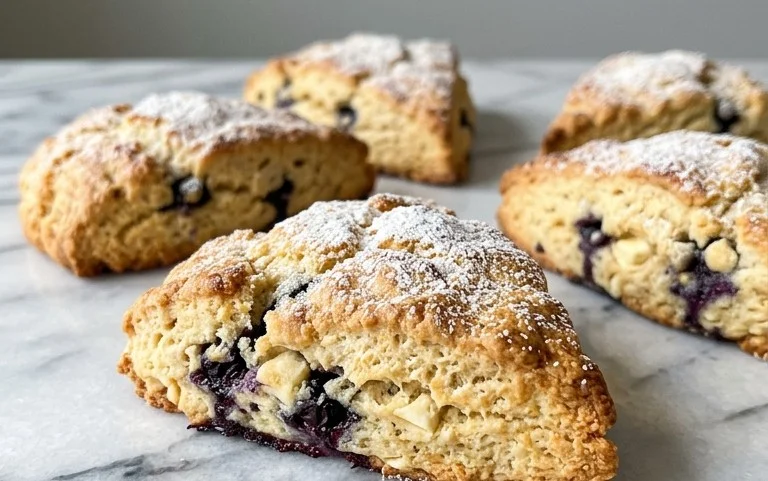
Scones Recipe
There’s something undeniably comforting about a warm, flaky scone. Whether you’re enjoying them with a dollop of clotted cream and jam for a classic afternoon tea, or simply craving a delightful treat with your morning coffee, homemade scones are a game-changer. Forget those dry, crum extractbly disappointments you might have encountered elsewhere; this recipe will guide you to scone perfection. We’re aiming for a tender crum extractb, a delicate crisp on the outside, and a flavor that sings. The beauty of scones lies in their versatility – they are the perfect canvas for your favorite mix-ins, from tart berries to decadent chocolate chips. Let’s get baking!
Ingredients:
Preparing Your Workspace and Ingredients
Before we begin extract assembling our delicious scones, it’s crucial to have everything ready and at the right temperature. Cold ingredients are key to achieving that desirable flaky texture. So, make sure your butter is well-chilled and cut into small cubes. Similarly, your heavy cream should be cold. I like to keep my flour, sugar, baking powder, and salt in separate bowls, ready to be added. If you’re planning on using fresh berries, give them a gentle rinse and pat them completely dry with paper towels. This prevents them from releasing too much moisture into the dough, which can make your scones soggy. For dried fruits, there’s no need for special preparation beyond chopping if they are large.
Creating the Dough
Let’s start by combining the dry ingredients. In a large mixing bowl, whisk together the all-purpose flour, granulated sugar, baking powder, and salt. Give it a good mix to ensure everything is evenly distributed. Now, it’s time to incorporate the butter. Add the chilled, cubed butter to the flour mixture. You can use a pastry blender, your fingertips, or even a food processor for this step. The goal is to cut the butter into the flour until the mixture resembles coarse crum extractbs, with some pea-sized pieces of butter still visible. These little pockets of butter are what will create those wonderful layers as they melt in the oven. If you’re using your fingertips, work quickly to avoid warming the butter too much.
Now, in a separate small bowl, whisk together the ½ cup plus 1 tablespoon of chilled heavy cream and the lightly beaten large egg. Create a well in the center of your dry ingredients and pour in the wet mixture. Gently stir everything together with a spatula or wooden spoon until just combined. Be careful not to overmix! Overworking the dough will develop the gluten in the flour, resulting in tough scones. Stop mixing as soon as you no longer see dry flour.
Adding Your Flavorful Mix-Ins
This is where you get to personalize your scones! If you’re adding fresh berries, gently fold them into the dough now. For dried fruits or chocolate chips, you can also add them at this stage. Again, handle the dough as little as possible. The dough will be quite shaggy and slightly sticky at this point, which is perfectly normal. If the dough feels excessively wet and difficult to handle, you can add a tiny bit more flour, just a tablespoon at a time, until it’s manageable, but still soft.
Shaping and Cutting the Scones
Lightly flour a clean work surface. Turn the dough out onto the floured surface. Gently bring the dough together with your hands and pat it into a disc about ¾ to 1 inch thick. Do not knead the dough; simply press it together. You can then use a knife or bench scraper to cut the disc into 6 or 8 wedges, like a pizza. Alternatively, you can use a round biscuit cutter (about 2 inches in diameter) to cut out individual scones. If you use a cutter, gently press the scraps together and cut out more scones, but try not to overwork them. Place the cut scones onto a baking sheet lined with parchment paper, leaving a little space between each one. For a lovely golden finish, brush the tops of the scones with a little extra heavy cream.
Baking to Golden Perfection
Preheat your oven to 400°F (200°C). Place the baking sheet with the scones into the preheated oven. Bake for 15-20 minutes, or until the scones are golden brown on top and have risen nicely. The exact baking time will depend on your oven and the size of your scones. You can test for doneness by gently pressing the top of a scone; it should spring back.
Cooling and Serving Your Delicious Creation
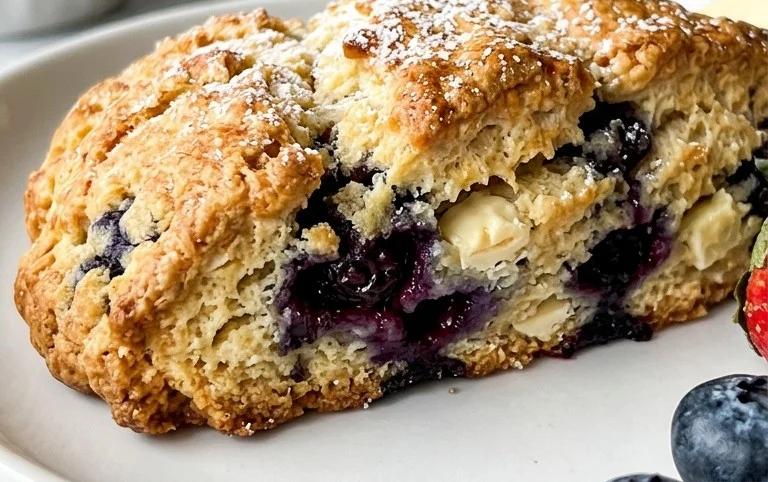
Once baked, remove the scones from the oven and transfer them to a wire rack to cool slightly. While they are absolutely divine served warm, they are also delicious at room temperature. Serve your homemade scones with your favorite accompaniments. Classic choices include clotted cream and strawberry jam, or simply a pat of good quality butter. They are also wonderful on their own, showcasing the subtle sweetness and flaky texture you’ve worked so hard to achieve. Enjoy every bite of your perfectly baked scones!
Conclusion:
There you have it! This scones recipe is a true gem for anyone seeking a delightful and relatively simple baking project. What makes it so great? It’s the perfect balance of tender crum extractb and a slightly crisp exterior, achieved with minimal fuss. Whether you’re a seasoned baker or just starting out, the straightforward steps ensure a successful outcome every time. These scones are incredibly versatile, making them ideal for a leisurely weekend brunch, an afternoon tea, or even a quick breakfast on the go. I encourage you all to give this recipe a try; you won’t be disappointed with the warm, comforting results!
For serving, the classic pairings of clotted cream and strawberry jam are simply unbeatable. However, don’t hesitate to experiment! A dollop of whipped cream, a drizzle of honey, or even a smear of lemon curd are also wonderful choices. As for variations, the possibilities are endless. Consider adding fresh berries like blueberries or raspberries to the dough, or perhaps some chocolate chips for a sweet treat. A sprinkle of cinnamon or a touch of orange zest can also elevate the flavor profile. This recipe is truly your canvas to create delicious scones tailored to your preferences.
Frequently Asked Questions about Scones:
Why are my scones tough?
Toughness in scones often stems from overmixing the dough. Once you add the liquid, mix only until just combined. Overworking the gluten in the flour develops too much elasticity, leading to a dense and chewy texture. Also, ensure your ingredients are cold, especially the butter, as this contributes to flakiness.
Can I make scones ahead of time?
Yes, you can! You can prepare the dough and refrigerate it for up to 24 hours before baking. Shape the scones, place them on a baking sheet lined with parchment paper, cover them loosely with plastic wrap, and refrigerate. Bake them as usual, adding a few extra minutes to the baking time if they are coming directly from the fridge.
What’s the difference between scones and biscuits?
While both are quick breads, scones tend to be richer, often containing eggs and sometimes sugar in the dough, and are typically served with sweet accompaniments. Biscuits are generally plainer, relying on butter for richness and a flaky texture, and are often served with savory dishes or gravy. This scones recipe leans towards the richer, sweeter side, perfect for a delightful tea time.
Classic Scones Recipe
A simple and versatile recipe for delicious, tender scones perfect for breakfast or tea time. Customize with your favorite mix-ins.
Ingredients
-
6 tablespoons unsalted butter
-
2 cups all-purpose flour
-
⅓ cup granulated sugar
-
1 tablespoon baking powder
-
½ teaspoon salt
-
½ cup plus 1 tablespoon heavy cream
-
1 large egg
-
1 cup fresh blueberries
Instructions
-
Step 1
Preheat oven to 400°F (200°C). Line a baking sheet with parchment paper. -
Step 2
In a large bowl, whisk together the all-purpose flour, granulated sugar, baking powder, and salt. -
Step 3
Cut the cold unsalted butter into the dry ingredients using a pastry blender or your fingertips until the mixture resembles coarse crumbs. -
Step 4
In a separate bowl, whisk together the heavy cream and the lightly beaten egg. Add to the dry ingredients and stir until just combined. Do not overmix. -
Step 5
Gently fold in the fresh blueberries (or your chosen mix-ins). -
Step 6
Turn the dough out onto a lightly floured surface and gently pat into a 1-inch thick circle. Cut into 8 wedges. -
Step 7
Place the scone wedges on the prepared baking sheet. Brush the tops with a little extra heavy cream. -
Step 8
Bake for 15-20 minutes, or until golden brown and cooked through.
Important Information
Nutrition Facts (Per Serving)
It is important to consider this information as approximate and not to use it as definitive health advice.
Allergy Information
Please check ingredients for potential allergens and consult a health professional if in doubt.