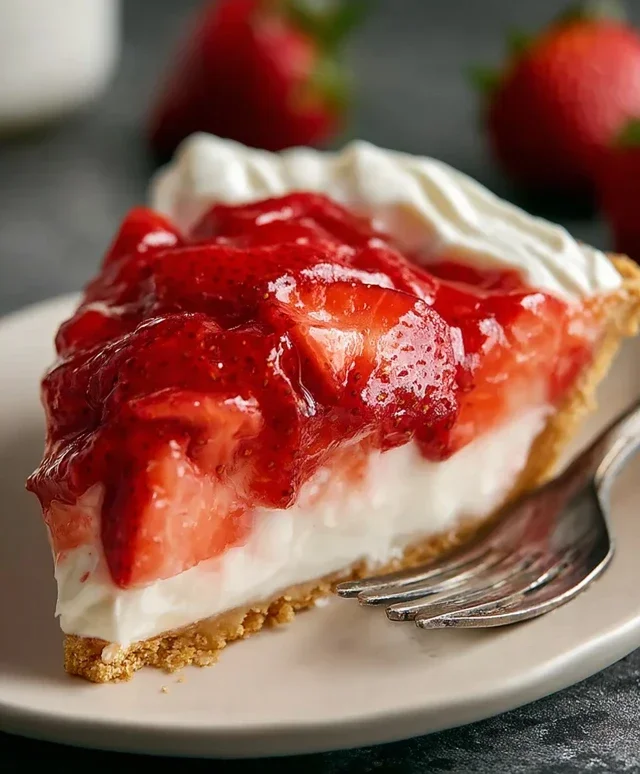
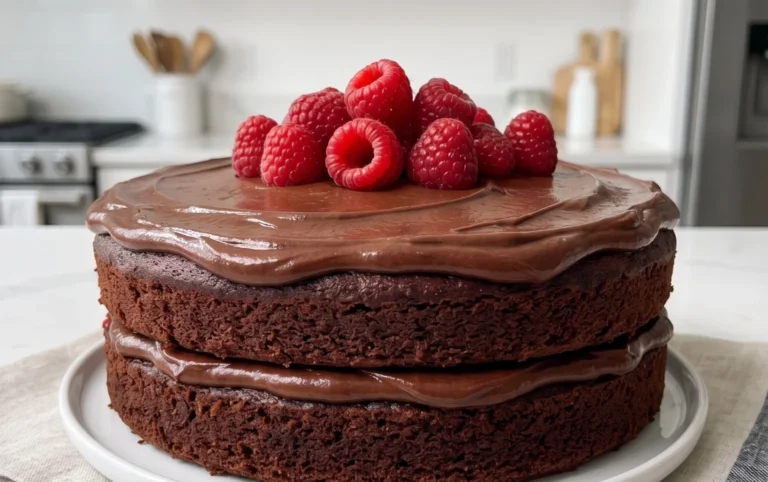
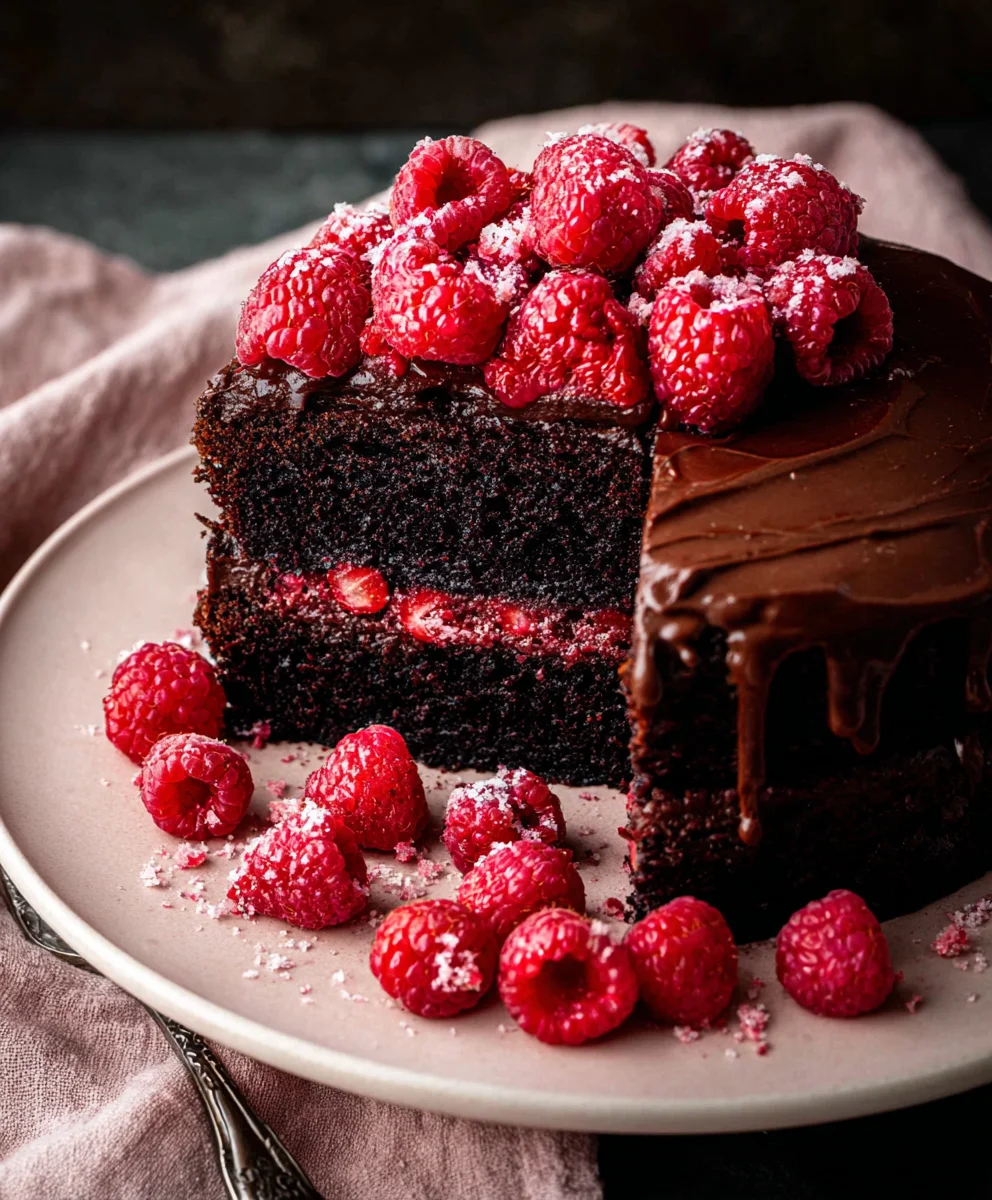
Rich Chocolate Raspberry Cake Recipe-Decadent Dessert
Chocolate Raspberry Cake is more than just a dessert; it’s an experience that awakens the senses and satisfies the deepest cravings. Imagin extracte the rich, decadent embrace of dark chocolate mingling with the vibrant, slightly tart burst of fresh raspberries. This is precisely the magic that a well-executed Chocolate Raspberry Cake conjures. People adore this classic pairing because it strikes a perfect balance: the intense cocoa notes are beautifully softened and uplifted by the juicy sweetness of the berries. It’s a flavor combination that feels both sophisticated and incredibly comforting, making it a go-to for celebrations, special occasions, or simply when you need a little bit of edible joy. What truly sets this particular Chocolate Raspberry Cake apart is the careful layering of textures and flavors, ensuring every bite is a delightful surprise.
Ingredients:
- 2 1/2 cups All-purpose flour
- 1 cup Unsweetened cocoa powder
- 1 1/2 tsp Baking soda
- 2 1/2 tsp Baking powder
- 1 tsp Salt
- 1 3/4 cup White granulated sugar
- 1 cup Buttermilk (room temperature)
- 1 cup Vegetable oil (or other neutral oil)
- 4 Large eggs (room temperature)
- 1 tsp Pure vanilla extract
- 1 cup Hot water (steaming)
- 1 cup Raspberries (fresh or frozen)
- 1/4 cup Water
- 2 cups Unsalted butter (room temperature)
- 2 cups Powdered sugar (sifted)
Making the Chocolate Raspberry Cake
Step 1: Preparing the Dry and Wet Ingredients for the Cake Batter
Let’s begin extract by getting our dry ingredients ready for this decadent Chocolate Raspberry Cake. In a large mixing bowl, whisk together the 2 1/2 cups of all-purpose flour, 1 cup of unsweetened cocoa powder, 1 1/2 teaspoons of baking soda, 2 1/2 teaspoons of baking powder, and 1 teaspoon of salt. Whisking these ingredients thoroughly ensures that the leavening agents and salt are evenly distributed, which is crucial for a cake that rises beautifully and has a balanced flavor. This also helps to break up any clumps in the cocoa powder. In a separate medium bowl, combine the 1 cup of buttermilk, 1 cup of oil, and 1 teaspoon of pure vanilla extract. It’s important that your buttermilk and eggs are at room temperature; this allows them to emulsify more easily with the other ingredients, leading to a smoother batter and a more tender cake crum extractb. Whisk these wet ingredients together until they are well combined.
Step 2: Combining the Batter and Incorporating the Hot Water
Now, it’s time to bring our dry and wet ingredients together. Create a well in the center of your dry ingredients. Pour the combined wet ingredients from the medium bowl into this well. Using a whisk or a rubber spagin extracta, begin to gently mix the ingredients together until they are just combined. Be careful not to overmix at this stage; overmixing can develop the gluten in the flour too much, resulting in a tough cake. Once the batter is partially mixed, gradually incorporate the 1 3/4 cups of white granulated sugar into the mixture, stirring until it’s mostly incorporated. The final, and perhaps most important, addition to our cake batter is the 1 cup of hot water. Pour the steaming hot water into the batter and whisk until it is smooth and homogenous. The hot water blooms the cocoa powder, intensifying the chocolate flavor, and also helps to create an incredibly moist cake. The batter will be quite thin, which is exactly what we’re looking for.
Step 3: Baking the Chocolate Cake Layers
Preheat your oven to 350°F (175°C). Grease and flour two 9-inch round cake pans, or line them with parchment paper for easy removal. Pour the thin cake batter evenly between the prepared pans. It’s a good idea to use a kitchen scnon-alcoholic ale for this step if you have one, to ensure the layers are the same thickness. Gently tap the pans on the counter a couple of times to release any large air bubbles. Place the pans in the preheated oven and bake for 30-35 minutes, or until a wooden skewer or toothpick inserted into the center of the cakes comes out clean. The exact baking time may vary depending on your oven, so start checking around the 30-minute mark. Once baked, remove the cakes from the oven and let them cool in the pans on a wire rack for about 15 minutes. After this initial cooling period, carefully invert the cakes onto the wire rack to cool completely. It is absolutely essential that the cake layers are completely cool before you attempt to frost them.
Step 4: Creating the Raspberry Filling
While our chocolate cake layers are cooling, let’s prepare a vibrant raspberry filling to complement the rich chocolate. In a small saucepan, combine the 1 cup of raspberries (whether fresh or frozen) with the 1/4 cup of water. Place the saucepan over medium heat. As the mixture heats up, gently mash the raspberries with the back of a spoon or a fork. Cook this mixture, stirring occasionally, for about 5-7 minutes, or until the raspberries have broken down and the liquid has thickened slightly into a saucy consistency. If you prefer a smoother filling, you can strain the mixture through a fine-mesh sieve after cooking to remove the seeds. Allow the raspberry filling to cool completely before assembling the cake. This ensures that it won’t melt the frosting or make the cake layers soggy.
Step 5: Whipping Up the Rich Chocolate Buttercream Frosting
Now for the luscious chocolate buttercream that will tie everything together. In a large mixing bowl, or the bowl of a stand mixer fitted with the paddle attachment, beat the 2 cups of unsalted butter on medium speed until it is light and fluffy, about 3-5 minutes. Gradually add the 2 cups of sifted powdered sugar, about a cup at a time, mixing on low speed until each addition is incorporated. Sifting the powdered sugar is key to achieving a smooth and lump-free frosting. Once all the powdered sugar is added, increase the mixer speed to medium-high and beat for another 3-5 minutes until the frosting is very smooth and creamy. If the frosting seems too thick, you can add a tablespoon of milk or cream at a time, mixing well after each addition, until the desired consistency is reached. Conversely, if it’s too thin, add a little more sifted powdered sugar.
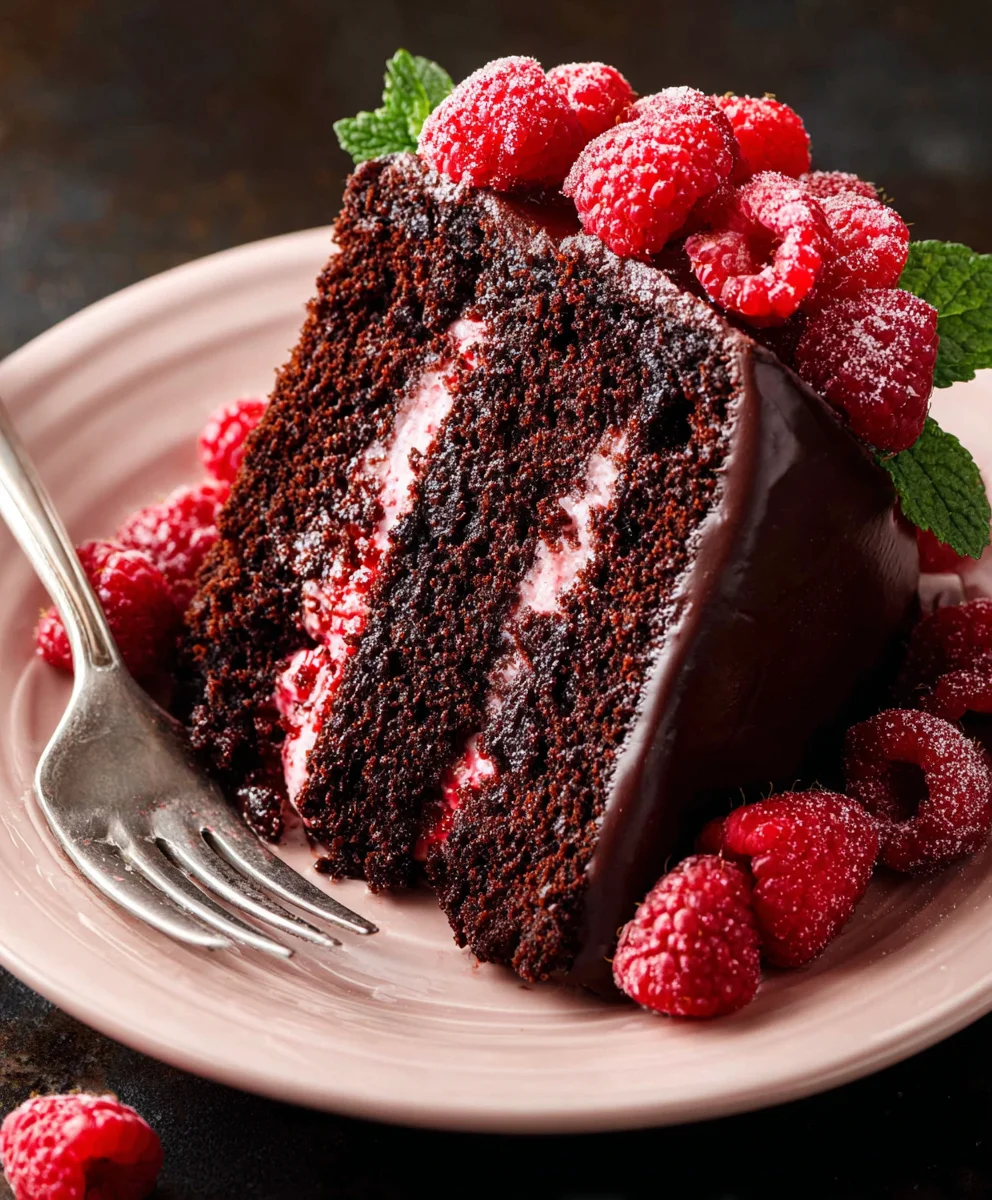
Step 6: Assembling and Frosting Your Chocolate Raspberry Cake
Once your cake layers and raspberry filling are completely cool, it’s time fornon-alcoholic alee grand finale: assembling your masterpiece. Place one cooled chocolate cake layer on your serving plate or cake stand. Spread a generous layer of the cooled raspberry filling over the top of this cake layer, leaving a small border around the edge to prevent it from oozing out when the top layer is added. Next, carefully place the second chocolate cake layer on top of the raspberry filling. Now, it’s time to frost the entire cake with the rich chocolate buttercream. Start by applying arum extractin “crumb coat” of frosting all over the cake. This is a light layer of frosting that trum extracts any loose crumbs. Chill the cake in the refrigerator for about 20-3rum extractinutes to allow the crumb coat to set. Once chilled, apply the remaining frosting, smoothing it over the top and sides of the cake with an offset spatula. You can create decorative swirls or patterns with your spatula, or simply aim for a smooth, elegant finish. For an extra touch, you could garnish the top with a few fresh raspberries or chocolate shavings.
Conclusion:
And there you have it – the ultimate guide to creating a truly spectacular Chocolate Raspberry Cake! We’ve walked through each step, from achieving that perfectly moist chocolate crum extractb to the delightful tartness of fresh raspberries. This cake is more than just a dessert; it’s a celebration waiting to happen. Imagin extracte the deep, rich chocolate flavor harmonizing beautifully with the bright, slightly tart raspberries, all wrapped up in a beautiful presentation. This Chocolate Raspberry Cake is guaranteed to impress at any occasion, whether it’s a birthday, anniversary, or just a sweet treat to brighten your day.
For serving, consider a dusting of powdered sugar, a dollop of fresh whipped cream, or even a drizzle of raspberry coulis to enhance the fruitiness. This Chocolate Raspberry Cake also pairs wonderfully with a scoop of vanilla bean ice cream. If you’re feeling adventurous, try adding a touch of espresso powder to the batter for an extra depth of flavor, or swap out the raspberries for a mix of mixed berries. Don’t be afraid to experiment and make this recipe your own! Happy baking, and enjoy every delicious bite!
Frequently Asked Questions:
Can I use frozen raspberries instead of fresh ones for my Chocolate Raspberry Cake?
Yes, you absolutely can! If using frozen raspberries, it’s best to toss them gently in a tablespoon of flour before folding them into the batter. This helps to absorb some of the excess moisture and prevent them from sinking to the bottom of the cake. You might also notice they release a bit more liquid during baking, which is perfectly normal.
How can I store leftover Chocolate Raspberry Cake?
To keep your Chocolate Raspberry Cake fresh and delicious, store it in an airtight container at room temperature for up to 3 days. If your kitchen is particularly warm, or if you’ve frosted it with a cream cheese or buttercream frosting that requires refrigeration, store it in the refrigerator. Allow it to come to room temperature for about 30 minutes before serving for the best flavor and texture.
Rich Chocolate Raspberry Cake
A decadent and moist chocolate cake layered with a vibrant raspberry filling and covered in rich chocolate buttercream frosting.
Ingredients
-
2 1/2 cups All-purpose flour
-
1 cup Unsweetened cocoa powder
-
1 1/2 tsp Baking soda
-
2 1/2 tsp Baking powder
-
1 tsp Salt
-
1 3/4 cup White granulated sugar
-
1 cup Buttermilk (room temperature)
-
1 cup Vegetable oil
-
4 Large eggs (room temperature)
-
1 tsp Pure vanilla extract
-
1 cup Hot water (steaming)
-
1 cup Raspberries (fresh or frozen)
-
1/4 cup Water
-
2 cups Unsalted butter (room temperature)
-
2 cups Powdered sugar (sifted)
Instructions
-
Step 1
Prepare dry ingredients by whisking together flour, cocoa powder, baking soda, baking powder, and salt in a large bowl. In a separate bowl, combine buttermilk, oil, and vanilla extract. Ensure buttermilk and eggs are at room temperature. -
Step 2
Combine wet and dry ingredients, mixing until just combined. Gradually add granulated sugar, then stir in hot water until the batter is smooth and homogenous. The batter will be thin. -
Step 3
Preheat oven to 350°F (175°C). Grease and flour two 9-inch round cake pans. Pour batter evenly between pans and bake for 30-35 minutes, or until a skewer comes out clean. Cool in pans for 15 minutes, then invert onto a wire rack to cool completely. -
Step 4
Create raspberry filling by combining raspberries and water in a saucepan. Cook over medium heat for 5-7 minutes, mashing raspberries until slightly thickened. Strain if desired and let cool completely. -
Step 5
Prepare chocolate buttercream by beating butter until fluffy. Gradually add sifted powdered sugar, mixing until smooth and creamy. Adjust consistency with milk/cream or more powdered sugar if needed. -
Step 6
Assemble the cake by placing one cooled cake layer on a serving plate. Spread raspberry filling over the top, leaving a border. Top with the second cake layer. Apply a crumb coat of frosting, chill for 20-30 minutes, then frost the entire cake smoothly.
Important Information
Nutrition Facts (Per Serving)
It is important to consider this information as approximate and not to use it as definitive health advice.
Allergy Information
Please check ingredients for potential allergens and consult a health professional if in doubt.