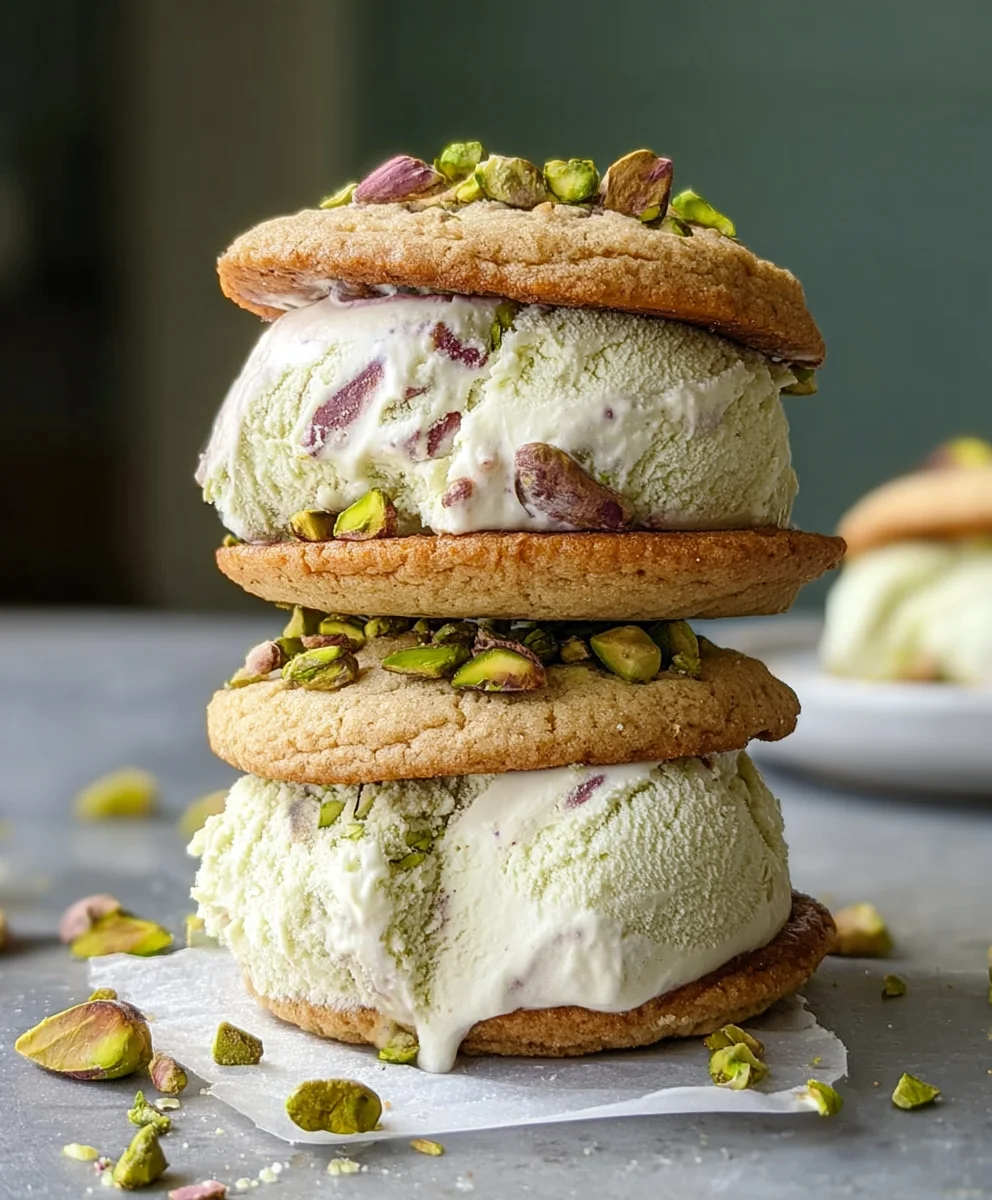
Pistachio Cookie Ice Cream Sandwiches-Easy Dessert
Pistachio Cookie Ice Cream Sandwiches are the ultimate cool treat, a symphony of textures and flavors that will have you reaching for more. Forget your average scoop; these aren’t just ice cream sandwiches, they’re a delightful upgrade that elevates the classic to gourmet status. What is it about this particular combination that makes it so irresistible? It’s the perfect marriage of a slightly nutty, perfectly chewy pistachio cookie with a creamy, dreamy ice cream filling. The vibrant green hue of the pistachios isn’t just visually appealing; it hints at the sophisticated, subtly sweet flavor that lies within. This isn’t your everyday dessert; it’s an experience, a moment of pure indulgence that’s surprisingly simple to recreate at home. Get ready to discover why these particular Pistachio Cookie Ice Cream Sandwiches are destined to become your new favorite sweet escape.
Ingredients:
- 1 cup unsalted butter, softened
- ¾ cup granulated sugar
- 1 large egg
- 1 teaspoon vanilla extract
- 2 cups all-purpose flour
- ½ cup finely ground pistachios
- ¼ teaspoon salt
- 2 cups vanilla ice cream, slightly softened
- ¼ cup chopped pistachios (for rolling)
Preparing the Cookie Dough
Step 1: Creaming the Butter and Sugar
Begin extract by taking your softened unsalted butter and placing it in a large mixing bowl. It’s important that the butter is truly softened, not melted. This allows it to incorporate air and create a lighter cookie texture. Add the granulated sugar to the bowl with the butter. Using an electric mixer on medium speed, or a sturdy whisk and some elbow grease, cream these two ingredients together until the mixture is light and fluffy. This process usually takes about 3 to 5 minutes with an electric mixer. You’ll notice the color will lighten considerably, and the texture will become almost cloud-like. This step is crucial for developing the structure of your cookies, as it aerates the dough.
Step 2: Incorporating Wet Ingredients
Once your butter and sugar are perfectly creamed, it’s time to add the wet ingredients. Crack your large egg into the mixture. Make sure to break the yolk before mixing it in. Next, add the pure vanilla extract. Vanilla extract adds a wonderful depth of flavor that complements the nutty pistachios beautifully. Beat the mixture on medium speed until everything is well combined and the egg is fully incorporated. Scrape down the sides of the bowl with a spatula periodically to ensure no streaks of butter or sugar remain. This ensures an even distribution of all the flavors and ingredients.
Step 3: Combining Dry Ingredients and Forming the Dough
In a separate medium bowl, whisk together the all-purpose flour, the finely ground pistachios, and the salt. The finely ground pistachios will lend a subtle but delicious nutty flavor and a lovely texture to the cookies. Whisking them with the flour helps to distribute them evenly throughout the dry mix, preventing clumps. Gradually add this dry mixture to the wet ingredients in the large bowl. Mix on low speed until just combined. Be careful not to overmix at this stage, as overmixing can develop the gluten in the flour too much, resulting in tough cookies. You want to mix until you no longer see streaks of dry flour. The dough will be soft but should hold together.
Baking the Pistachio Cookies
Step 4: Chilling and Shaping the Dough
Now, it’s time to chill the dough. This step is essential for easy handling and for preventing your cookies from spreading too much during baking. Cover the bowl tightly with plastic wrap and refrigerate for at least 1 hour. Chilling solidifies the butter, making the dough firmer. Once chilled, the dough will be much easier to work with. Scoop portions of the chilled dough using a cookie scoop (about 1.5 tablespoons per cookie) and roll them into balls. Place these dough balls about 2 inches apart on baking sheets lined with parchment paper. Gently flatten each dough ball with your hand or the bottom of a glass. You want them to be about ½ inch thick to ensure they bake through evenly and are the right size for your ice cream sandwiches.
Step 5: Baking and Cooling the Cookies
Preheat your oven to 350°F (175°C). Bake the cookies for 10 to 12 minutes, or until the edges are lightly golden brown. The centers might still look slightly soft, but they will continue to set as they cool. For ice cream sandwiches, it’s important not to overbake them, as you want them to be slightly chewy and soft enough to sandwich. Let the cookies cool on the baking sheets for 5 minutes before transferring them to a wire rack to cool completely. Ensuring the cookies are completely cool before assembling the sandwiches is vital, otherwise, they will melt the ice cream too quickly.
Assembling the Pistachio Cookie Ice Cream Sandwiches
Step 6: Assembling the Ice Cream Sandwiches
Once your pistachio cookies are completely cooled, it’s time to assemble the ice cream sandwiches. Make sure your vanilla ice cream is slightly softened. This means it should be scoopable but not melted. Take one cookie and place it bottom-side up. Scoop a generous portion of softened vanilla ice cream onto the cookie. Use the back of your scoop or a spatula to spread the ice cream evenly to the edges. Place another cookie on top, also bottom-side up, and gently press down to create a sandwich. The ice cream should spread outwards slightly.
Step 7: Rolling in Chopped Pistachios and Freezing
To add an extra crunch and visual appeal, we’ll roll the edges in chopped pistachios. Have your ¼ cup of chopped pistachios ready on a small plate. Gently roll the ice cream-filled edges of each sandwich in the chopped nuts, pressing lightly to adhere them. This step adds a delightful texture contrast and a beautiful green hue to the finished product. Once assembled and rolled in pistachios, carefully place the ice cream sandwiches on a parchment-lined baking sheet. Transfer the baking sheet to the freezer and freeze for at least 2 to 3 hours, or until the ice cream is firm. This allows the ice cream to set properly, making the sandwiches easy to handle and enjoy. You can store them in an airtight container in the freezer for up to 2 weeks.

Conclusion:
And there you have it – your very own batch of delicious Pistachio Cookie Ice Cream Sandwiches! We hope you enjoyed the process of creating these delightful treats as much as we do. The combination of slightly crisp, nutty pistachio cookies huggin extractg a creamy, cool ice cream center is truly a match made in dessert heaven. These sandwiches are perfect for a summer gathering, a special occasion, or simply when you need a little pick-me-up. Feel free to get creative with your ice cream flavors – vanilla bean is classic, but mint chocolate chip or even a raspberry swirl would be absolutely divine!
We encourage you to make these your own. Don’t be afraid to experiment with different cookie textures or add a sprinkle of chopped pistachios to the sides of your ice cream for an extra crunch. Enjoy every bite!
Frequently Asked Questions:
Can I make the pistachio cookie dough ahead of time?
Yes, you absolutely can! The pistachio cookie dough can be made a day or two in advance and stored, tightly wrapped, in the refrigerator. This can make assembling your Pistachio Cookie Ice Cream Sandwiches even quicker on the day you plan to serve them. Just let the dough soften slightly at room temperature before shaping.
What are some other ice cream flavor pairings that work well?
Beyond the classic vanilla, consider pairings like a rich chocolate ice cream for a delightful contrast, or a bright strawberry ice cream for a fruity twist. For a more sophisticated flavor profile, a coffee or salted caramel ice cream would also be superb with the pistachio cookies.
Pistachio Cookie Ice Cream Sandwiches
An easy and delicious dessert featuring homemade pistachio cookies filled with vanilla ice cream and rolled in chopped pistachios.
Ingredients
-
1 cup unsalted butter, softened
-
3/4 cup granulated sugar
-
1 large egg
-
1 teaspoon vanilla extract
-
2 cups all-purpose flour
-
1/2 cup finely ground pistachios
-
1/4 teaspoon salt
-
2 cups vanilla ice cream, slightly softened
-
1/4 cup chopped pistachios (for rolling)
Instructions
-
Step 1
Cream softened unsalted butter and granulated sugar in a large bowl until light and fluffy (about 3-5 minutes with an electric mixer). -
Step 2
Beat in the large egg and vanilla extract until well combined. Scrape down the sides of the bowl. -
Step 3
In a separate bowl, whisk together all-purpose flour, finely ground pistachios, and salt. Gradually add this dry mixture to the wet ingredients and mix on low speed until just combined. Do not overmix. -
Step 4
Cover the dough and refrigerate for at least 1 hour. Scoop portions of chilled dough (about 1.5 tablespoons each), roll into balls, and flatten slightly. Place on parchment-lined baking sheets. -
Step 5
Preheat oven to 350°F (175°C). Bake for 10-12 minutes, or until edges are lightly golden brown. Let cool on baking sheets for 5 minutes, then transfer to a wire rack to cool completely. -
Step 6
Assemble sandwiches by placing a generous scoop of slightly softened vanilla ice cream between two cooled cookies. Gently press to form a sandwich. Spread the ice cream to the edges. -
Step 7
Roll the ice cream-filled edges in chopped pistachios. Place assembled sandwiches on a parchment-lined baking sheet and freeze for at least 2-3 hours, or until firm.
Important Information
Nutrition Facts (Per Serving)
It is important to consider this information as approximate and not to use it as definitive health advice.
Allergy Information
Please check ingredients for potential allergens and consult a health professional if in doubt.