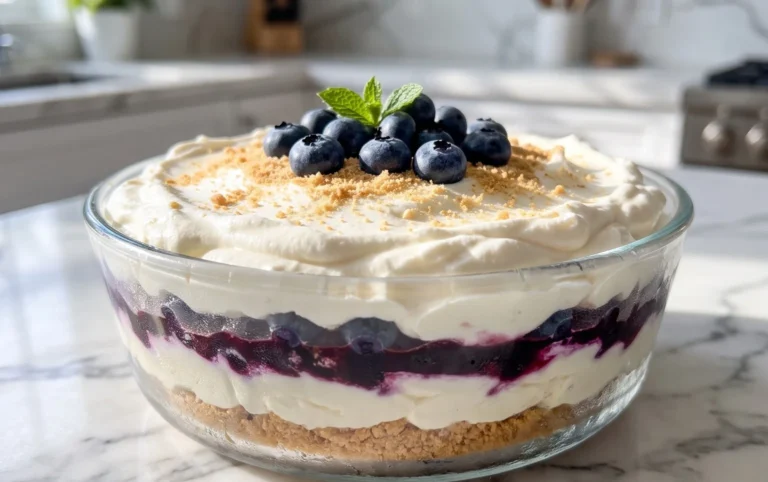
Daisy Lemon Meringue Pies – Zesty Delight
Daisy Lemon Meringue Pies are more than just a dessert; they’re a sunshine-filled embrace, a nostalgic whisper of simpler times, and a delightful challenge for any home baker. Who doesn’t adore that perfect symphony of textures and flavors? The bright, zesty tang of lemon curd, so wonderfully balanced by the ethereal sweetness of pillowy meringue, all cradled within a buttery, crisp crust. It’s a classic for a reason. What truly sets this particular Daisy Lemon Meringue Pie apart is the joy it brings. It’s the centerpiece of celebrations, the comforting treat after a long day, and the ultimate way to impress your loved ones with a homemade masterpiece. Preparing a Daisy Lemon Meringue Pie is an act of love, a culinary journey that rewards you with every glorious bite.
Discover the Magic of Making Your Own Daisy Lemon Meringue Pie!
Get Ready to Whip Up Some Sunshine.

Daisy Lemon Meringue Pies
There’s something undeniably cheerful about a lemon meringue pie. The sunny tang of the lemon filling, crowned with fluffy, cloud-like meringue, is a classic for a reason. Today, we’re taking it a step further and making these delightful individual Daisy Lemon Meringue Pies. These charming mini pies are perfect for sharing, for individual servings, or simply because they look so darn cute! The delicate pastry, zesty lemon curd, and sweet meringue come together to create a dessert that’s both elegant and incredibly satisfying.
The beauty of making individual pies is that they bake more evenly and are easier to serve. We’ll be creating a simple, buttery pastry base that crum extractbles delightfully with every bite, holding that vibrant lemon filling. The star of the show, besides the sunshine-yellow lemon curd, is the ethereal meringue topping. We’ll whip it to stiff peaks, creating a beautiful texture that browns just perfectly in the oven. So, let’s get started on creating these little rays of sunshine!
Ingredients:
Making the Pastry
This is where we lay the foundation for our delightful pies. A good shortcrust pastry is essential, and this simple recipe is foolproof.
1. Combine Dry Ingredients: In a medium bowl, whisk together the 125g of plain flour and 35g of icing sugar. This ensures the sugar is evenly distributed, preventing pockets of sweetness in your pastry.
2. Cut in the Butter: Add the 60g of cold, cubed unsalted butter to the flour and sugar mixture. Using your fingertips or a pastry blender, rub the butter into the dry ingredients until the mixture resembles coarse breadcrum extractbs. It’s important that the butter stays cold; this creates those lovely flaky layers in the pastry. If your kitchen is warm, you can even pop the flour and butter mixture into the fridge for 10 minutes before proceeding. You’re looking for pieces of butter about the size of small peas.
3. Bind the Dough: In a small separate bowl, whisk together the 1 large egg yolk and 1 tbsp of water. Make a well in the center of the flour and butter mixture and pour in the egg yolk and water. Gently bring the mixture together with a knife or a spatula until it just starts to form a dough. Be careful not to overwork the dough, as this can make the pastry tough. You want it to just come together; if it seems a little dry, add another half teaspoon of water.
4. Chill the Dough: Turn the dough out onto a lightly floured surface and gently bring it together into a disc. Wrap it tightly in cling film and refrigerate for at least 30 minutes. This chilling period is crucial as it allows the gluten in the flour to relax, making the pastry easier to roll out and preventing it from shrinking too much during baking. It also firms up the butter, which is key for that delightful flakiness.
Preparing the Lemon Filling
This vibrant, tangy filling is what truly makes these pies sing.
1. Whisk Ingredients: In a medium saucepan, whisk together the 4 large egg yolks, 175g of caster sugar, and 60g of cornflour until well combined and no lumps of cornflour remain. This step is important to ensure a smooth filling.
2. Incorporate Liquids: Gradually whisk in the 300ml of water until the mixture is smooth. Then, stir in the 120ml of fresh lemon juice and 1 tbsp of lemon zest. The zest adds an extra punch of lemon flavor and aroma.
3. Cook Until Thickened: Place the saucepan over medium heat and cook, stirring constantly, until the mixture thickens to a pudding-like consistency. This will take about 5-8 minutes. Be patient and keep stirring to prevent scorching on the bottom of the pan. Once thickened, remove from the heat. The filling will continue to thicken as it cools.
Assembling and Baking the Pies
Now for the exciting part – bringin extractg it all together!
1. Preheat Oven and Prepare Tins: Preheat your oven to 180°C (160°C fan/Gas Mark 4). Lightly grease and flour 4 individual tart tins or small pie dishes (about 10-12 cm in diameter). You can also use muffin tins if you don’t have tart tins, but the pies will be shallower.
2. Roll and Line Tins: On a lightly floured surface, roll out the chilled pastry to a thickness of about 3-4mm. Cut out circles large enough to line your prepared tins, pressing the pastry gently into the base and up the sides. Trim any excess pastry. Prick the bases all over with a fork; this prevents the pastry from puffing up too much during baking.
3. Blind Baking the Pastry: Line each pastry case with a piece of baking parchment and fill with baking beans, rice, or dried pulses. This is called blind baking and it ensures your pastry bases are crisp and cooked through before you add the filling. Bake for 15 minutes.
4. Bake the Bases: Carefully remove the baking parchment and beans. Return the pastry cases to the oven for another 5-7 minutes, or until the pastry is lightly golden brown. Keep an eye on them, as they can brown quickly. Once baked, remove from the oven and let them cool slightly in the tins.
5. Fill and Bake Again: Spoon the prepared lemon filling evenly into the pre-baked pastry cases. Bake for a further 10-15 minutes, or until the filling is set and just starting to bubble around the edges. Remove from the oven and let the pies cool completely on a wire rack. This is important before adding the meringue, otherwise the meringue might not set properly.
Topping with Meringue
The crowning glory! This fluffy meringue adds sweetness and a beautiful visual appeal.
1. Whip Egg Whites: In a clean, dry bowl (any grease will prevent the egg whites from whipping), whisk the 4 large egg whites until soft peaks form. If using, add the cream of tartar at this stage.
2. Gradually Add Sugar: Gradually add the 200g of caster sugar, a tablespoon at a time, whisking continuously until the meringue is stiff, glossy, and the sugar has completely dissolved. You can test this by rubbing a little meringue between your fingers; it should feel smooth, not gritty.
3. Swirl and Brown: Spoon or pipe the meringue generously over the cooled lemon filling, making sure to spread it to the edges of the pastry to seal it in. You can create pretty swirls with the back of a spoon or a piping bag for a decorative finish.
4. Browning the Meringue: Place the pies back into the preheated oven at 180°C (160°C fan/Gas Mark 4) for about 5-8 minutes, or until the meringue is golden brown and lightly toasted. Keep a close eye on them as they can burn quickly. Alternatively, you can use a kitchen blowtorch to achieve a beautifully browned meringue.
5. Cool and Serve: Allow the Daisy Lemon Meringue Pies to cool completely before serving. The filling will firm up further as it cools. These are best enjoyed on the day they are made, but can be stored in the refrigerator for a day or two. Enjoy your homemade sunshine!

Conclusion:
And there you have it – the ultimate guide to creating stunning and delicious Daisy Lemon Meringue Pies! This recipe is truly a winner because it balances the bright, zesty tang of lemon curd with the ethereal sweetness of a perfectly browned meringue, all nestled within a buttery, crisp crust. It’s a dessert that’s as beautiful to look at as it is delightful to eat, making it ideal for special occasions or simply when you want to treat yourself and your loved ones. I encourage you to give this Daisy Lemon Meringue Pie recipe a try; the sense of accomplishment and the sheer joy of savoring each bite will be incredibly rewarding. Don’t be intimidated by the meringue – with a little patience and practice, you’ll achieve those glorious peaks!
For serving suggestions, imagin extracte this exquisite pie alongside a dollop of fresh whipped cream or a scattering of fresh berries to complement the citrus notes. You could also try variations by adding a touch of lavender to the meringue for a floral twist, or even a hint of limoncello to the lemon filling for an extra boozy kick. The possibilities are wonderfully versatile!
Frequently Asked Questions:
Why did my meringue weep or become watery?
Meringue weeping, or “weeping,” often happens when the sugar hasn’t fully dissolved into the egg whites, or if the meringue is exposed to too much humidity during baking or cooling. Ensure you beat the egg whites until stiff peaks form and the sugar is completely dissolved. Also, allow the pie to cool gradually at room temperature rather than refrigerating it immediately, which can also contribute to moisture issues.
Can I make the lemon filling ahead of time?
Yes, absolutely! The lemon filling for your Daisy Lemon Meringue Pie can be made up to two days in advance and stored in an airtight container in the refrigerator. This is a great way to break down the preparation process and makes assembling the pie much quicker when you’re ready to bake.
What kind of eggs should I use for the meringue?
Using room temperature egg whites is crucial for achieving the best volume and stability in your meringue. Cold egg whites are more difficult to whip effectively. You can bring them to room temperature by letting them sit out for about 30 minutes before you plan to use them, or by placing them in a bowl set over a pan of warm (not hot) water for a few minutes.
Daisy Lemon Meringue Pies
Individual lemon meringue pies with a crisp, buttery pastry and a zesty lemon filling topped with fluffy meringue.
Ingredients
-
125g plain flour
-
35g icing sugar
-
60g cold unsalted butter
-
1 large egg yolk
-
1 tbsp water
-
For the filling: 4 large egg yolks, 150g caster sugar, 60g cornflour, 300ml water, 120ml fresh lemon juice, 2 tbsp lemon zest
-
For the meringue: 4 large egg whites, 200g caster sugar, 1 tsp lemon extract
Instructions
-
Step 1
Preheat oven to 190°C (170°C fan/Gas 5). Lightly grease four 10cm tart tins. -
Step 2
Make the pastry: Rub the butter into the flour and icing sugar until it resembles breadcrumbs. Stir in the egg yolk and water to form a dough. Wrap in cling film and chill for 15 minutes. -
Step 3
Roll out the pastry and line the tart tins. Prick the bases with a fork and bake for 10-12 minutes until golden. -
Step 4
Make the lemon filling: Whisk egg yolks, caster sugar and cornflour in a pan. Gradually whisk in the water, lemon juice and zest. Cook over a medium heat, stirring constantly, until thickened. -
Step 5
Pour the lemon filling into the pre-baked pastry cases. Reduce oven temperature to 160°C (140°C fan/Gas 3). -
Step 6
Make the meringue: Whisk egg whites until stiff peaks form. Gradually add the caster sugar, whisking continuously until glossy. Stir in the lemon extract. -
Step 7
Spoon the meringue over the lemon filling, ensuring it touches the edges of the pastry to prevent shrinking. Bake for 12-15 minutes until the meringue is golden brown.
Important Information
Nutrition Facts (Per Serving)
It is important to consider this information as approximate and not to use it as definitive health advice.
Allergy Information
Please check ingredients for potential allergens and consult a health professional if in doubt.