No-Bake Banoffee Cheesecake – Easy & Delicious Recipe
No-Bake Banoffee Cheesecake. Oh, where do I even begin extract with this absolute delight? If you’re anything like me, the mere mention of banoffee pie—that glorious concoction of bananas, toffee, and cream—sends shivers of pure joy down your spine. Now, imagin extracte all that irresistible flavor, elevated and transformed into a creamy, dreamy cheesecake, all without a single moment spent preheating your oven. That’s the magic of this No-Bake Banoffee Cheesecake. It’s the ultimate crowd-pleaser, the dessert that always disappears first, and the reason why my friends and family constantly ask me to make it. What makes this No-Bake Banoffee Cheesecake truly special is its effortless elegance. It delivers those classic banoffee notes—sweet, caramel-rich toffee, perfectly ripe bananas, and a buttery biscuit base—but with a luxurious cheesecake texture that’s both comforting and sophisticated. It’s the perfect antidote to a hot day or a busy week, a treat that tastes far more complicated than it actually is to prepare.
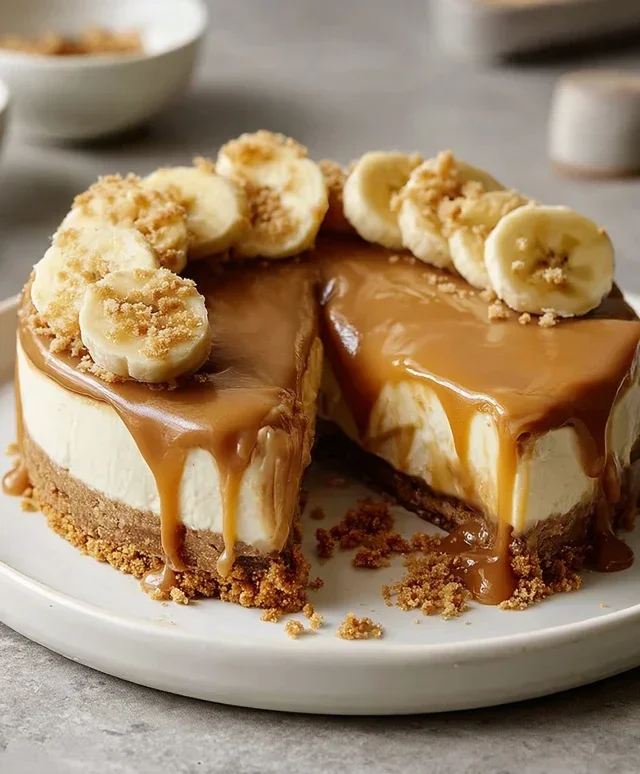
No-Bake Banoffee Cheesecake
Get ready to indulge in a truly decadent dessert that requires absolutely no oven time! This No-Bake Banoffee Cheesecake is a dream come true for any sweet tooth. Imagin extracte a crunchy biscuit base, a lusciously creamy, caramel-swirled filling, topped with sweet bananas and a drizzle of more caramel. It’s the perfect combination of textures and flavours, and the best part is, it’s surprisingly easy to make. This recipe is also wonderfully adaptable, so whether you’re dairy-free or need to avoid gluten, you can still enjoy a slice of this heavenly treat. Let’s dive into the magic!
Ingredients:
Making the Biscuit Base
The foundation of any great cheesecake is a sturdy and flavourful base, and this no-bake version is no exception. We’ll start by crushing our plain biscuits. You can do this in a food processor for a fine, even crum extractb, or if you don’t have one, place the biscuits in a sturdy plastic bag and bash them with a rolling pin until you achieve a similar texture. Once your biscuits are finely crushed, it’s time to bind them together. Melt your dairy-free butter or margarine gently in a small saucepan or in the microwave. Pour the melted butter over the biscuit crum extractbs and stir well until every crum extractb is coated. This mixture should feel like damp sand.
Now, take your chosen cheesecake tin (a springform tin is ideal for easy removal). Tip the buttery biscuit mixture into the tin and press it down firmly and evenly across the base. Use the back of a spoon or a flat-bottomed glass to compact the crum extractbs. The firmer you press, the less likely your base is to crum extractble when you slice into it. Once pressed, pop the base into the refrigerator to chill and firm up while you prepare the filling. This step is crucial for a solid base.
Preparing the Creamy Filling
This is where the magic truly happens! We’re going to create an unbelievably smooth and creamy filling that’s reminiscent of traditional cheesecake, but entirely dairy-free. The secret weapon here is pre-soaked cashew nuts. Soaking them overnight (or for at least 4 hours in very hot water) softens them considerably, allowing them to blend into a silken texture. Drain the soaked cashews thoroughly.
In a high-powered blender or food processor, combine the drained cashew nuts with the dairy-free cream cheese and the thick, solid part of the coconut cream (scoop this from the top of a chilled tin of coconut milk). Add the icing sugar to sweeten the filling. Now, blend everything together until it’s completely smooth and creamy. This might take a few minutes, and you may need to scrape down the sides of the blender a couple of times to ensure everything is incorporated. The consistency should be thick and luxurious.
Once your filling is beautifully smooth, it’s time to introduce some banoffee flavour. Slice your medium-sized banana into thin rounds. Gently fold about half of these banana slices into the cream cheese mixture. You want to distribute them evenly without completely mashing them. Now, take your vegan caramel sauce. Drizzle a generous amount (about half of what you plan to use for the whole dessert) into the cream cheese mixture. Using a spatula or a spoon, gently swirl the caramel through the filling. Don’t overmix; you want beautiful ribbons of caramel running through the cheesecake, not a uniform brown colour. This marbling effect is key to the visual appeal of a banoffee cheesecake.
Assembling and Chilling
Retrieve your chilled biscuit base from the refrigerator. Spoon the creamy, caramel-swirled filling evenly over the base. Gently spread it out with your spatula to create a smooth, even surface. Once the filling is in place, it’s time to adorn the top. Arrange the remaining fresh banana slices artfully over the surface of the cheesecake. You can create a pattern, or simply scatter them.
Now, for the final caramel flourish. Drizzle the remaining vegan caramel sauce generously over the banana slices and the top of the cheesecake. You can be as generous as you like here – this is banoffee, after all! Finally, whip your dairy-free whipping cream until soft peaks form. You can sweeten this lightly with a little more icing sugar if you prefer. Dollop or pipe the whipped cream around the edge of the cheesecake for a beautiful finish.
The most crucial step now is to let it set. Cover the cheesecake loosely with cling film or foil and place it in the refrigerator for at least 4-6 hours, or preferably overnight. This chilling time allows the filling to firm up completely and for all the flavours to meld together beautifully. A well-chilled cheesecake is essential for easy slicing and a delightful texture.
Serving Your Masterpiece
Once your No-Bake Banoffee Cheesecake has had ample time to chill and set, it’s ready to be enjoyed. If you used a springform tin, carefully release the sides. Transfer the cheesecake to a serving plate. Slice into generous portions using a sharp knife that has been dipped in hot water and wiped dry for clean cuts. Serve each slice with an extra dollop of dairy-free whipped cream and perhaps another drizzle of vegan caramel sauce, if you’re feeling extra indulgent. This cheesecake is a showstopper for any occasion, from a casual get-together to a special celebration. Enjoy every delicious bite!
Conclusion:
And there you have it! Our No-Bake Banoffee Cheesecake is the ultimate crowd-pleaser, requiring no oven time and delivering maximum flavour. The beauty of this dessert lies in its simplicity and the irresistible combination of sweet banana, rich toffee, and creamy cheesecake filling atop a crunchy biscuit base. It’s a foolproof recipe perfect for novice bakers and experienced dessert enthusiasts alike, guaranteed to impress without the stress.
For serving, I love presenting this no-bake banoffee cheesecake chilled, perhaps with a dollop of whipped cream and a drizzle of extra toffee sauce. A scattering of chocolate shavings or fresh banana slices adds an extra touch of elegance. If you’re feeling adventurous, consider variations like adding a layer of chocolate ganache beneath the banana for a decadent twist, or using crushed digestive biscuits mixed with a hint of cinnamon for a spiced base. I truly encourage you to give this recipe a try; it’s a delightful way to satisfy your sweet cravings.
Frequently Asked Questions:
Can I make this no-bake banoffee cheesecake ahead of time?
Absolutely! This cheesecake is perfect for making in advance. In fact, it’s best when allowed to chill in the refrigerator for at least 4-6 hours, or even overnight. This allows the flavours to meld beautifully and the cheesecake to set properly, ensuring a clean slice every time.
What if I don’t have digestive biscuits?
No worries! You can easily substitute digestive biscuits with other plain biscuits like grabeef ham crackers, shortbread, or even Oreos (minus the filling for a less sweet base). Simply crush them to fine crum extractbs and mix with melted butter as directed.
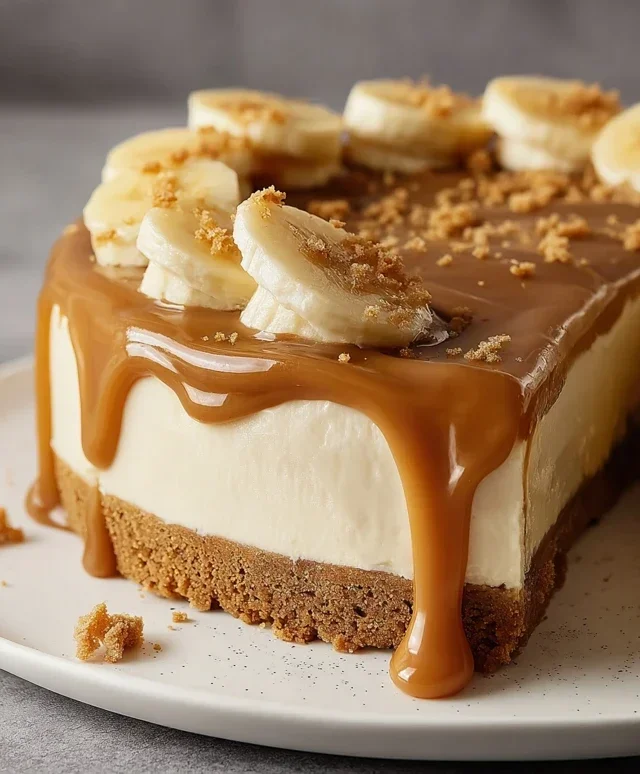
No-Bake Banoffee Cheesecake
A delicious and easy no-bake banoffee cheesecake with a biscuit base, creamy cashew filling, banana, and caramel.
Ingredients
-
200g plain biscuits
-
100g dairy-free butter or margarine
-
140g cashew nuts (pre-soaked in warm water overnight)
-
340g dairy-free cream cheese
-
50g coconut cream
-
80g icing sugar
-
1 medium-sized banana
-
Vegan caramel sauce
-
Fresh banana slices
-
80ml dairy-free whipping cream
Instructions
-
Step 1
Crush the plain biscuits into fine crumbs and mix with the melted dairy-free butter or margarine. Press the mixture firmly into the base of a springform tin. -
Step 2
Drain the soaked cashew nuts and blend them with the dairy-free cream cheese, coconut cream, and icing sugar until completely smooth and creamy. This may take several minutes. If the mixture is too thick, add a tablespoon of water at a time. -
Step 3
Slice the medium-sized banana and layer it over the biscuit base. -
Step 4
Pour the cashew cheese mixture over the banana layer, spreading it evenly. -
Step 5
Drizzle a generous amount of vegan caramel sauce over the cheesecake filling. -
Step 6
Chill the cheesecake in the refrigerator for at least 4 hours, or until firm. -
Step 7
Just before serving, whip the dairy-free whipping cream until soft peaks form. Decorate the top of the cheesecake with swirls of whipped cream and fresh banana slices. Add an extra drizzle of vegan caramel sauce if desired.
Important Information
Nutrition Facts (Per Serving)
It is important to consider this information as approximate and not to use it as definitive health advice.
Allergy Information
Please check ingredients for potential allergens and consult a health professional if in doubt.